Configure AWS in Skyhigh CASB
When integrating Skyhigh CASB for AWS, you will use the Account Settings page to enter your AWS account information and enter your organization information to auto discover the AWS accounts information associated with the particular organization. You can also choose to upload a CSV file of all AWS account information.
Before you begin, make sure you've created an Identity and Access Management (IAM) role in your AWS account to grant access to Skyhigh CASB. Assign the permission template "ReadOnlyAccess" to this role. Skyhigh CASB's Account ID and External ID are specific to you and will be available on the Skyhigh CASB dashboard while enabling AWS integration.
| Limited Availability: To enable Enter my organization info method (found under Accounts), contact Skyhigh Support. |
Step 1: Create IAM Roles
To create an IAM Role in AWS with the required permissions:
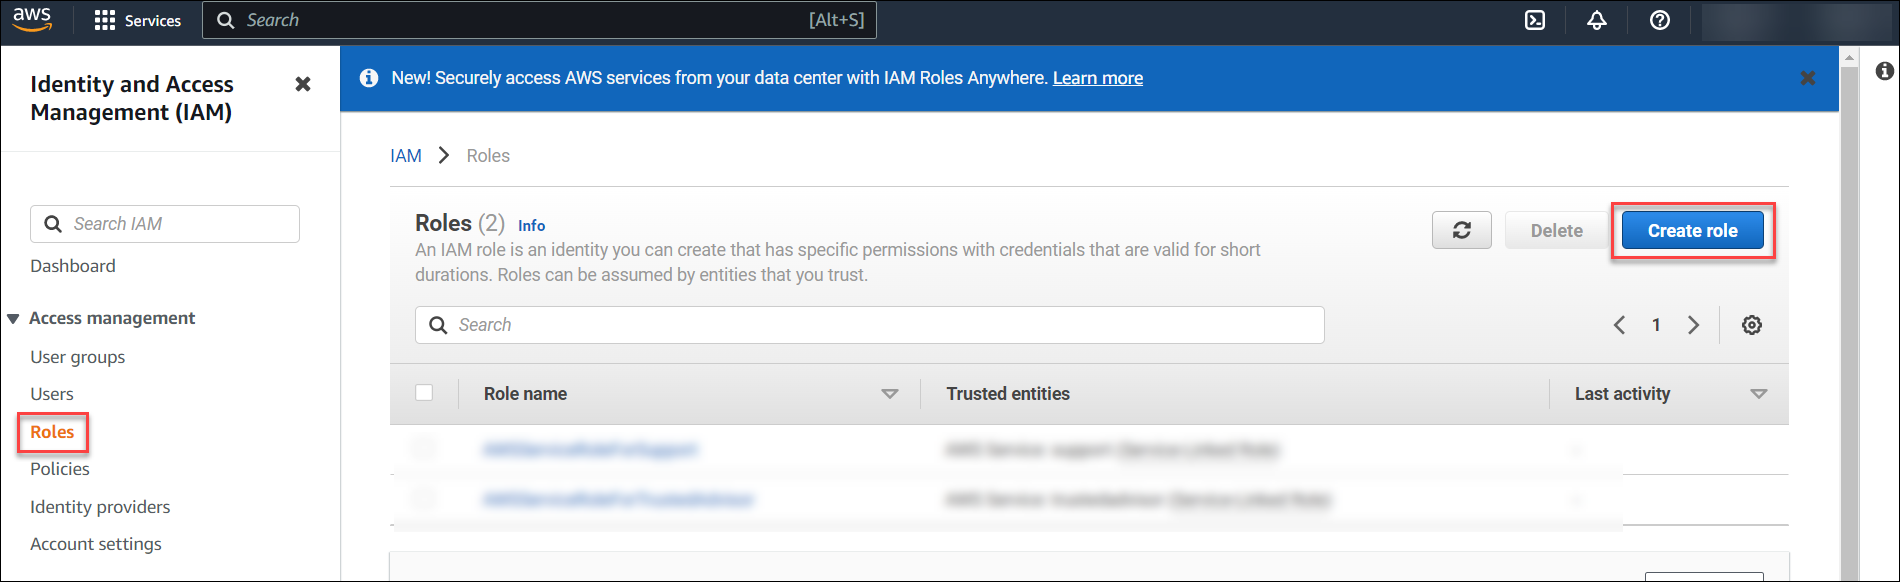
- Log in to your AWS management account and select IAM from the services menu.
- Go to Users > Roles > Create role.
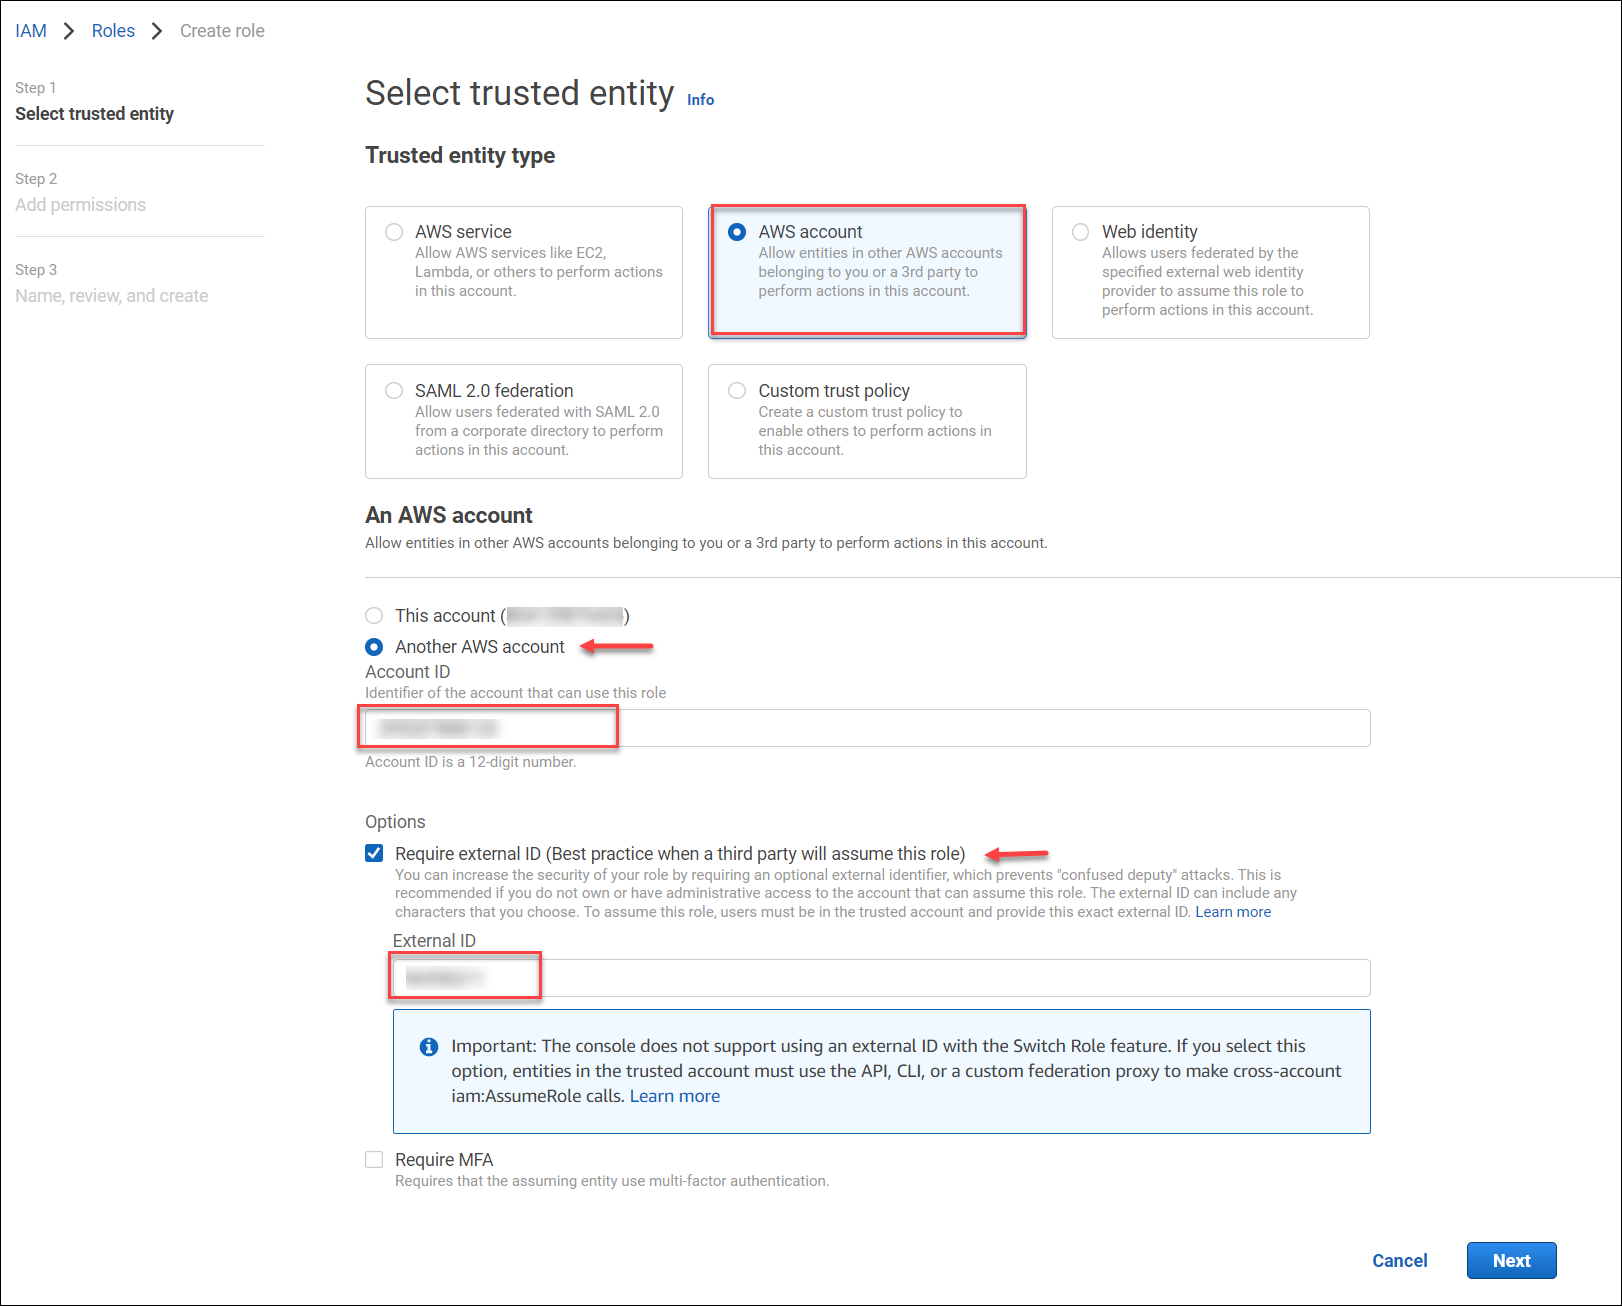
- Select Another AWS account, and copy the AWS account ID and external ID from the Skyhigh CASB dashboard into the AWS.
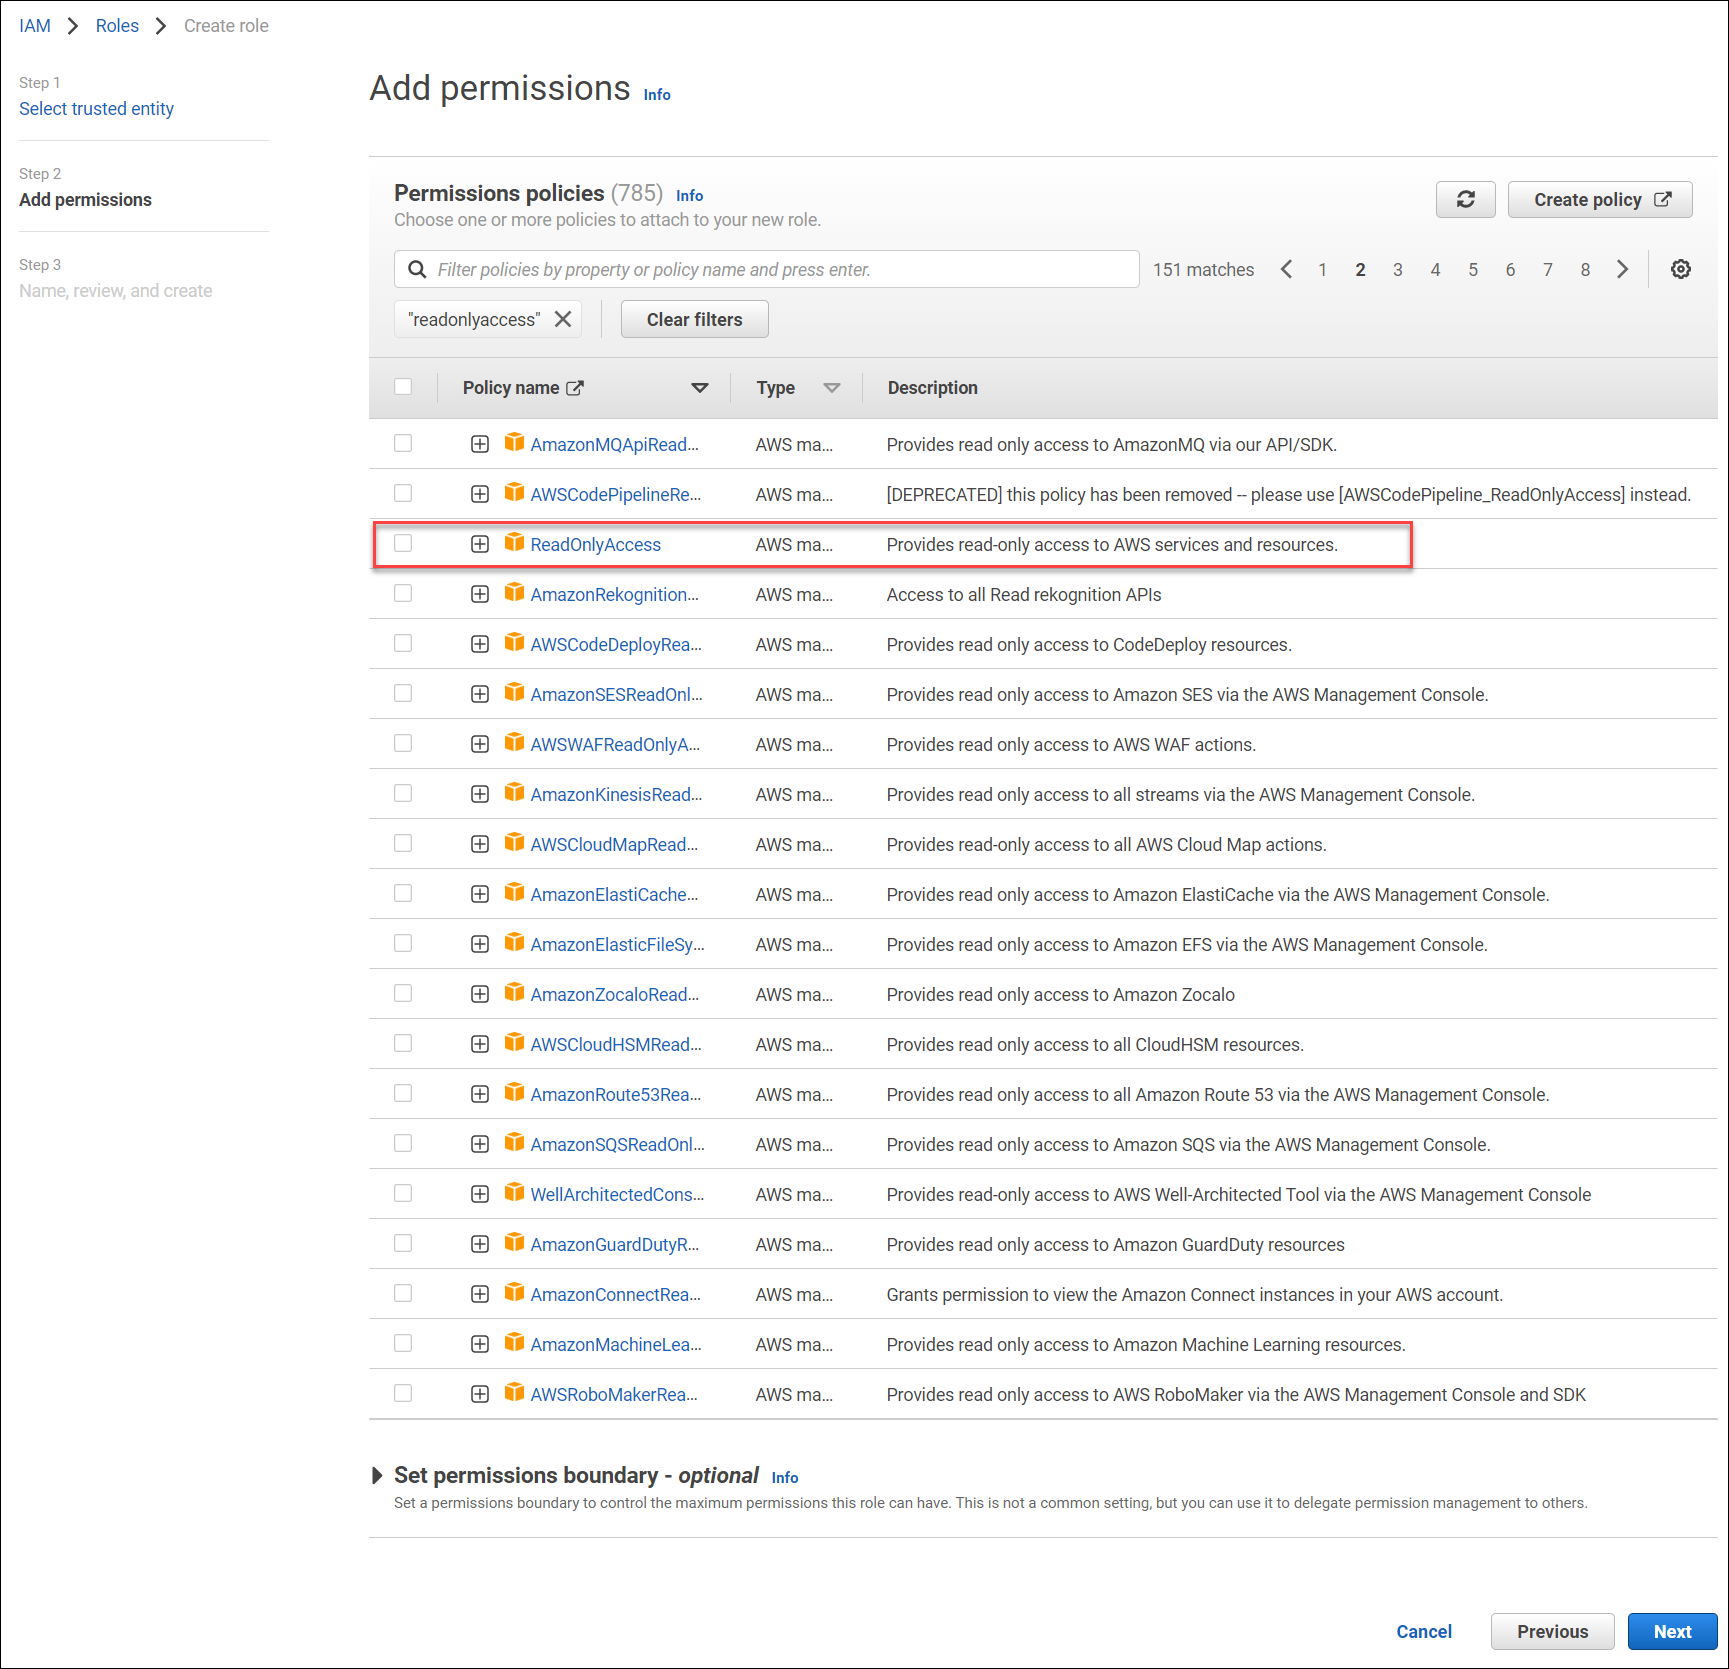
- Select the ReadOnlyAccess permission.
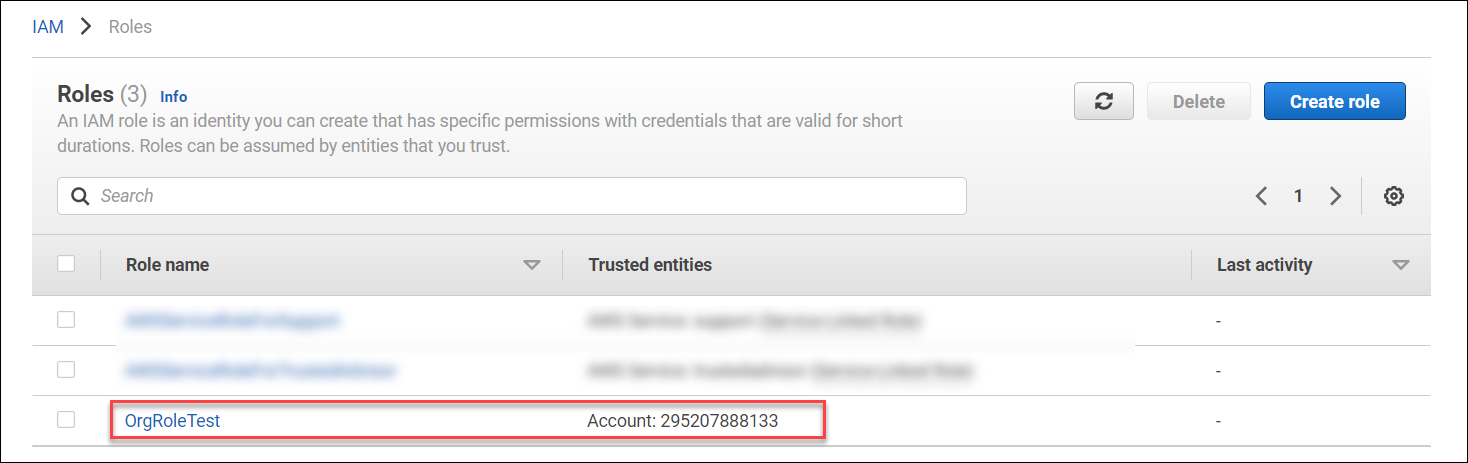
- Enter the preferred Role name. For example, OrgRoleTest. For more information, see Configure Skyhigh CASB IAM Roles for AWS.

- Click Create role.
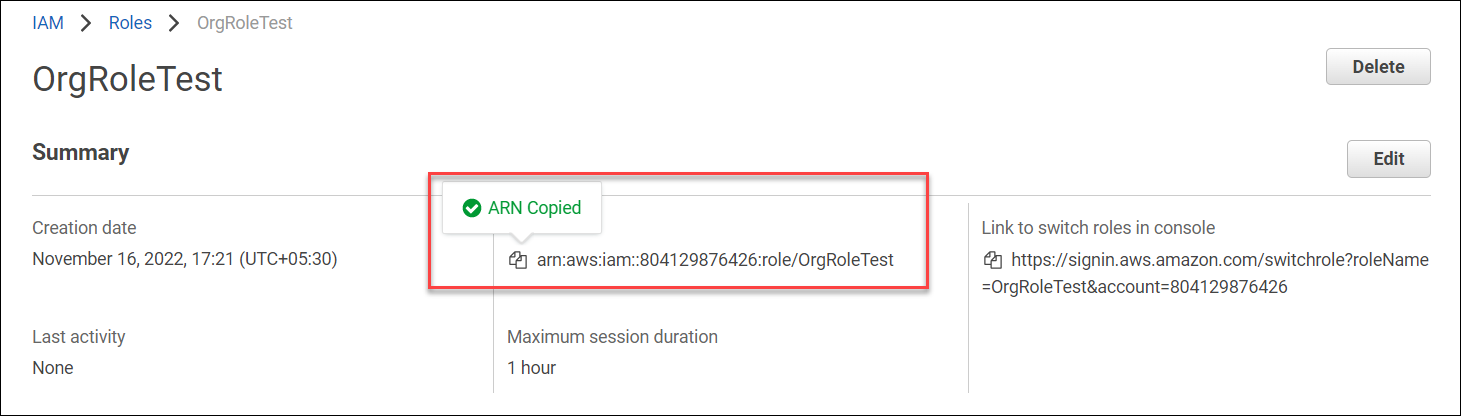
- The new role name is now created. Click the role name in AWS.
- Copy the Role ARN and paste the Role ARN into Skyhigh CASB (refer to the instructions in Step 2: Integrate AWS).
Step 2: Integrate AWS
To integrate AWS:
- Log in to Skyhigh CASB and go to Settings > Service Management.
- Click Add Service Instance and select Amazon Web Services (AWS).
- Add an Instance Name and click Done.
- On the Setup tab, click API Enable.
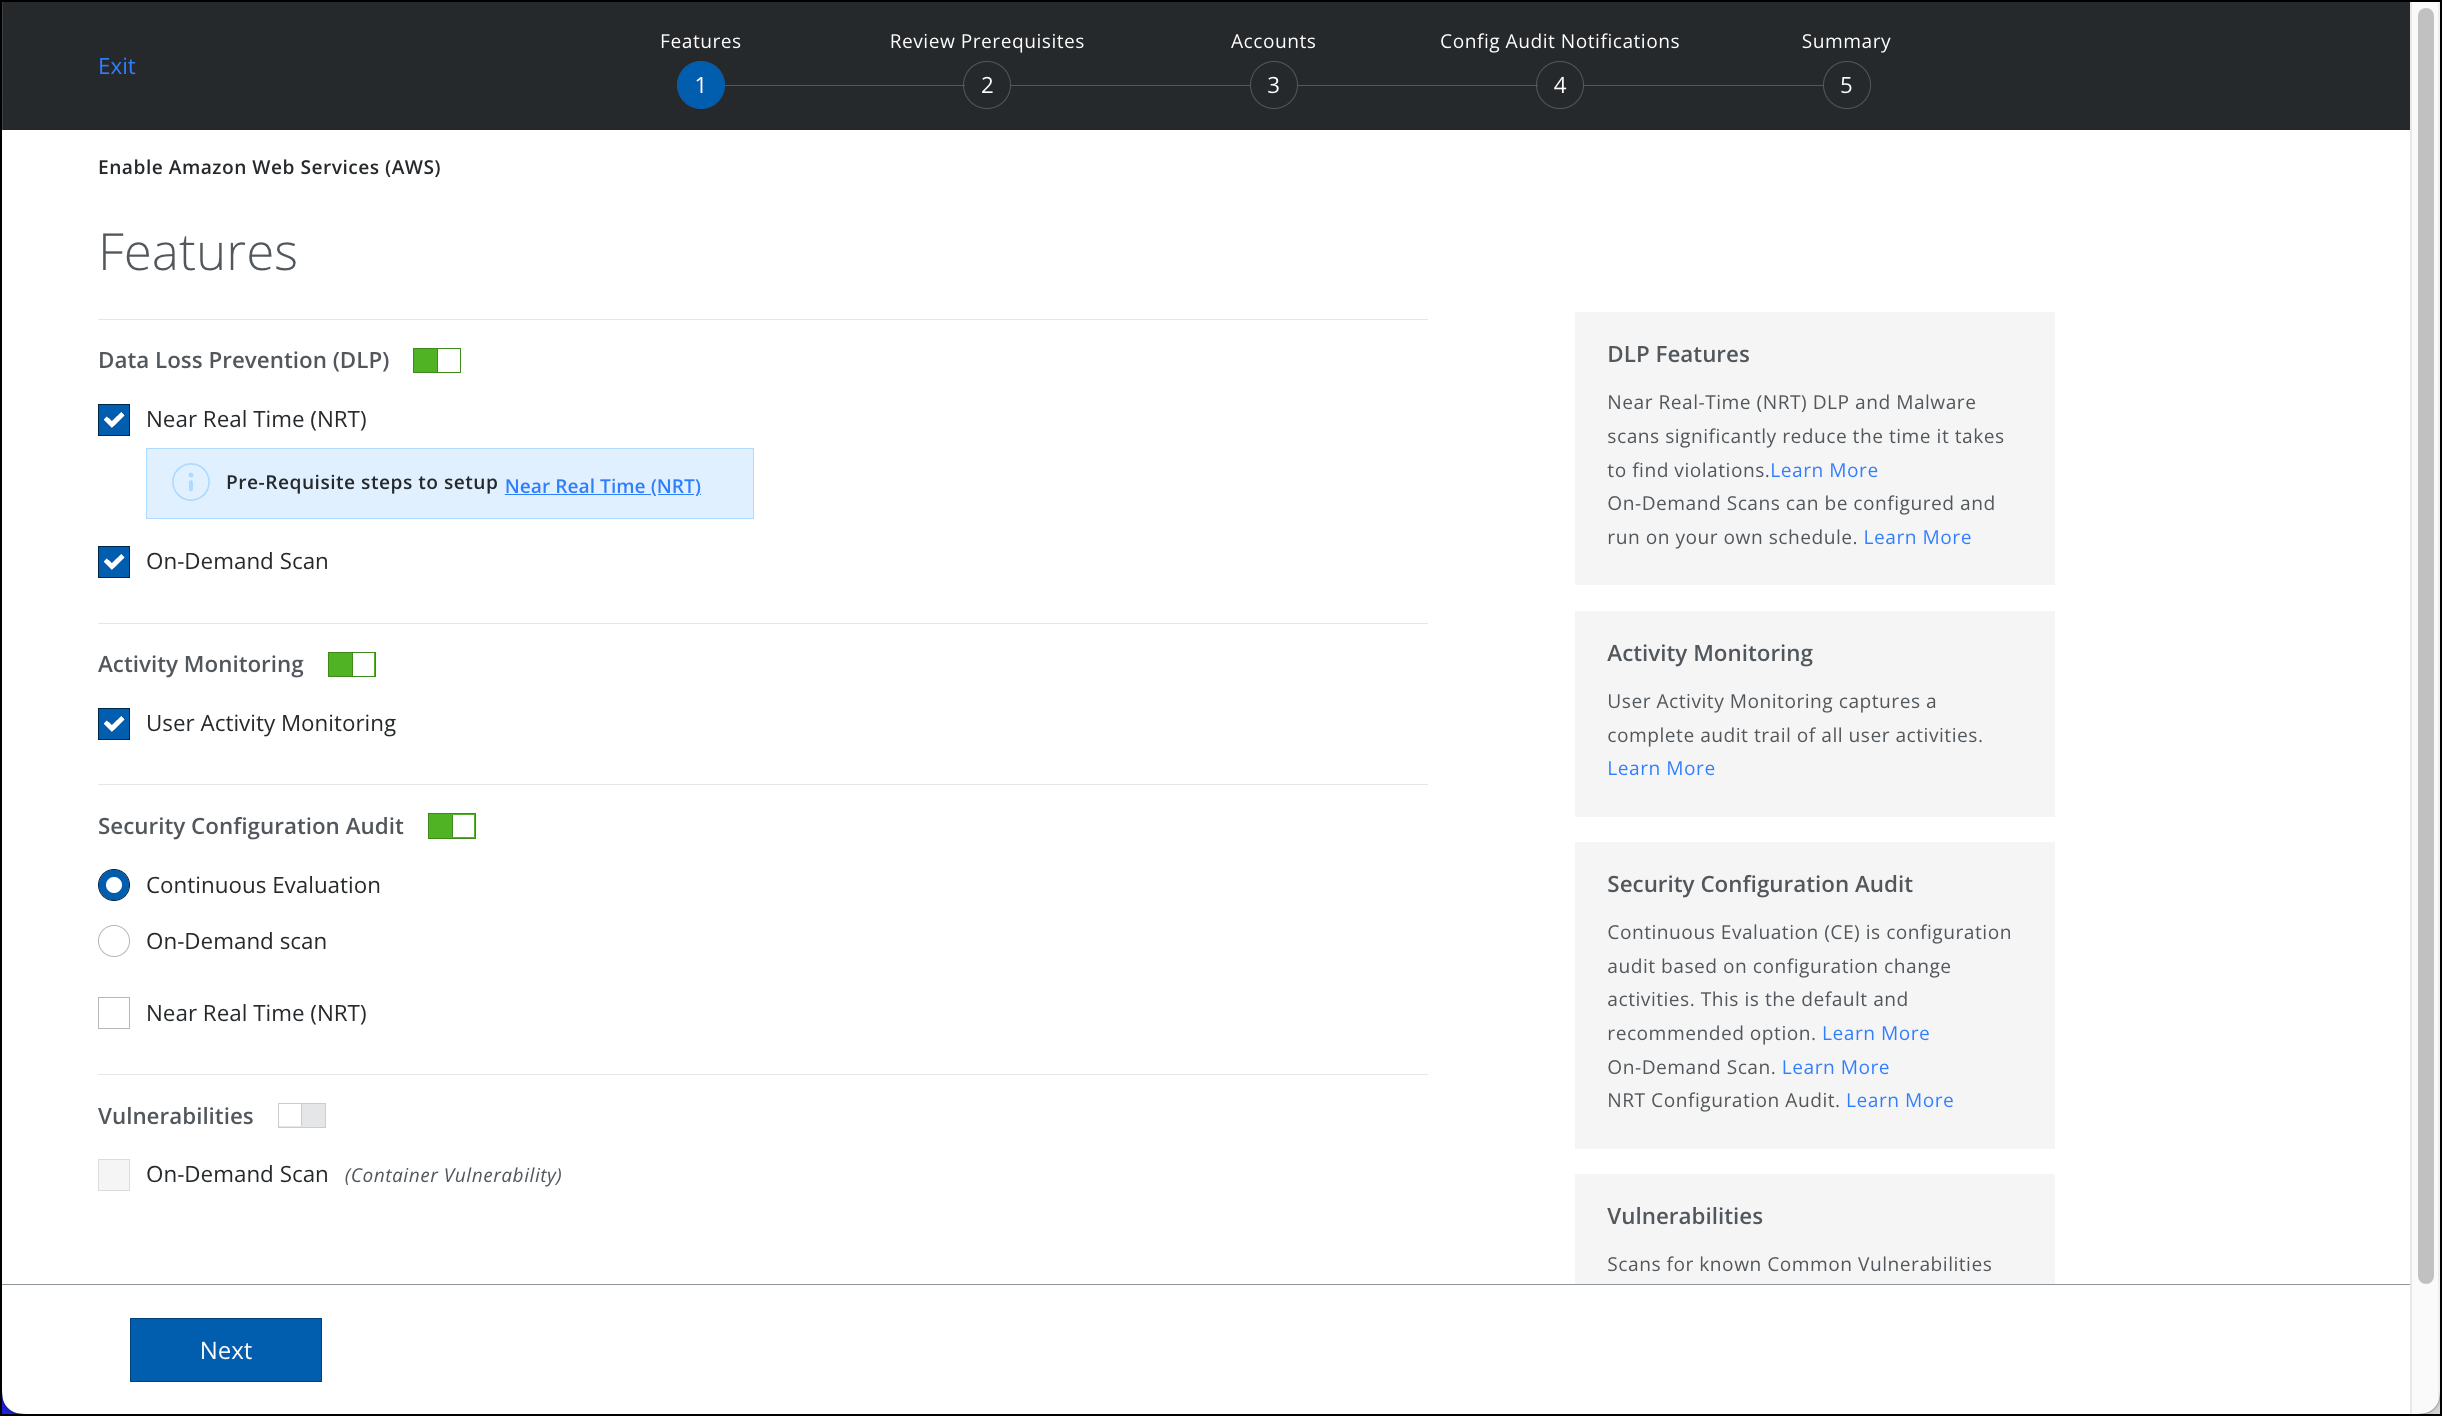
- You are redirected to the Features page. Select the features you want to enable for your AWS account:
- DLP. Select this option to automatically enable the Near Real Time and On Demand Scan.
- Select Near Real Time to enable NRT DLP scan. For details, see Near Real Time DLP and Malware Scan.
- Select On Demand Scan to provide Data Loss Prevention (DLP) protection to files stored in Amazon S3 Buckets.
- Activity Monitoring. Select this option to monitor the activity of AWS users and detect risk activity trends for the entire organization over time. If you do not select this option, you don't need to provide AWS Bucket names to Skyhigh CASB. Learn more
- Security Configuration Audit. Select this option to automatically enable the configuration audit and real-time configuration audit policies. Learn more
- DLP. Select this option to automatically enable the Near Real Time and On Demand Scan.
- Click Next. Review the mandatory prerequisites, click the checkbox, and click Next.
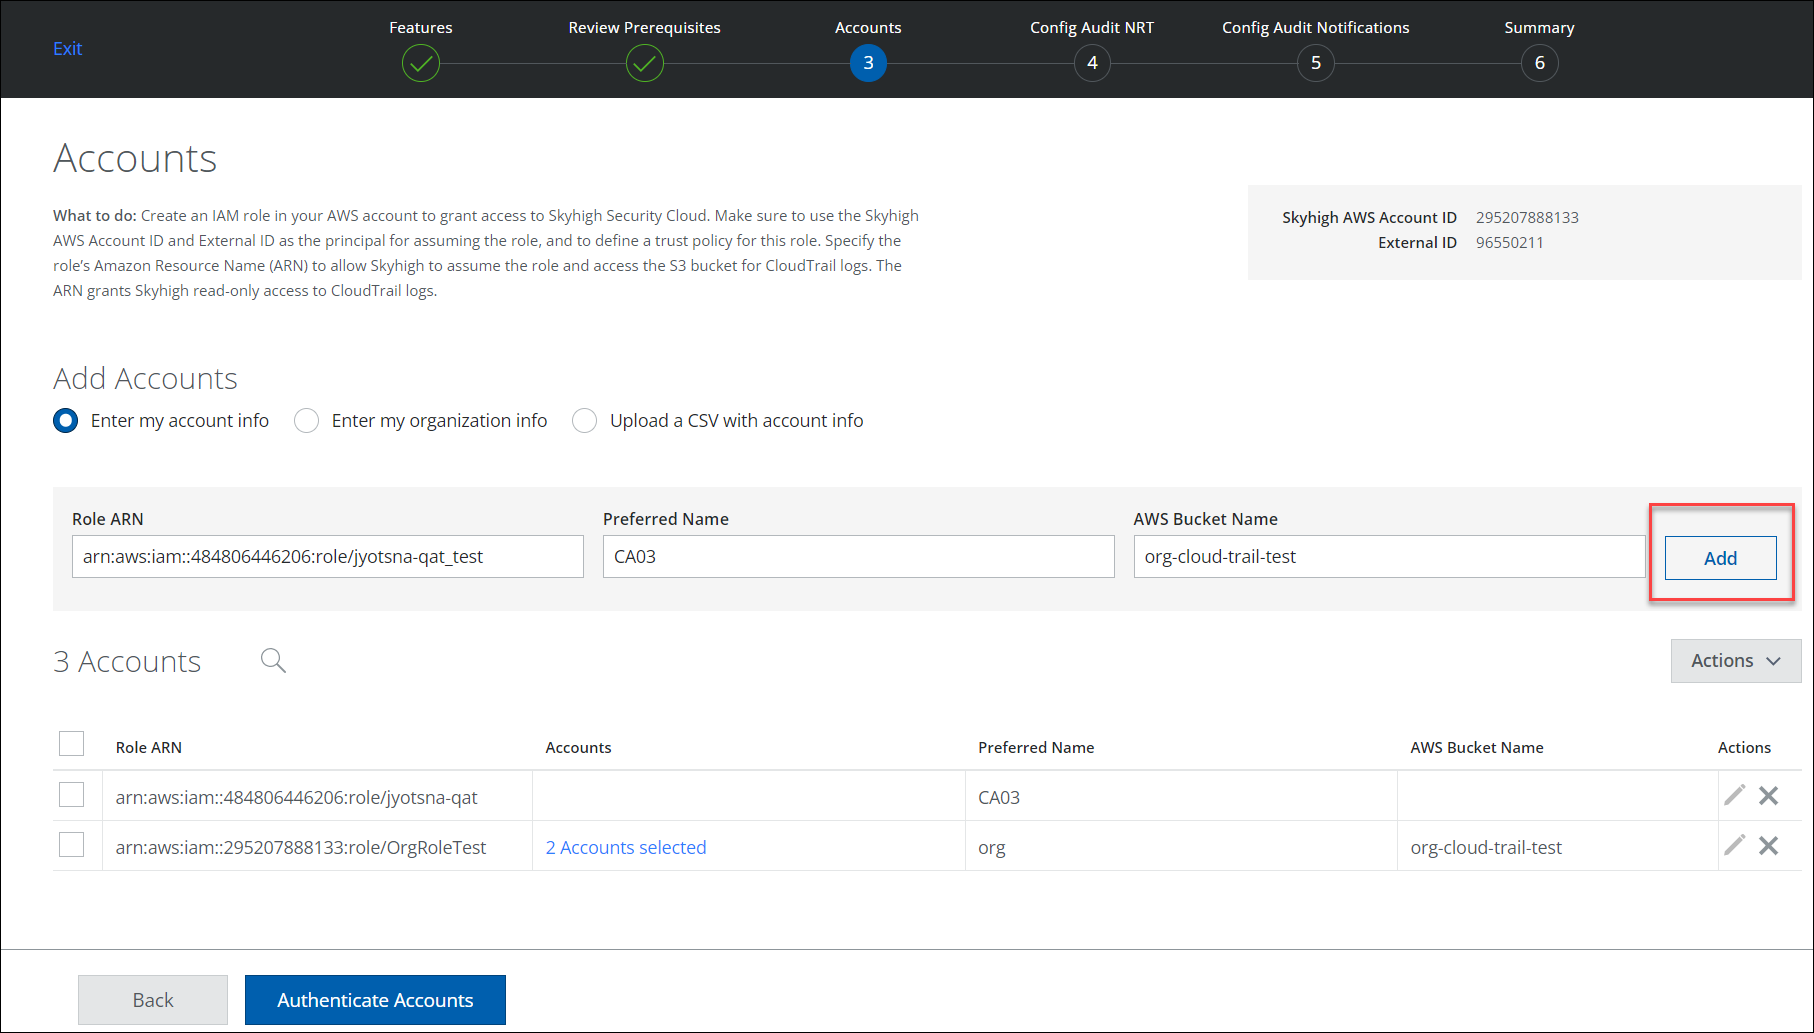
- Under Add Accounts, choose any method to provide AWS account information to Skyhigh CASB:
Enter my account info
- Choose this option, then type each AWS account's Role ARN, Preferred Name, and AWS Bucket Name.
- Click Add. You can add multiple AWS account details.
- To authenticate the information of your AWS account, click Authenticate Accounts.
Enter my organization info
- Choose this option, then type AWS organization's Role ARN, Preferred Name, and AWS Bucket Name.
- To auto discover all the accounts from the organization info, click Discover. For more details to create AWS Organization Role ARN, see Create AWS Organization Role.

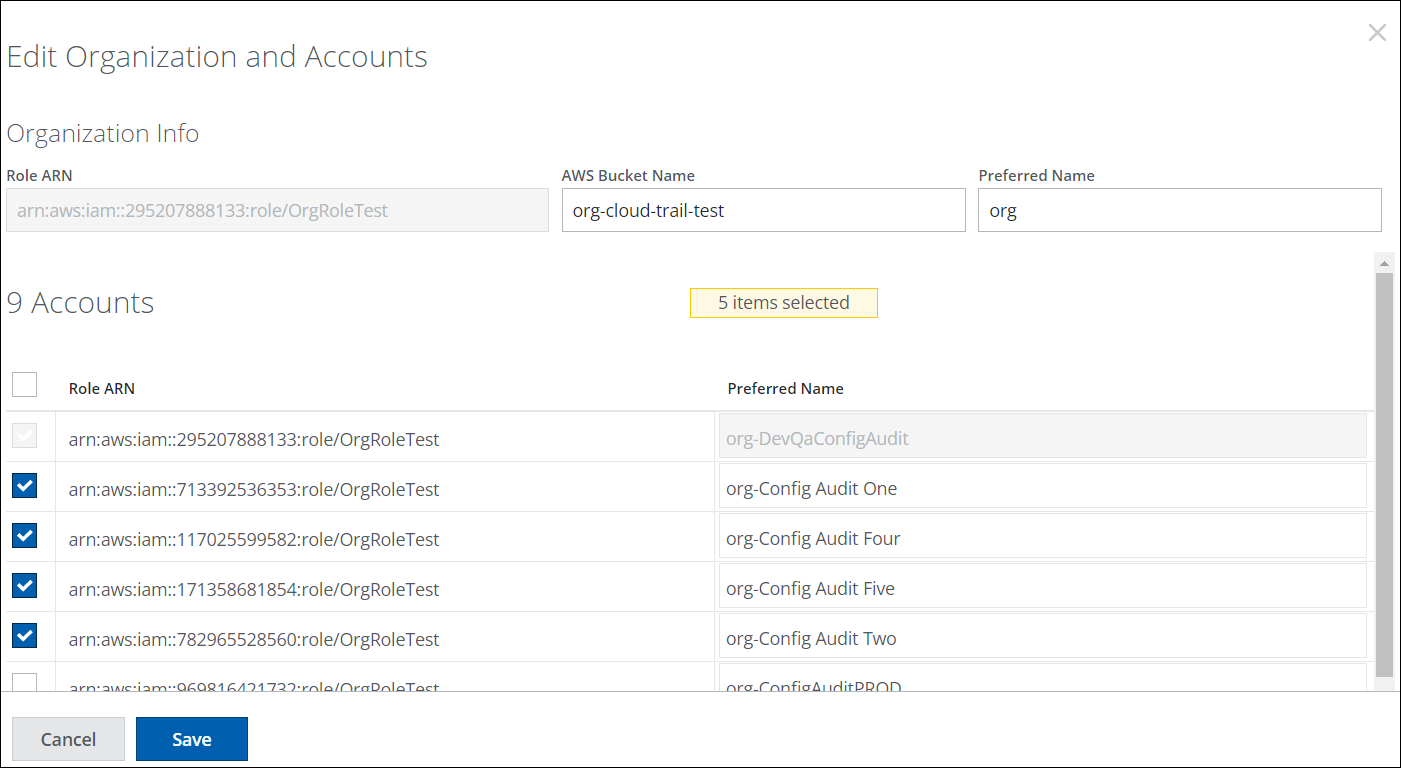
- The Organization details are displayed. You can either select the edit icon or the link under Accounts to view all the accounts associated with the particular organization.
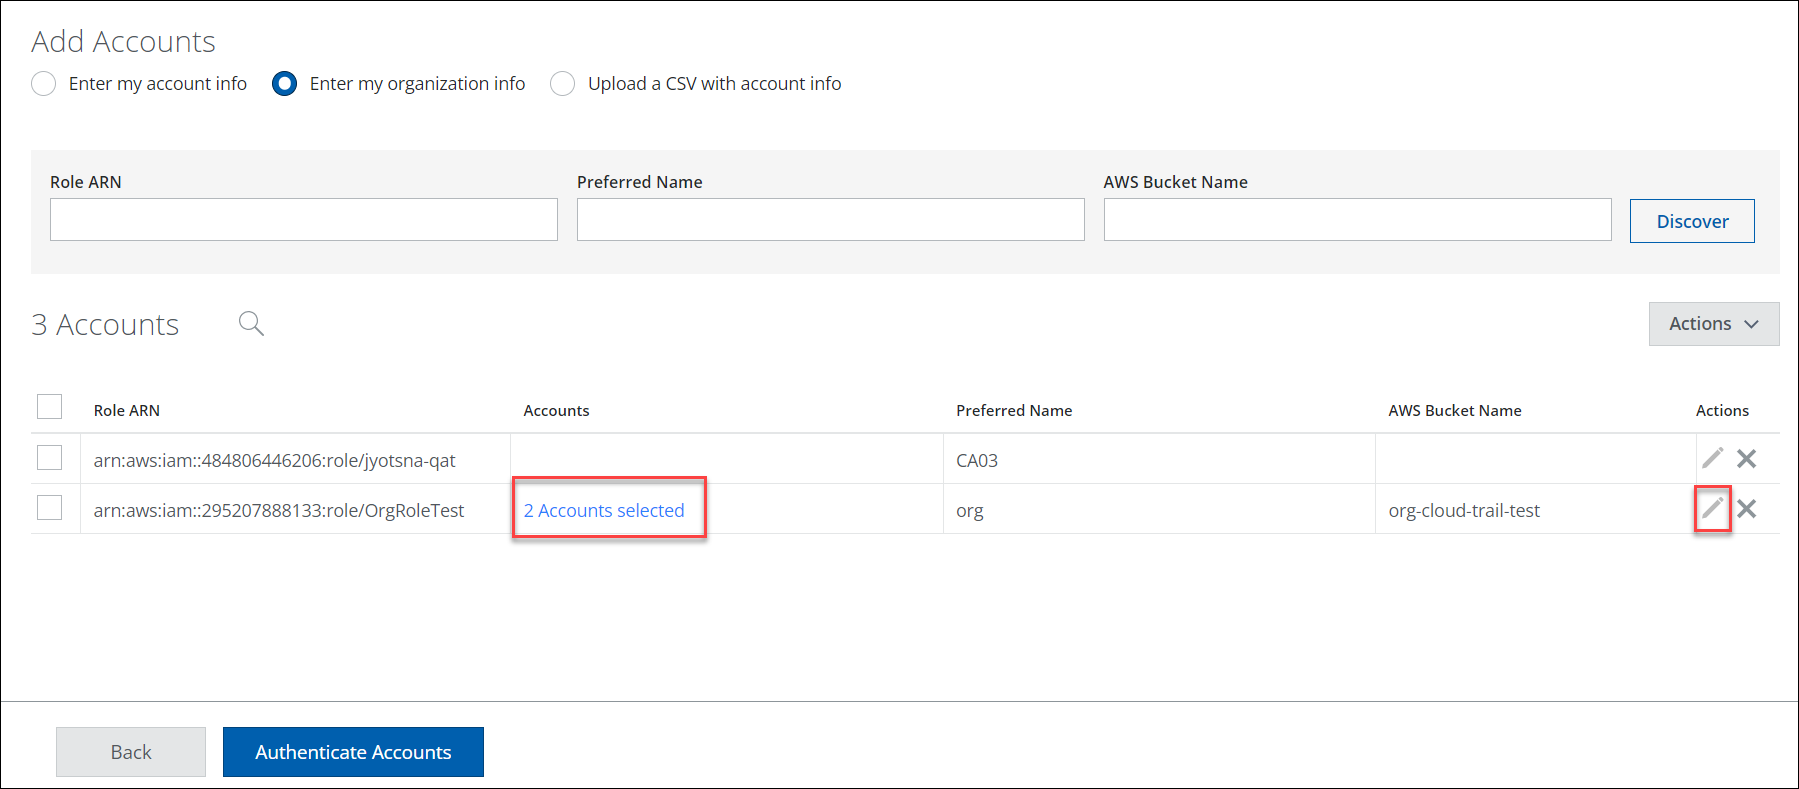
- On the Edit Organization and Accounts page, select all or the required accounts for your organization. click Save.
Upload a CSV with account info
- Choose this option only if you have a CSV file in the following format.
role-arn, preferred-name, aws-bucket-name
role-arn, preferred-name, aws-bucket-name
- To upload a CSV file, click Upload CSV.
- To authenticate the information of your AWS account, click Authenticate Accounts.
- On the unsuccessful authentication, you are redirected to the error screen. You can go back and fix the errors or if you do not want to fix the errors, click Continue With Error.
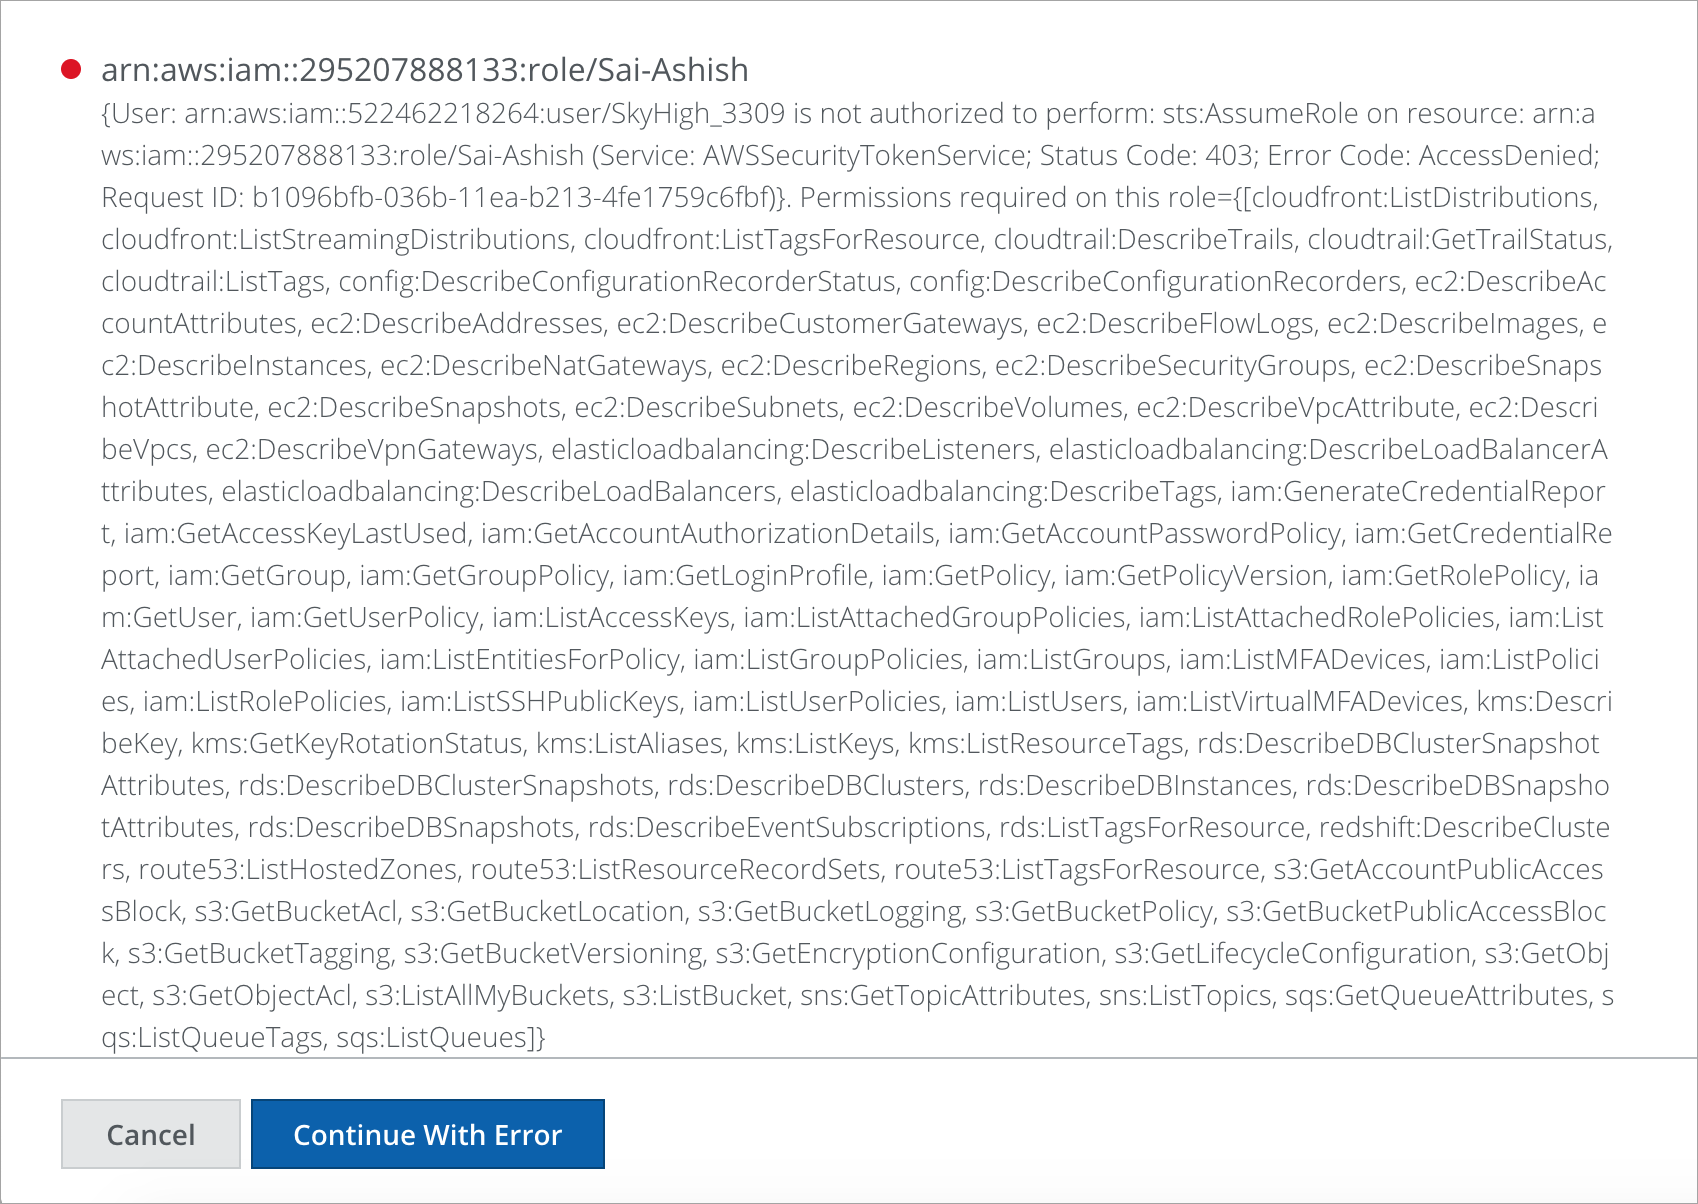
NOTE: Some features might not work as expected if you click Continue With Error.
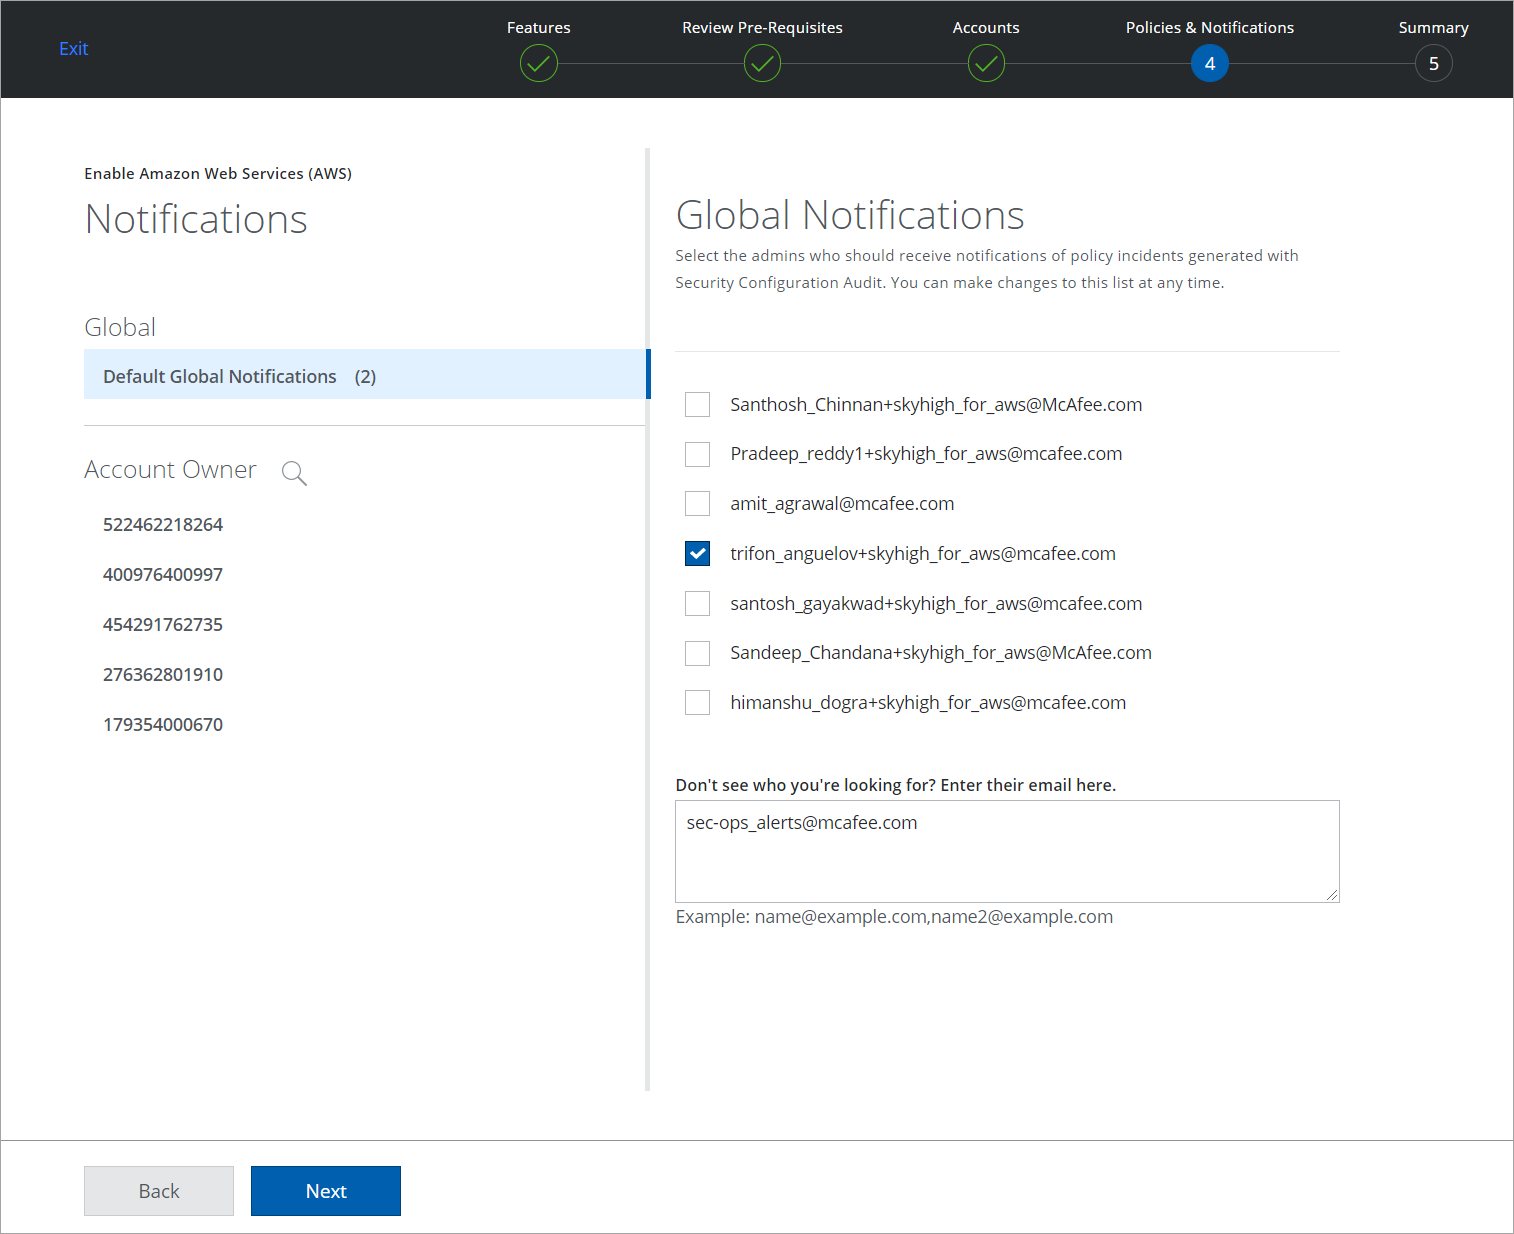
- Complete the further steps and go to Policies & Notifications.
- Select the pre-populated email ID(s) to notify any Configuration Audit Policy violation incidents. Alternatively, you can manually enter an email in the description box. For details, see Configure Account Administrator Email Notification.
- Click Next.
- On the Summary page, verify your settings, and to complete the integration, click Save.
Create AWS Organization Role
To create AWS Organization role, you need to follow these steps:
- Create IAM role in AWS Management Account. For details, see Create IAM Roles.
- Create CloudFormation Template file. For details, see Create CFT.
- Create Organization Role in AWS Member Account. For details, see Create Organization Role.
Create CloudFormation Template File (CFT)
- Download the CloudFormation Template to create AWS Organization role.
- The templates expect the following inputs:
- Role Name. Enter the IAM role name.
- Policy Name. Enter the IAM permissions.
- Save the inputs. The CloudFormation template file will be saved in JSON or YAML format. Later, you can use this to create Organization role in AWS member account.
NOTE: Your CFT template must contain the same role name and permissions as your AWS management account.
Create Organization Role in AWS Member Account
To create role for all member accounts in an organization, follow these steps:
- Log in to AWS console as a root/admin user.
- Go to CloudFormation > StackSets > Create StackSet.
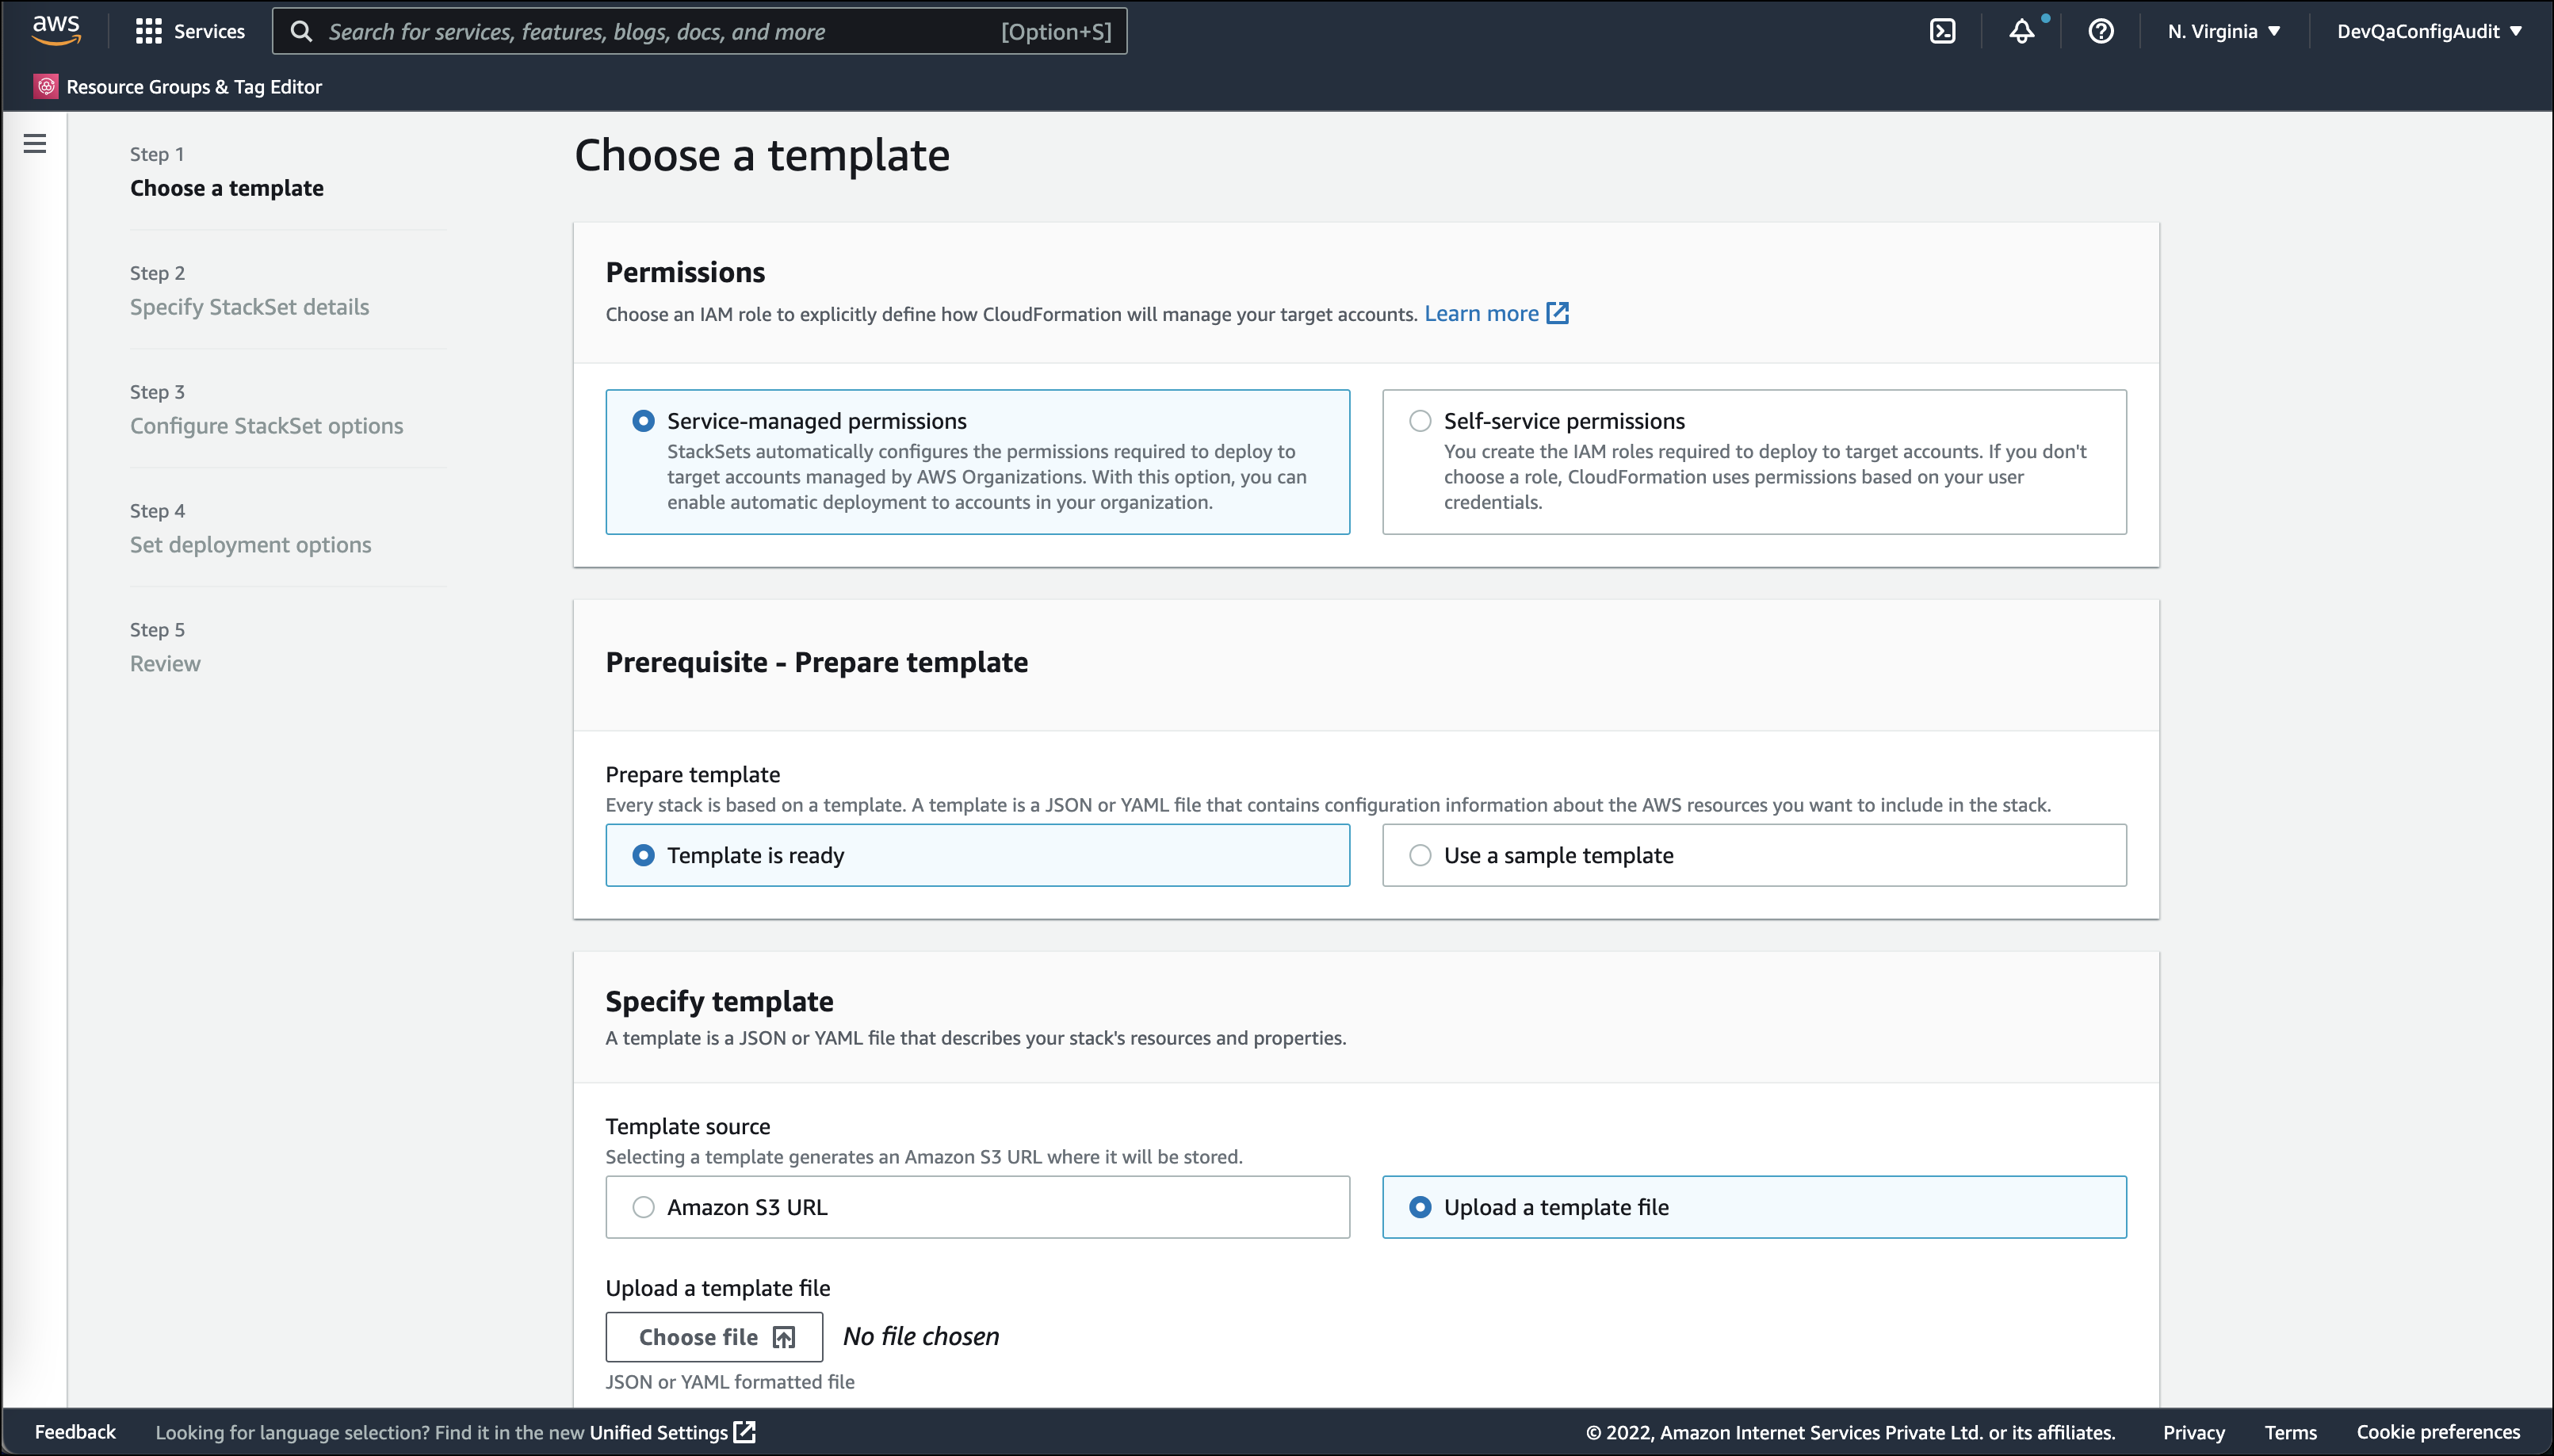
- Under Choose a template, configure the below options and click Next.
- For Permissions, select Service-managed permissions.
- For Prerequisite - Prepare template, select Template is ready.
- For Specify template > Upload a template file, browse and upload CFT template file saved in JSON or YAML format.
- Under Specify StackSet details, add the following information and click Next.
- StackSet name. Enter the name for StackSet.
- StackSet description. Enter the description for StackSet. You can use the description to identify the stack set's purpose or other important information.
- Parameters. Enter the parameters that are defined in your template. Parameters allow you to input custom values when you create or update a stack.

- Under Configure StackSet options, provide the required tags only if required and click Next.
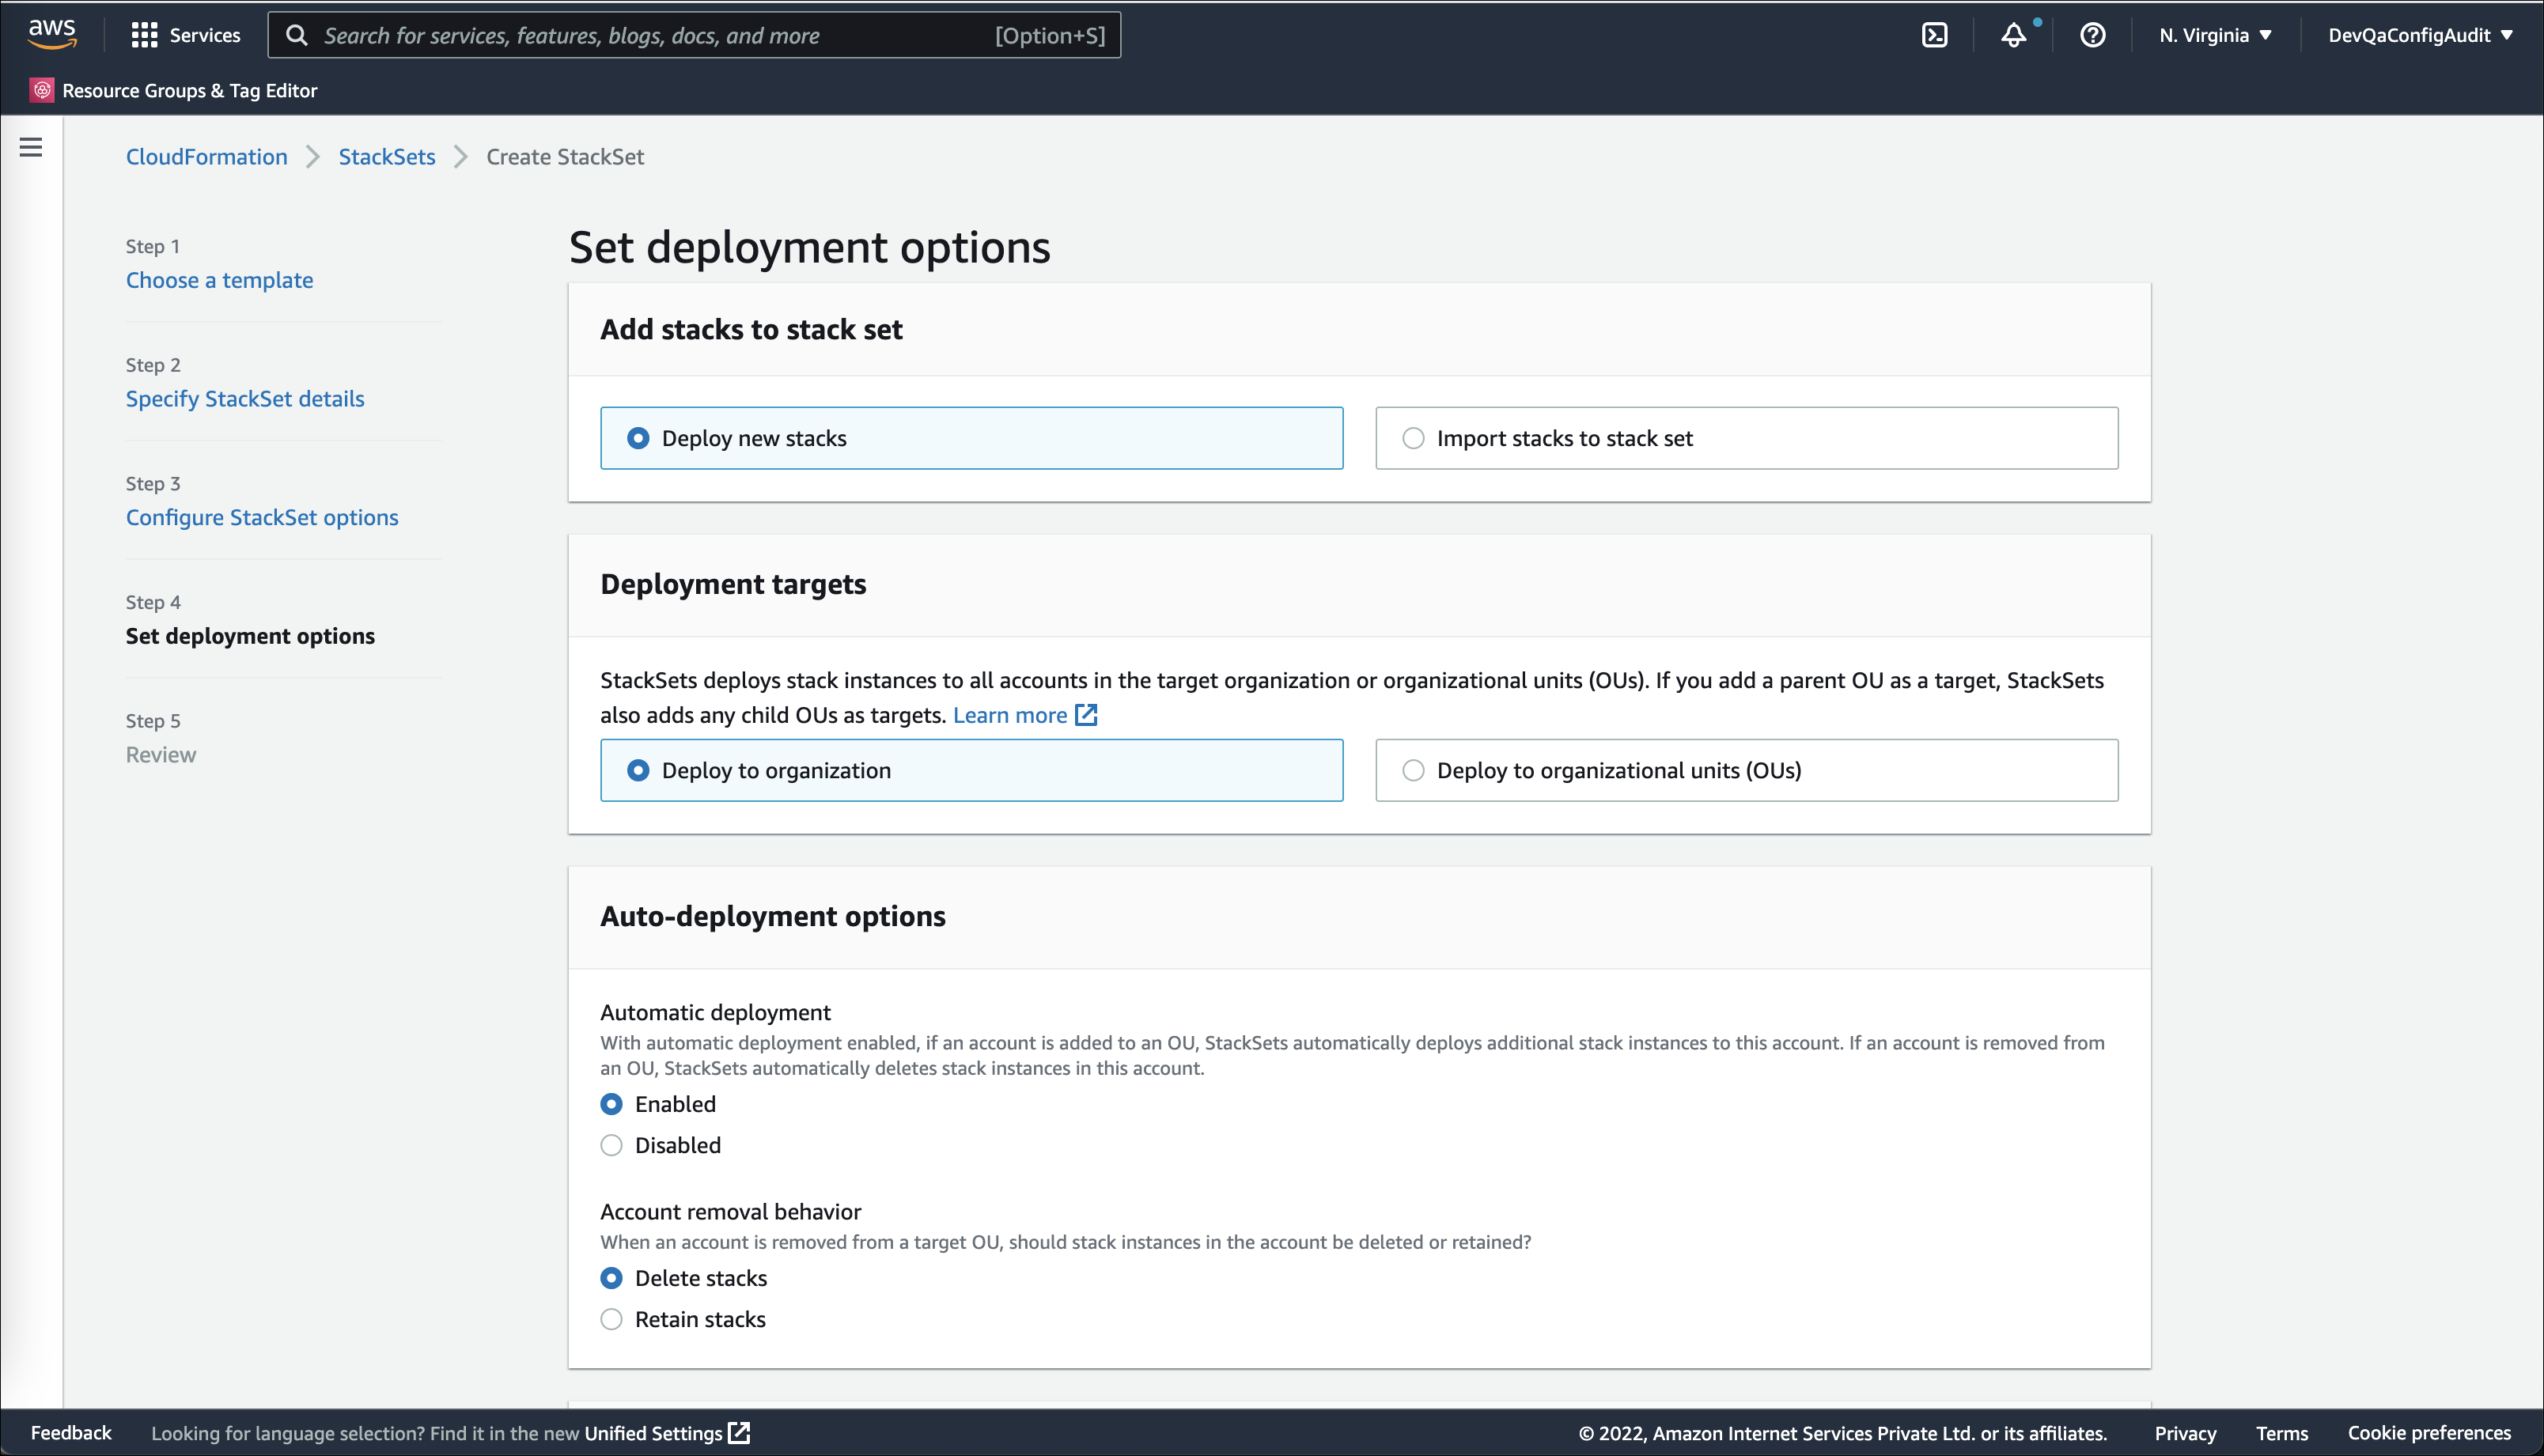
- Under Set deployment options, configure the below options and click Next.
- For Add stacks to stack set, select Deploy new stacks.
- For Deployment targets, select Deploy to organization.
- For Auto-deployment options, configure these:
- Activate Enabled for Automatic deployment.
- Activate Delete stacks for Account removal behavior.
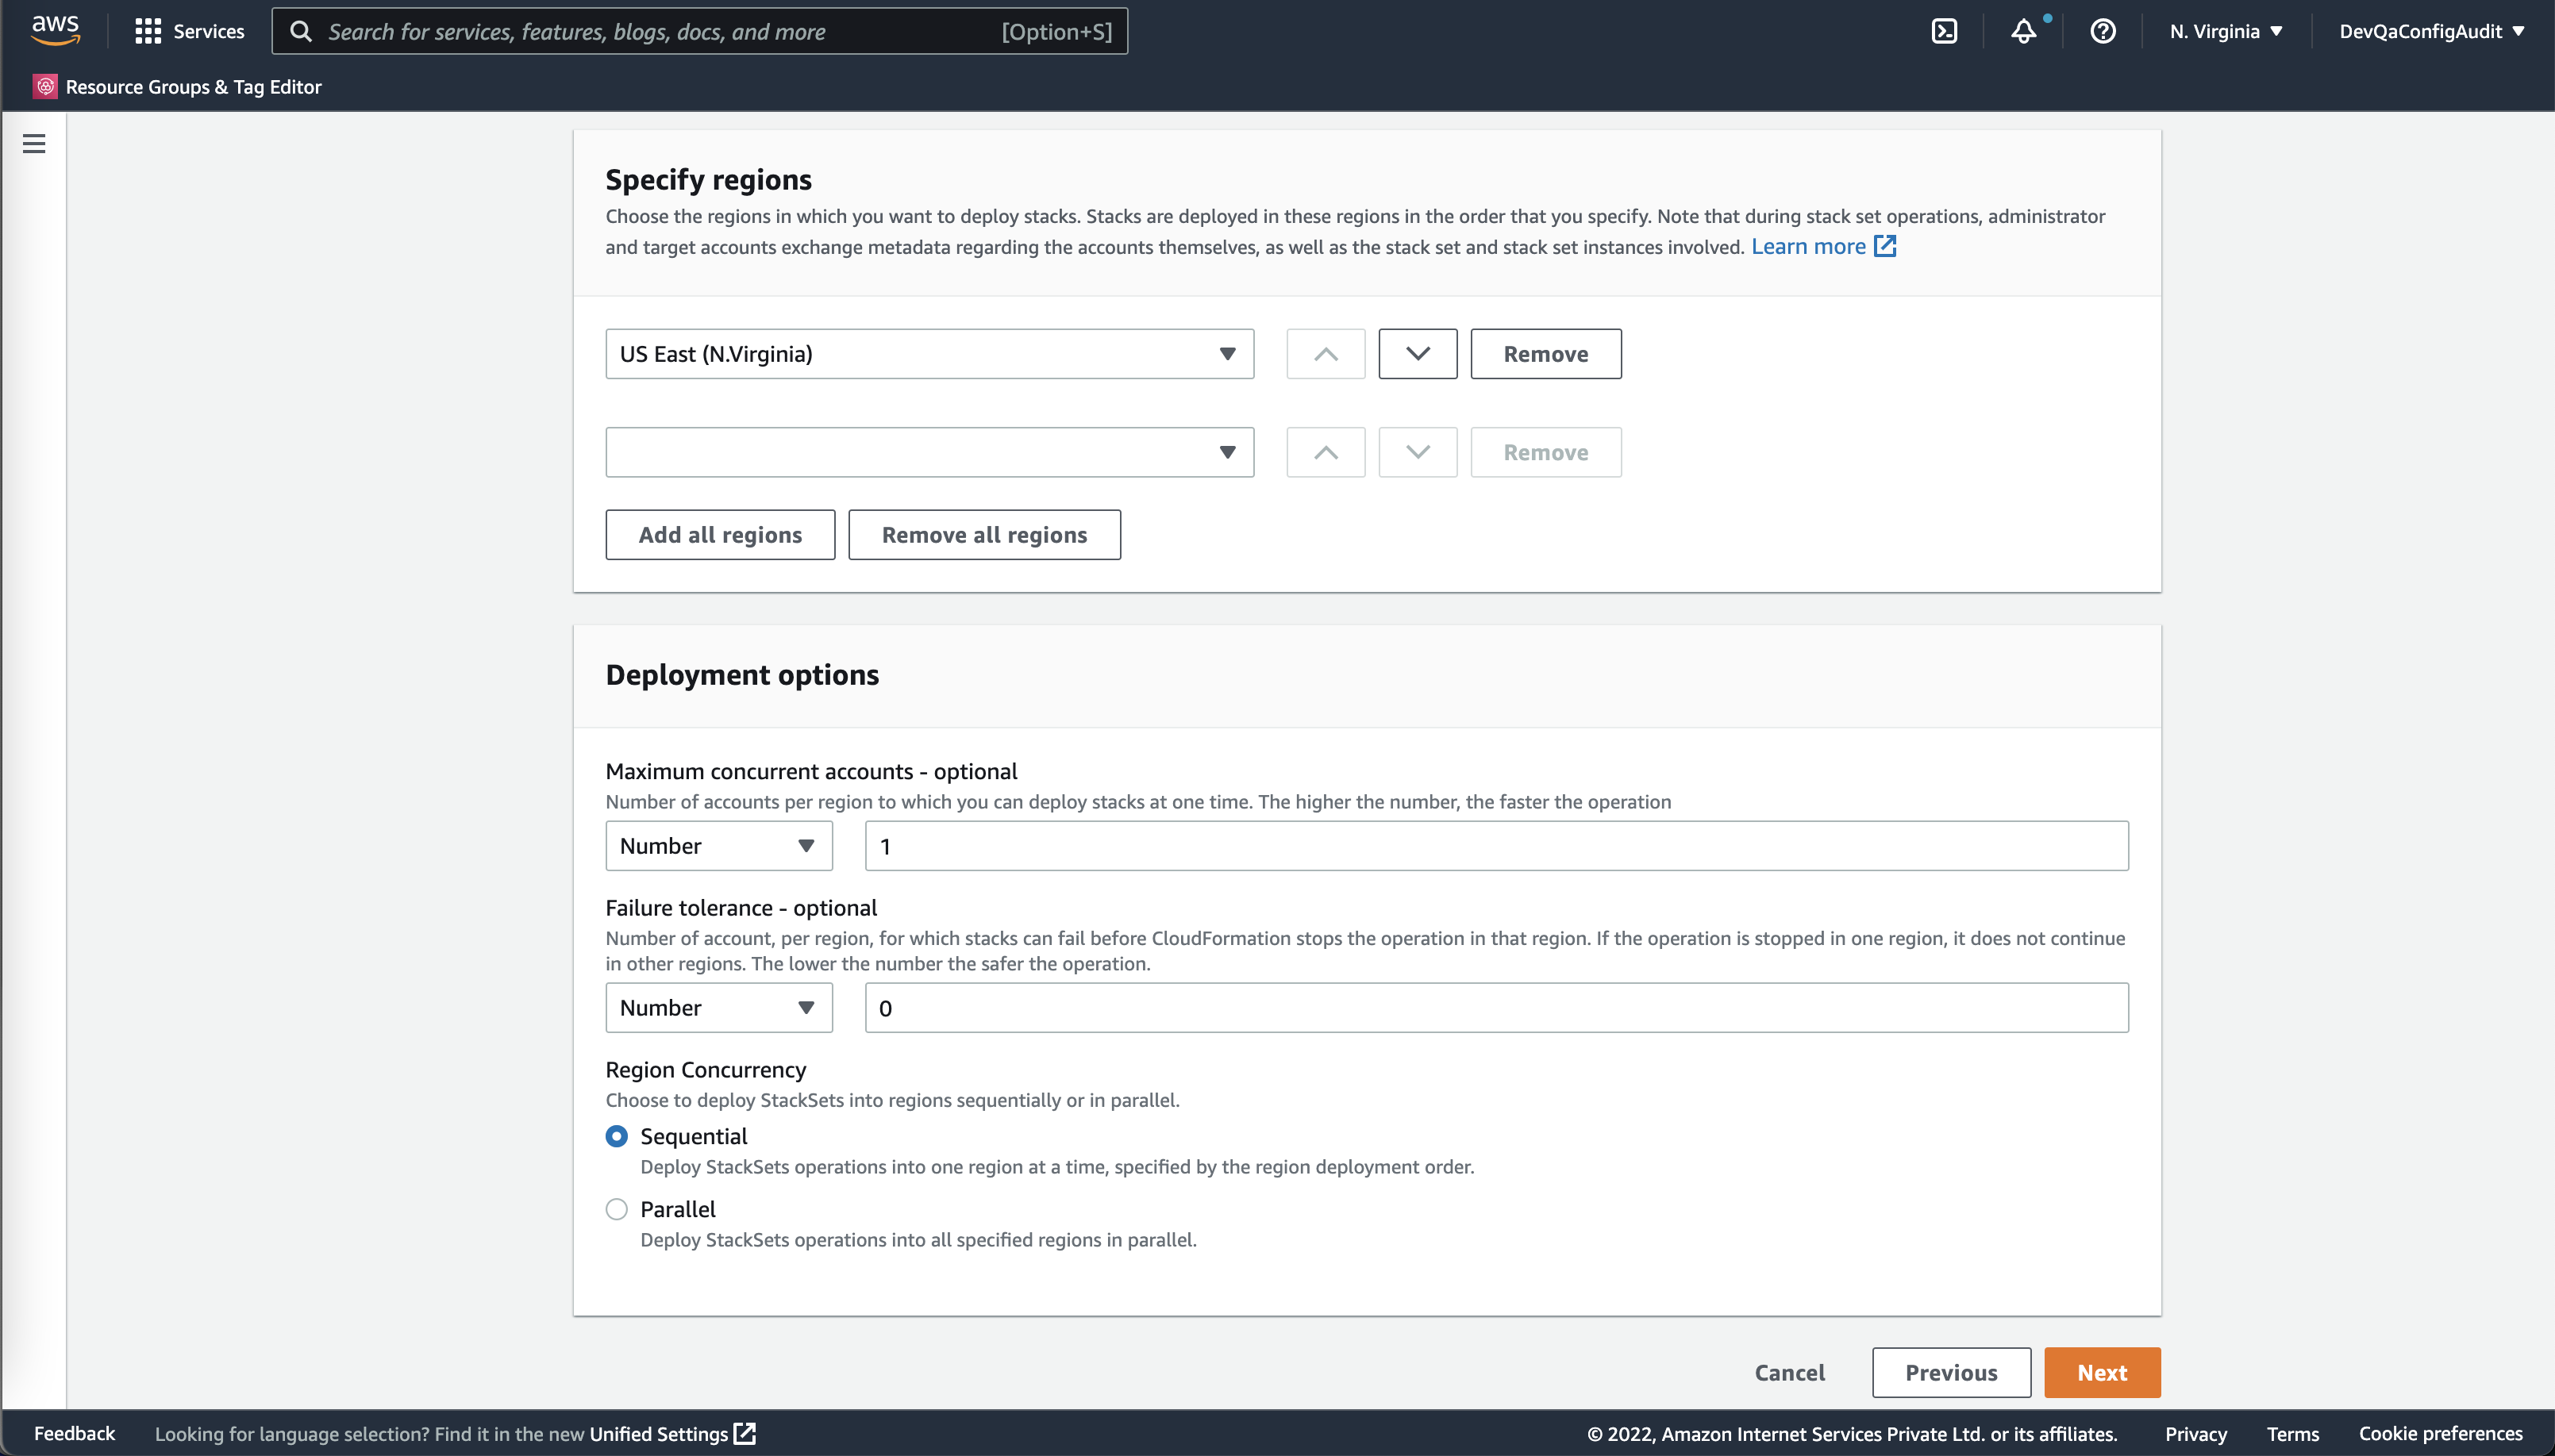
- Under Specify regions, choose the region in which you want to deploy stacks. Your selected regions are deployed in the order you specify.
- Under Review, verify your changes and save to create the stack set.
- Go inside the StackSet and check the Stack instances.