Near Real-Time DLP Scan and Malware Scan for AWS
Skyhigh CASB provides Near Real-Time (NRT) DLP and Malware scan for AWS S3 buckets. This feature significantly reduces the time to find new DLP and Malware violations in S3 buckets by detecting file creation, modification, or restoration events occurring in S3 buckets in real time and evaluating Skyhigh CASB's DLP and Malware policies.
Integrate your AWS account with Skyhigh CASB. For more details, see Integrate AWS and enable NRT DLP and Malware Scan for AWS S3.
This article describes how to enable Near-Real Time DLP and Malware Scan for AWS S3.
How it Works
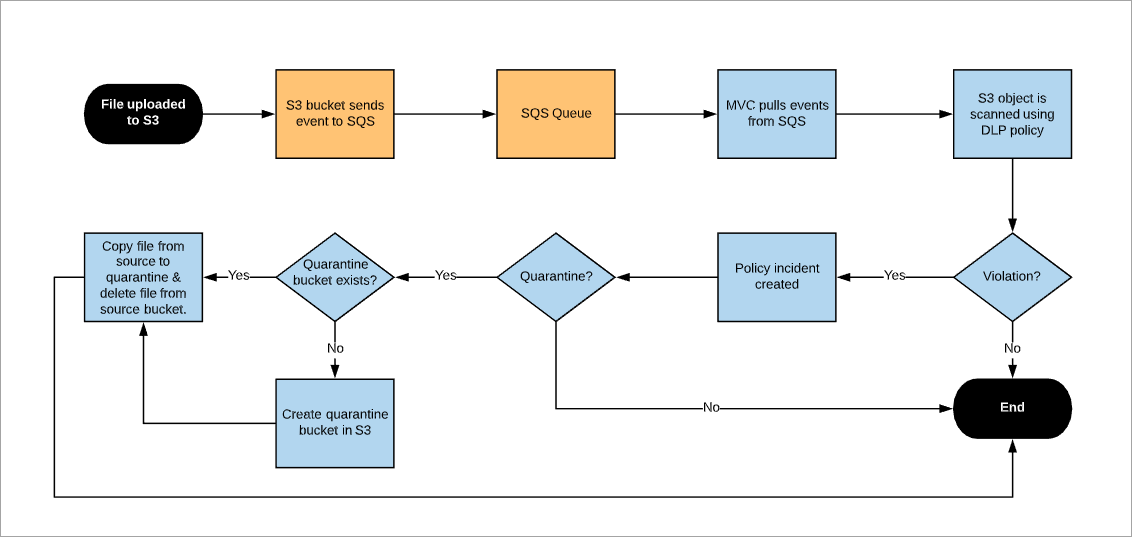
SQS queues are created in the AWS accounts and integrated with Skyhigh CASB using the CloudFormation template. The notifications are enabled on the AWS S3 buckets where the NRT DLP scan is run. If any files are added, modified, or restored on those AWS S3 buckets, then the notifications are sent to the respective SQS queues. Skyhigh CASB polls SQS every minute and triggers the evaluation of NRT DLP and Malware policies. In case of any violations, incidents are generated.
If quarantine is configured, Skyhigh CASB creates an S3 bucket for incidents that require quarantine.
How Quarantine File Works
A quarantine bucket is automatically created by Skyhigh CASB when a file needs to be quarantined. This bucket is used to store quarantined content. The manual and automated remediation action supported is quarantine. The original file is replaced with a tombstone file and the original file is copied from the source bucket to the quarantined bucket. The original file is then deleted from the source bucket.
The following flowchart describes the internal process of NRT DLP and Malware Scan for AWS S3:
NOTE:
- If the file triggering policy is deleted manually from the S3 bucket, then the incident is not automatically resolved. Henceforth, the automated incident resolution is not supported.
- The automated remediation action and policy incident takes less than or equal to 15 minutes.
- Quarantine restore is supported.
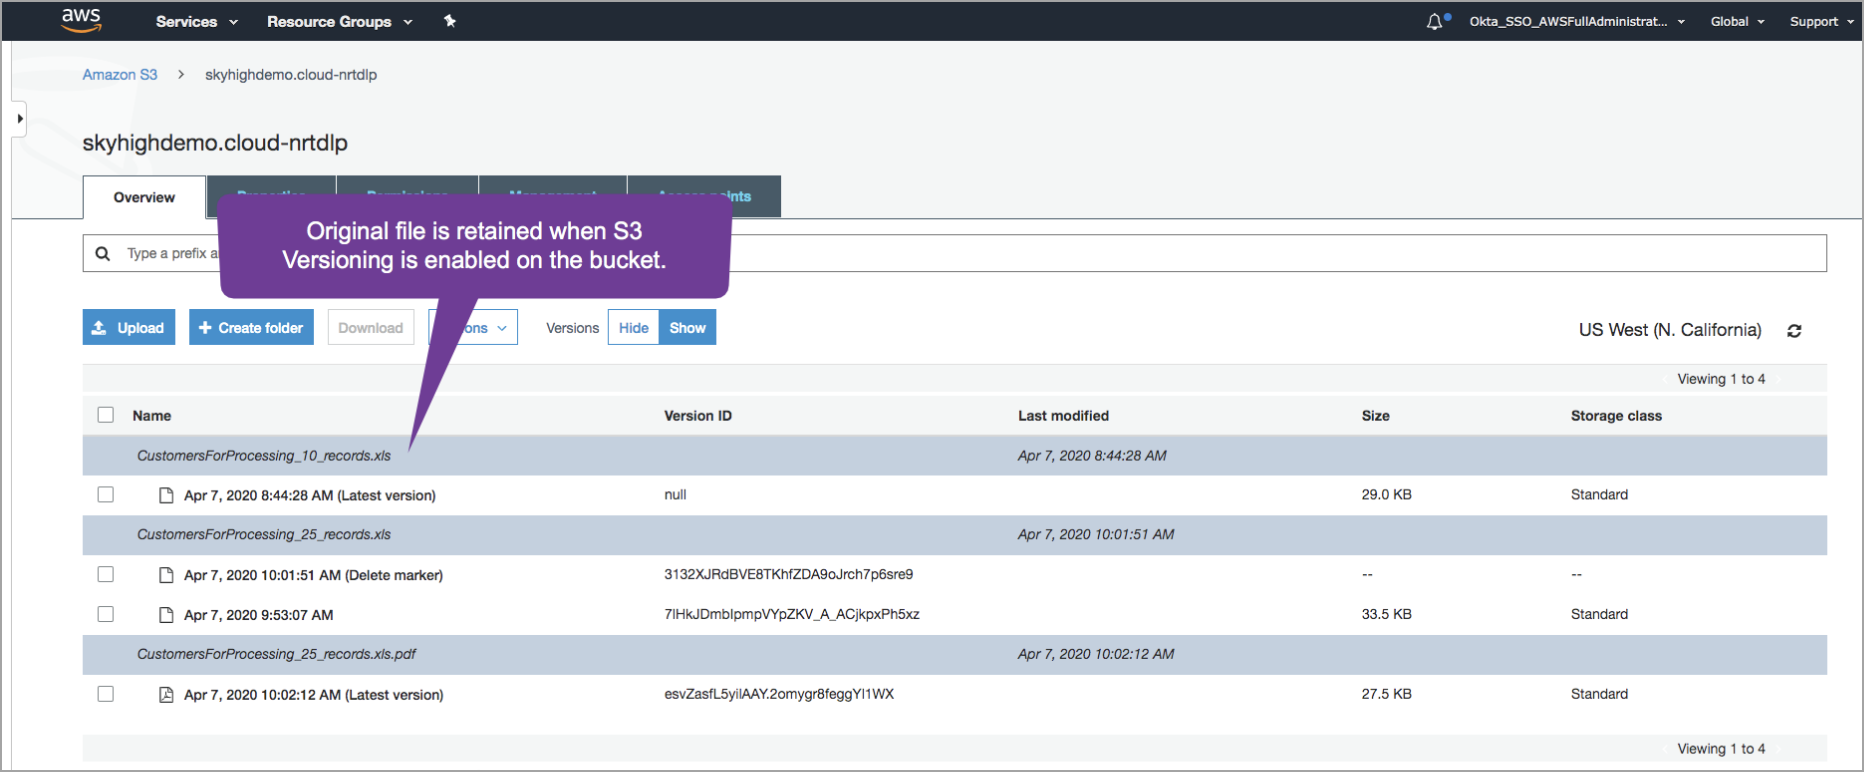
- If versioning is enabled for the bucket, then all the historic versions are available.
When the Quarantine S3 bucket is not accessible to the root user, then perform the following steps:
UI Validation on AWS Console
- Log in to the AWS console as a root user using the AWS root account.
- Go to the S3 Service page.
- Filter for the quarantine bucket. For example, “quarantine-skyhigh-94581868531711"
- Check the Access Column to make sure you do not see any errors and are able to browse all the S3 bucket content.
API Validation via Command Line Interface (AWS - cli)
- Generate Access Key and Secret Key for the AWS S3 root accounts.
- Set your AWS profile to use root accounts.
- Run aws s3 listObject command on buckets. Start with the quarantine buckets. For example, quarantine-skyhigh-94581868531711 is your quarantine bucket. For more information on listobject command, see List Objects.
- Share the output of each of the buckets.
Prerequisites
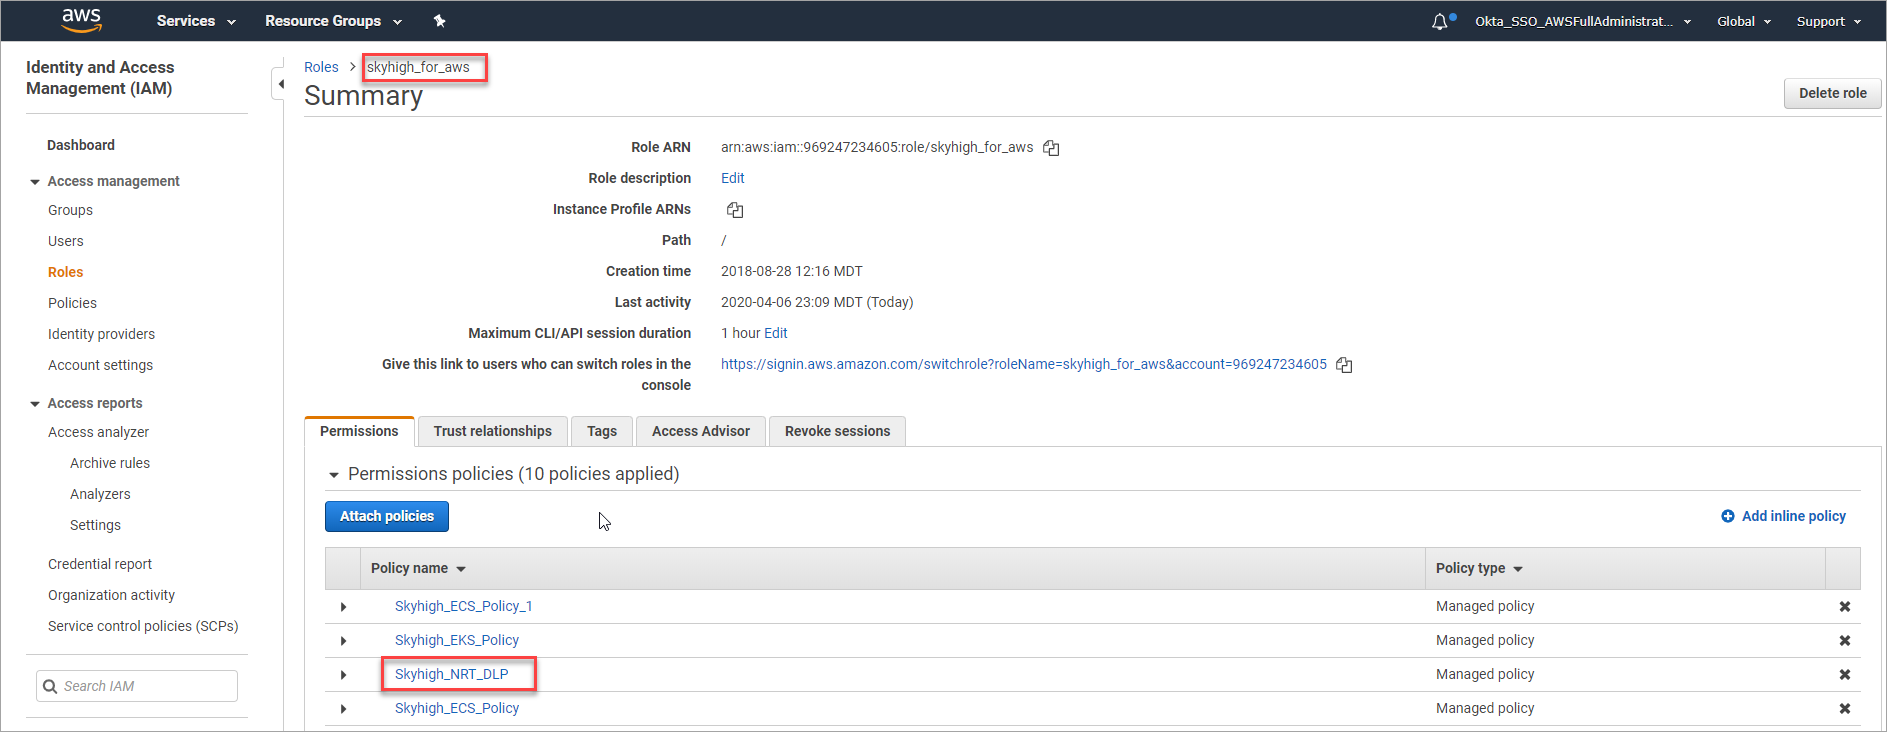
Before you begin, make sure you provide the following minimum SQS permissions to Skyhigh CASB IAM role to enable NRT DLP and Malware scan.
sqs:ListQueues
sqs:GetQueueAttributes
sqs:ReceiveMessage
sqs:DeleteMessage
s3:GetBucketNotification
To enable quarantine, the following additional S3 permissions are required:
s3:ListAllMyBuckets
s3:ListBucket
s3:PutObject
s3:CreateBucket
s3:DeleteObject
s3:PutBucketPolicy
s3:GetBucketLocation
Configure Quarantine for AWS S3
- Create a new IAM policy and grant the above SQS and S3 permissions. For example, the JSON format is exported for a suitable policy below which includes both the SQS and S3 (quarantine) permissions.
{ "Version": "2012-10-17", "Statement": [ { "Sid": "MVCNRTDLP", "Effect": "Allow", "Action": [ "sqs:DeleteMessage", "s3:PutObject", "s3:GetObject", "sqs:ListQueues", "s3:ListAllMyBuckets", "sqs:ReceiveMessage", "s3:PutBucketPolicy", "s3:CreateBucket", "sqs:GetQueueAttributes", "s3:ListBucket", "s3:DeleteObject", "s3:GetBucketLocation", "s3:GetBucketNotification" ], "Resource": "*" } ] } - Attach this new policy to the existing Skyhigh for AWS role.
Enable NRT DLP and Malware Scan for AWS S3
To enable Near Real-Time DLP and Malware Scan in the AWS Setup page:
- Login to Skyhigh CASB and go to Settings > Service Management.
- Select your AWS instance under Amazon Web Services and click Setup > Edit.
- You are redirected to the Summary page. Under Enabled Features, click Edit.
- To enable NRT DLP, select the checkbox Near Real Time.
- To view the prerequisite steps to set up NRT DLP, click the link NRT DLP. You are redirected to the current page, Prerequisites section.

- Download the CloudFormation Template and go to the AWS Console to run the CFT.
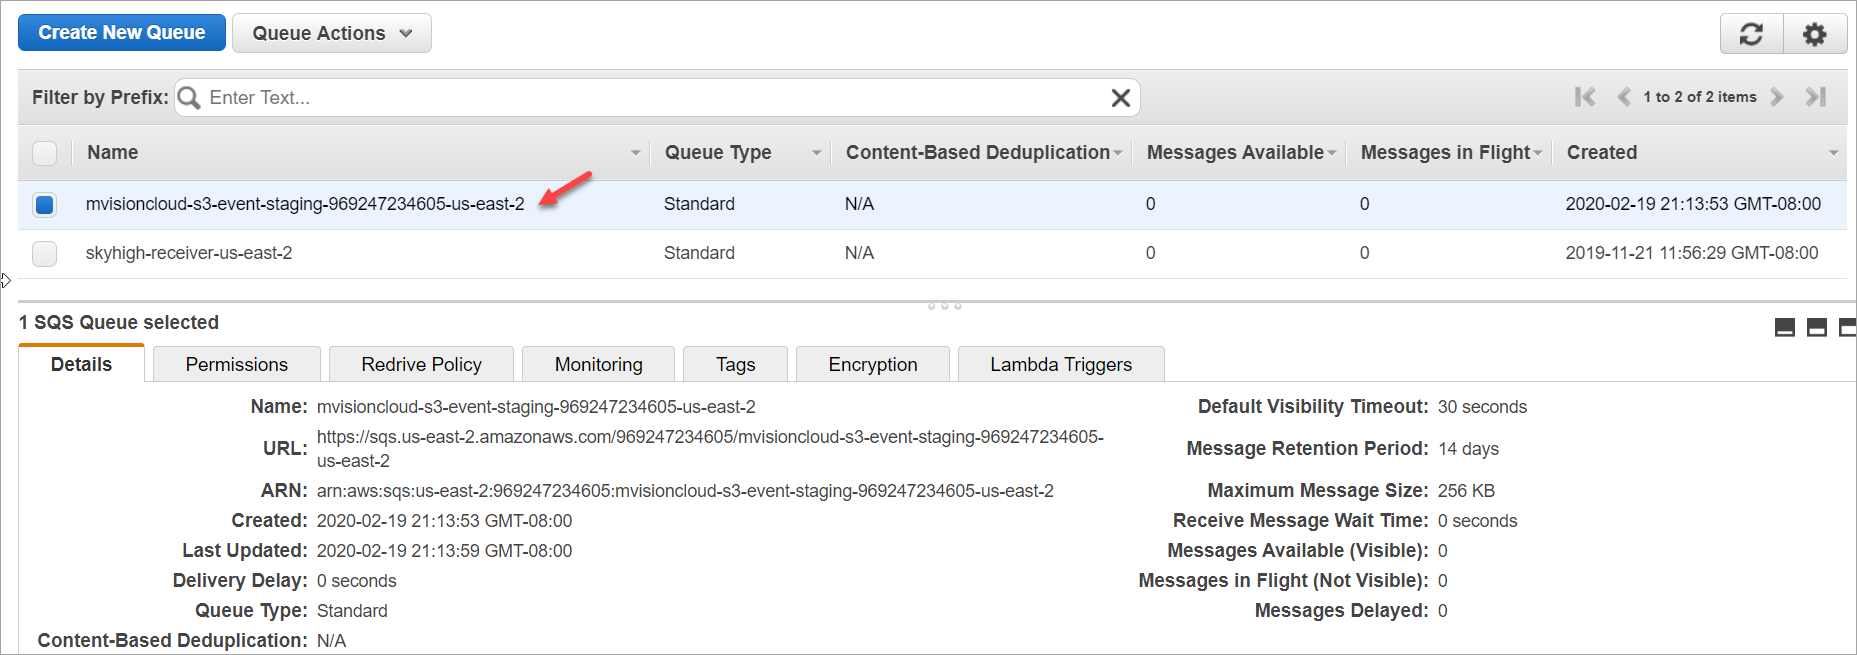
- The CFT creates SQS in your region. The naming convention for SQS is mvisioncloud-s3-event-staging-<cccountID>-<region>
- Go to S3 buckets and enable the notifications. There are two ways to enable notifications:
- Use the AWS console.
- Use the python script provided in Skyhigh CASB.
To enable notification in the AWS console:
-
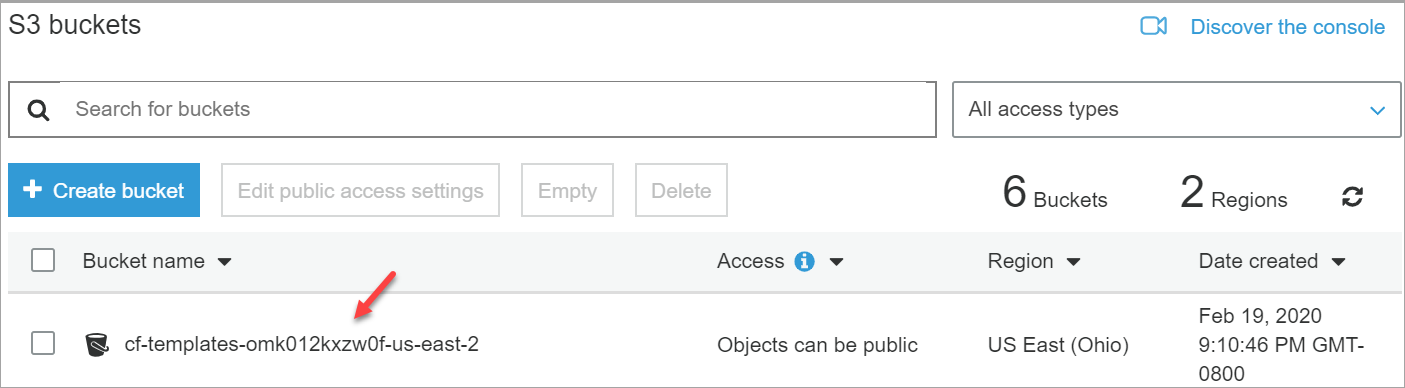
Select your S3 Bucket.
-
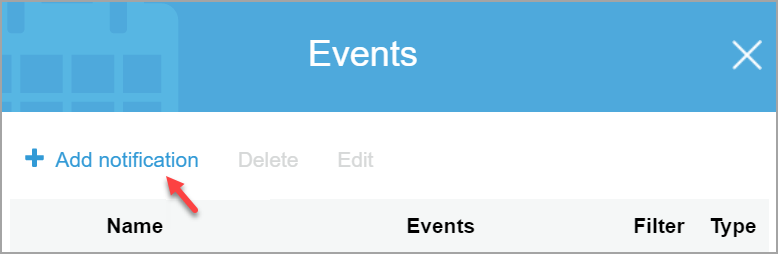
Choose Properties > Events and click Add notification.
-
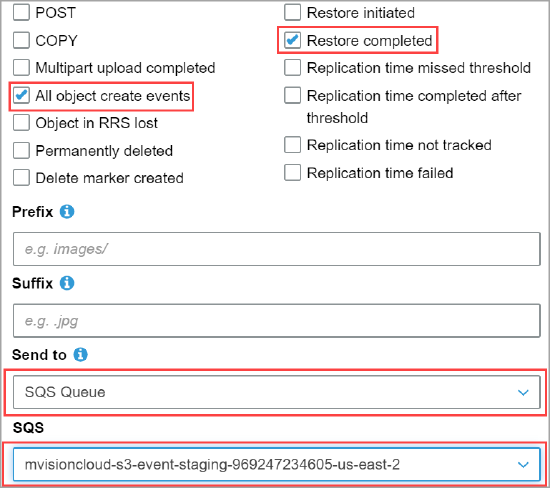
On the Add notification page, configure and save the following:
- Select the checkboxes All object create events and Restore completed.
- Select SQS Queue from the Send to menu.
- Select the SQS name created by the CFT template from the SQS menu.
Configure DLP and Malware Policies for NRT
- Go to Skyhigh CASB and choose Policy > DLP Policies.
- You can create a new DLP policy or edit an existing one and choose Services as Amazon S3. For complete details, see Create or Edit a Sanctioned DLP Policy.
- Review your policy and Save.
- You can create a new malware policy or edit an existing one. Choose Policy > Malware Policies
- Click Actions > Create a Malware Policy.
- For Services select Amazon S3.
- Complete the further steps, and then save your policy. For complete details, see Create a Malware Policy.