Configure CSPM for Amazon ECR
To enable Skyhigh CASB for use with Amazon ECR, make the following configurations in the Amazon Console and Skyhigh CASB.
NOTE: If you already have an AWS instance set up in Skyhigh CASB, nothing will change until you import ECR policies, after which you will need to provide necessary permissions for configuration audit.
Configure Amazon ECR
- In the AWS Console, go to ECR.
- Create an ECR cluster to use with Skyhigh CASB detection.
- Provide permissions to the Skyhigh CASB for ECR policies.
Configure Skyhigh CASB IAM Roles for AWS
Skyhigh CASB uses AWS CloudFormation Templates to create the IAM roles required to configure AWS accounts. Permissions for all Skyhigh CASB features are consolidated in CloudFormation Templates, so you do not have to track and provide permissions separately for each feature.
Use one of three options:
- AWS Managed Policy SecurityAudit. This is the recommended option.
- Read-Only Access.
- Minimum Permissions.
Configure Skyhigh CASB
Configure a New AWS Instance
If you haven't configured an AWS instance in Skyhigh CASB yet, use the following steps.
NOTE: Permissions against all the pre-defined policy templates are checked during authentication.
- Go to Settings > Service Management.
- Select the AWS service instance and click the Setup tab.
- Enable API access, then click Edit.
- For Enabled Features, make sure Security Configuration Audit is enabled. Click Next.
- In the Review Prerequisites screen, review permissions and click I have reviewed all prerequisites for enablement and completed any that are mandatory. Click Next.
- For Accounts, enter your Role ARN. Click Add.
- Click Authenticate Accounts.
- Click Save.
Configure an Existing AWS Instance
If you already have an AWS instance configured in Skyhigh CASB, use the following steps.
NOTE: Permissions against imported policies are checked during authentication and On-Demand Scans.
- Go to Policy > Policy Templates
- In the Table view, filter by Business Requirement > Container Security. (For details about policy templates for ECR, see Policy Templates for Container Security.)
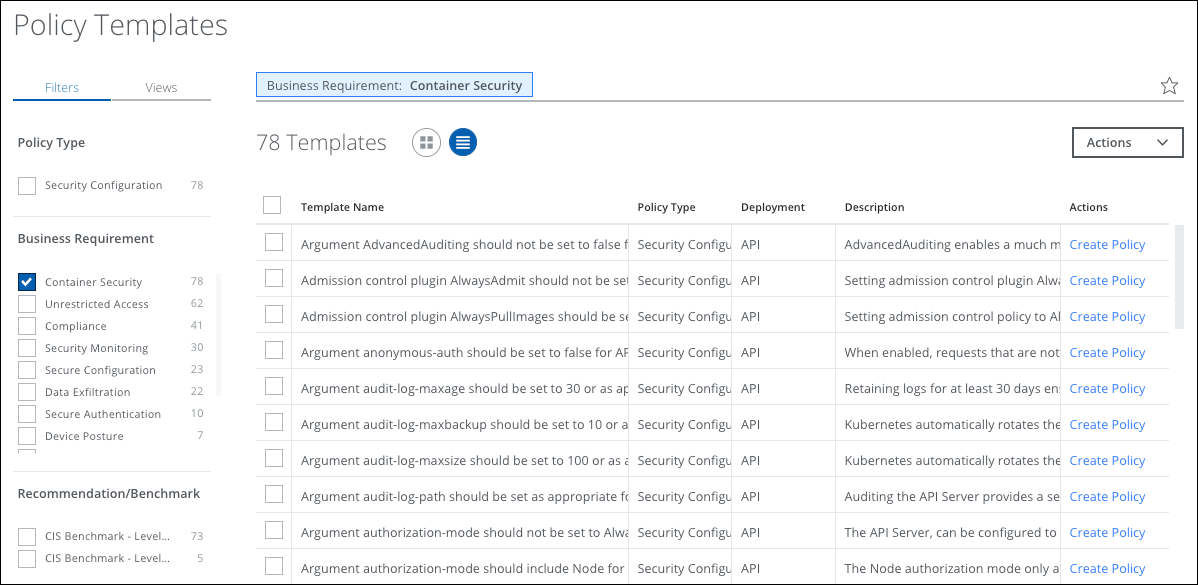
NOTE: In the Filters > Usage section, you can also choose Not Used to list all un-imported templates.
- Select all the templates you want to create policies for and click Actions > Create Policy. Click Create Policies
- All the imported policies will appear under Policy > Configuration Audit page
- Select the policies and click Actions > Activate Policies.
The policies are activated.
Scans
After activating the policies, subsequent AWS configuration audit scans discover AWS ECR resources and registries, and also evaluate these policies and report any incidents.
For more information, see About Configuration Audit Policies.
You may also choose to manually trigger the scan from the Policy > On-Demand Scan. For details, see On-Demand Scans for Container Security.