Geo-Location Cloud Access Policies
Geo IP location-based Cloud Access Policies check IP addresses against a geo-database to determine if access should be granted to cloud services. The geo-database is created using a policy dictionary that includes a list of country and region codes. You can set up Geo-location policies as an allow list (allow access only from the locations specified) or block list (never allow access from the locations specified).
NOTE: IP mapping is based on NetAcuity edgeDb, and occasional inaccuracies can happen.
Create a Geo IP DLP Dictionary
The first step is to create a Geo IP dictionary.
You can either manually enter locations in the dictionary text box, or upload a CSV of locations. If you're working with more than a handful of countries/regions, it is easier to create the file and then upload it. This also allows you to archive the dictionary, or use it in other Skyhigh CASB tenants.
The dictionary must follow this format:
| Dictionary Format | Example |
|---|---|
|
COUNTRY: <2 letter country code>,<2 letter country code> REGION: <2 letter country code>.<2 letter region code>, <2 letter country code>.<2 letter region code> |
COUNTRY: BR, CN REGION: US.NY, US.NJ |
TIP: You can find country and region codes on these sites:
- Country codes: http://www.nationsonline.org/oneworld/country_code_list.htm
- USA region codes: https://www.infoplease.com/state-abb...e-postal-codes
- Canada region codes: https://en.wikipedia.org/wiki/Canadi...nd_territories
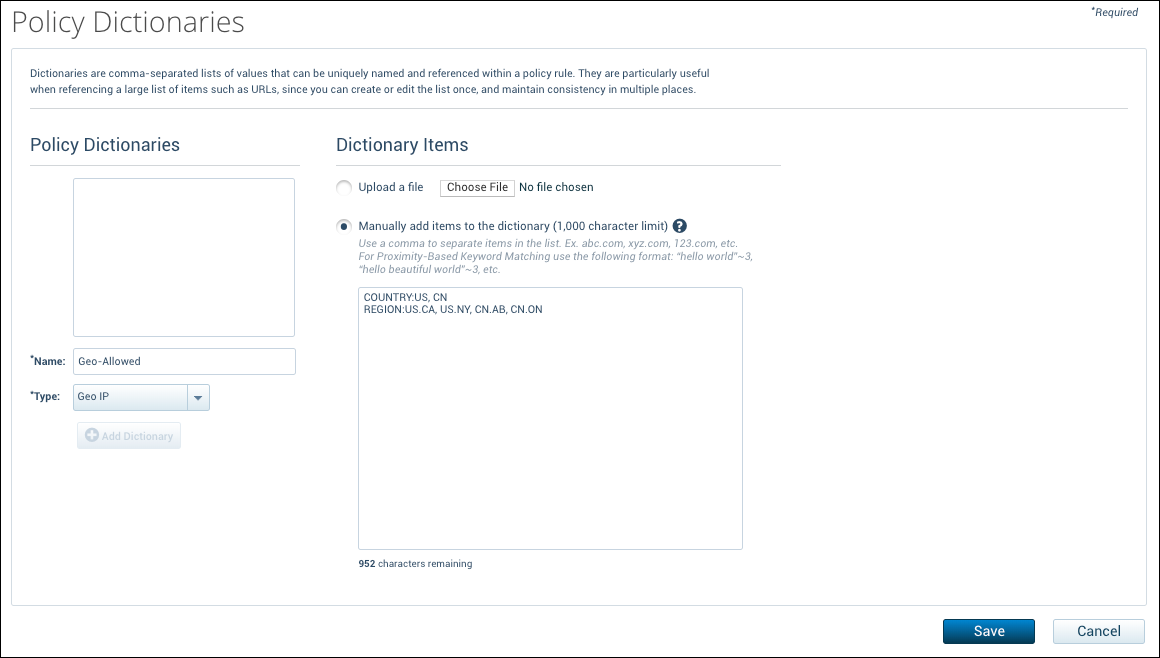
To create a DLP Dictionary:
- Choose Policy > DLP Policies > Dictionaries.
- Click Add Dictionary.
- Name. Enter a name for the dictionary that indicates it is geo-based.
- Type. Select GEO IP.
- Do one of the following:
- Select Upload a file, then choose a comma-separated file that includes text as shown above to specify countries and regions.
- Select Manually add items to the dictionary, then enter text to specify countries and regions.
- Click Save.
Create a Geo-IP Location Access Policy
To create a policy:
- Go to Policy > Access Control > Access Policies.
- Click Create Policy.
- Name. Enter a name for your policy.
- Description. Add a description, if needed.
- If the following conditions are met. Select IP Location. Then enter the Geo IP dictionary you created earlier, Geo-Allowed.
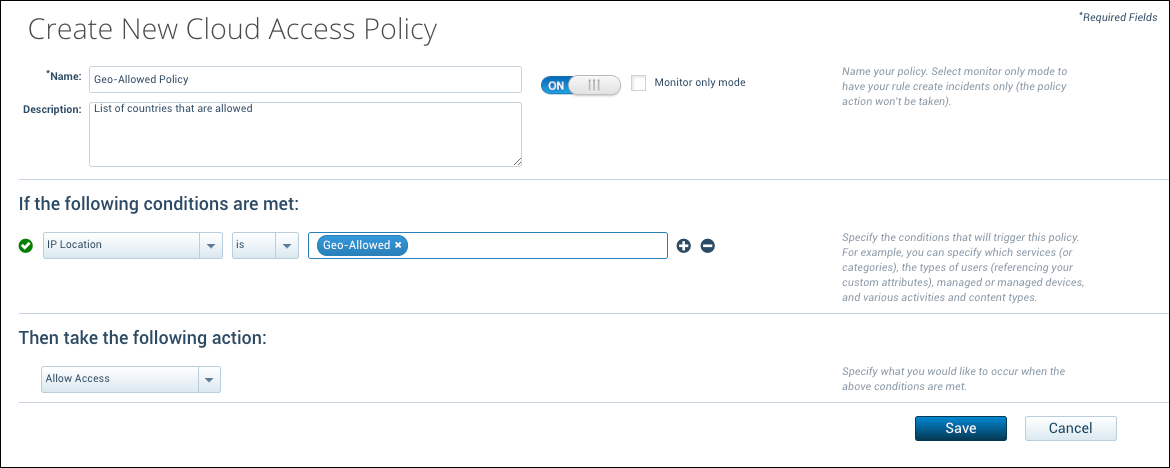
- Then take the following action. Select an option for the action. Because Geo-Allowed is an allow list dictionary, choose Allow Access. If you have set up a block list dictionary, choose Block Access. For more options, see Create a Cloud Access Policy.
- Click Save.