Create a Custom Portal
A Custom Portal is a branded site where users are registered and authorized. The Custom Portal captures cloud traffic details through the Skyhigh CASB Reverse Proxy.
The Customize Portal configures the look of the portal. Administrators can set a color of page elements, upload a company logo, and edit the display text. You can use up to five free text fields to collect additional information about a per device basis and determine eligibility for registration. For details, see Device Checking with Mobile Device Management.
To create a custom device management portal:
- Choose Policy > Access Control > Device Management.
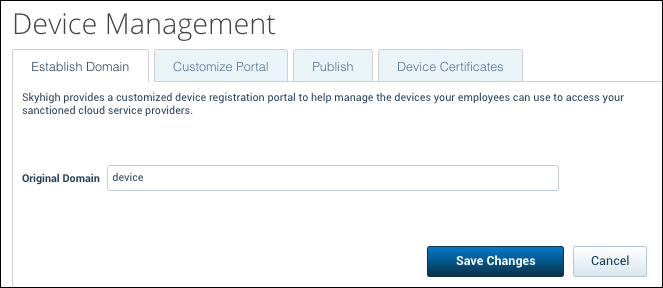
- On the Establish Domain tab, for Original Domain, enter Device or another name to identify it.
- On the Customize Portal tab, select Present User with Custom Portal.
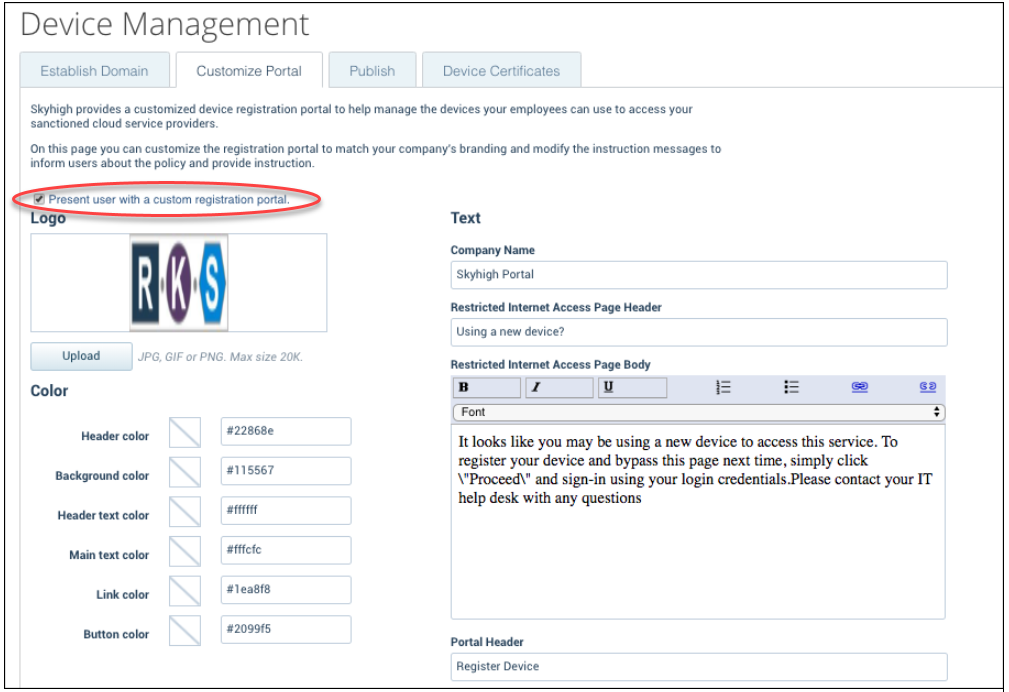
- To begin branding the portal, upload a Logo, and choose colors that match your corporate design guidelines.
NOTE: The maximum size for a logo file is 2 MB. Jpeg, png, and jpg formats are supported.
- For Text, enter the following:
- Company Name. Enter the name of your company.
- Restricted Internet Access Page Header. Enter the text to display at the top of the custom portal when a user tries to access the internet on a new device.
- Restricted Internet Access Page Body. Enter the content users see when they try to access the internet on a new device.
- Portal Header. Enter the text to display at the top of the portal when a user needs to register a device.
- Portal Body. Enter the content for users to see when a device needs to be registered.
- To collect additional information about a per-device basis and determine eligibility for registration, choose an option from the All Devices menu.
- Select the Publish tab.
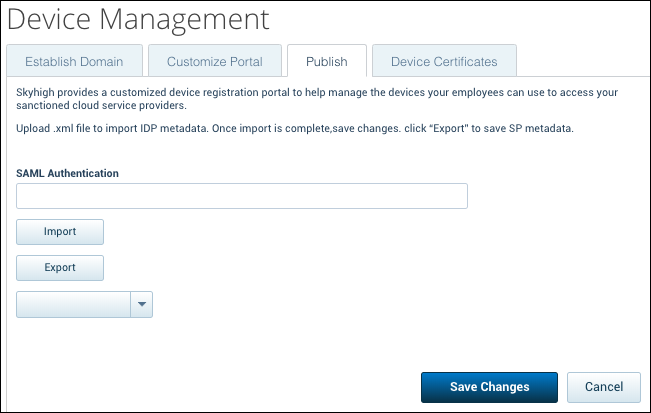
- Import the .xml formatted SAML Authentication file retrieved from your identity provider. Your Identity Provider might need a Domain Alias, which is available from Secure > Service Management.
- Select your target service from the menu and click Export.
- Open the downloaded file and look for Entity ID entry. For example:
entityID="https://skyhigh_entity/cid/2249" - Copy that entity ID and enter it to the appropriate place in your Identity Provider.
- Click Save Changes.