Enable Incident Management
Policy Incident Management (Deduplication) updates newer DLP policy violations automatically by adding the "Suppressed" status when the file name (including the absolute path), the username, and the offending content is the same. This prevents new policy violations from being displayed by default, no matter how many times the file is updated or modified, while the actual offending content is still the same.
Deduplication works by checking violations to see if they are similar, which means that the filename with the absolute path, username, and offending content is the same for a newer violation. When a similar violation is created, it is automatically marked as Suppressed, and effectively de-duplicated.
Deduplication applies even if the offending content is reordered within the document. For example, if the user changes the order of credit card numbers in a document, or if the text before or after the offending matched content is changed, no new violation is displayed.
IMPORTANT: If the status of an incident is changed to "Resolved", its deduplication status is reset. A future violation of the policy on the same file and offending content will create a new incident with the status "New" instead of "Suppressed".
Limitations
- Incident Management does not apply to Fingerprints.
- Incident Management cannot be used for incidents received through Enterprise DLP integration.
NOTE: Deduplication is only applicable to content-based rules.
Enable Incident Deduplication
By default, Incident Deduplication is enabled in your tenant. You can disable this feature on the Policy Settings page, or later re-enable it.
To enable Incident Deduplication:
- Go to Policy > Policy Settings.
- Select the Incident Management tab.

- Toggle Incident Deduplication to ON.
- Click Save.
Enable Incident Consolidation and Custom Incident Status
The Incident Consolidation allows you to group multiple incidents that have the same event ID in the DLP Policy. You can also create Custom Incident Statuses to group incidents.
To enable Incident Consolidation:
- Go to Policy > Policy Settings.
- Select the Incident Management tab.
- Select the status from Change Consolidate Incident Status to. For more details, see DLP Policy Incident Statuses.
- Add one or more Custom Incident Status. To create additional status, click +.
- Click Save.
- You are redirected to the Policy Incidents page. You can view the various Incident Status depending on the primary and secondary policy incidents.
About Primary and Secondary Policy Incidents
If an event, message, or uploaded document violates more than one policy, an incident is created for each corresponding policy, and actions are taken to the most restrictive policy. The restrictive policy is considered the Primary Policy, and the other policies as Secondary. The Primary Policy incidents are identified by the highest precedence order over the response action. For more details, refer to DLP Policy Response Action.
For example, consider the uploaded file violates three policies: Policy A, Policy B, and Policy C. The incidents are created for three different policies, and these policies lead to three different response actions such as Policy A – Quarantine, Policy B – Email Notification, Policy C – User Email Notification.
Here, Policy A is considered the Primary Policy incident, because it's the most restrictive policy and has the highest precedence order for the response action (Quarantine).
Policy B and Policy C are considered Secondary Policy incidents.
Incident Status Precedence
Here's how the Incident Status takes precedence when DLP incidents are created, depending on the method used:
- Incident Deduplication. The first priority is Incident Deduplication. When a duplicate incident is marked as Suppressed, then the status is set to Suppressed.
- DLP Policy Wizard. The next priority is any incident status automatically set in a DLP policy using the DLP Policy Wizard.
- Incident Consolidation. The last priority is the Incident Consolidation status, used to group multiple incidents when the event ID is the same.
IMPORTANT: Due to the priority order, it is not supported to use the DLP Policy Wizard to automatically set the incident status and Incident Consolidation at the same time. Use one feature or the other.
Impact of Incident Deduplication and Incident Consolidation on Incident Status
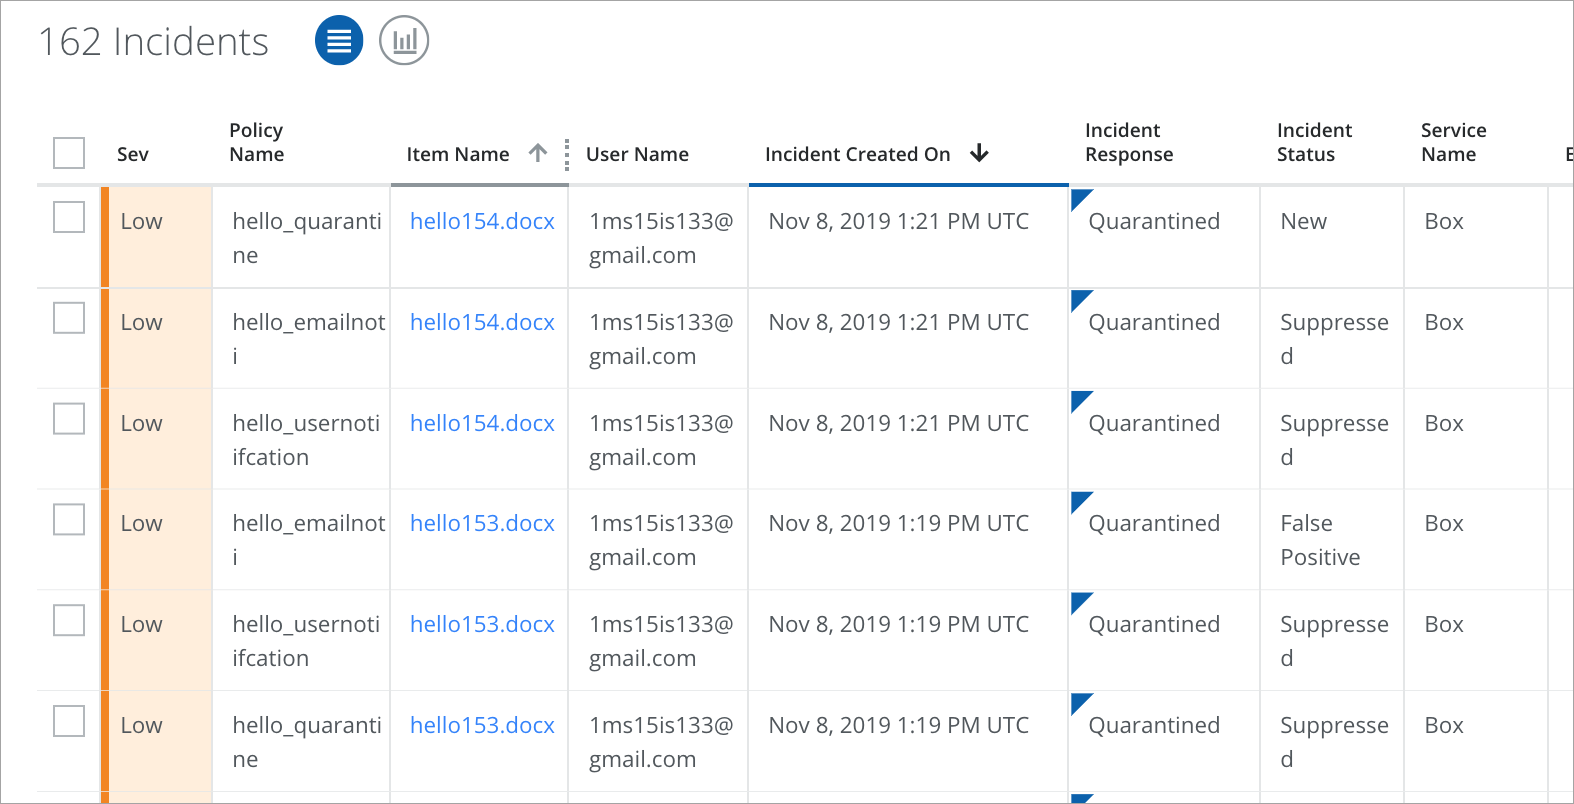
The incident status New is assigned only for Primary Policy incidents that have no deduplication.
The incident status Suppressed is assigned for Primary or Secondary policy incidents that have been found to be a duplicate of a previously generated policy.
For example, consider Incident A as the Primary incident. Incident B and Incident C are secondary incidents that have the existing consolidation status Resolved and False Positive.
Incident Status for Incident A is considered New since it’s the Primary Policy incident with no deduplication.
Incident Status for Incident B and Incident C are considered Suppressed. Incident B and C are the duplicates of a previous policy, and hence the existing statuses Resolved and False Positive are overridden by the Suppressed status.
If the status of an incident is changed to Resolved, its deduplication status is reset. A future violation of the policy on the same file and offending content will create a new incident with the status New instead of Suppressed.
Add Resolution Action
You can define custom Resolution Actions to be used with Incidents. Assign the Resolution Action on the Incidents > Policy Incidents > Incident Details page.
- Go to Policy > Policy Settings.
- Select the Incident Management tab.
- Define a custom Resolution Action for Incidents. Click + to assign more.
- Click Save.