DLP File Classifications in Skyhigh
The Skyhigh Security DLP/Skyhigh CASB integration has two parts. Skyhigh Security DLP synchronizes classification definitions with Skyhigh Security Cloud. This operation takes place automatically when a Skyhigh Security DLP classification definition is added or changed if synchronization is enabled in the DLP Settings. Users working in the cloud can use the Skyhigh Security DLP classifications to manually classify Microsoft Office 365 documents.
Cloud-based files with classifications that trigger incidents due to Skyhigh Security Cloud protection rules are pulled into the Trellix ePO database with a regularly scheduled server task and appear in DLP Incident Manager.
The incidents can be used for analysis and reporting in DLP Incident Manager and can be assigned to cases. However, they can only be resolved or updated in Skyhigh Security Cloud.
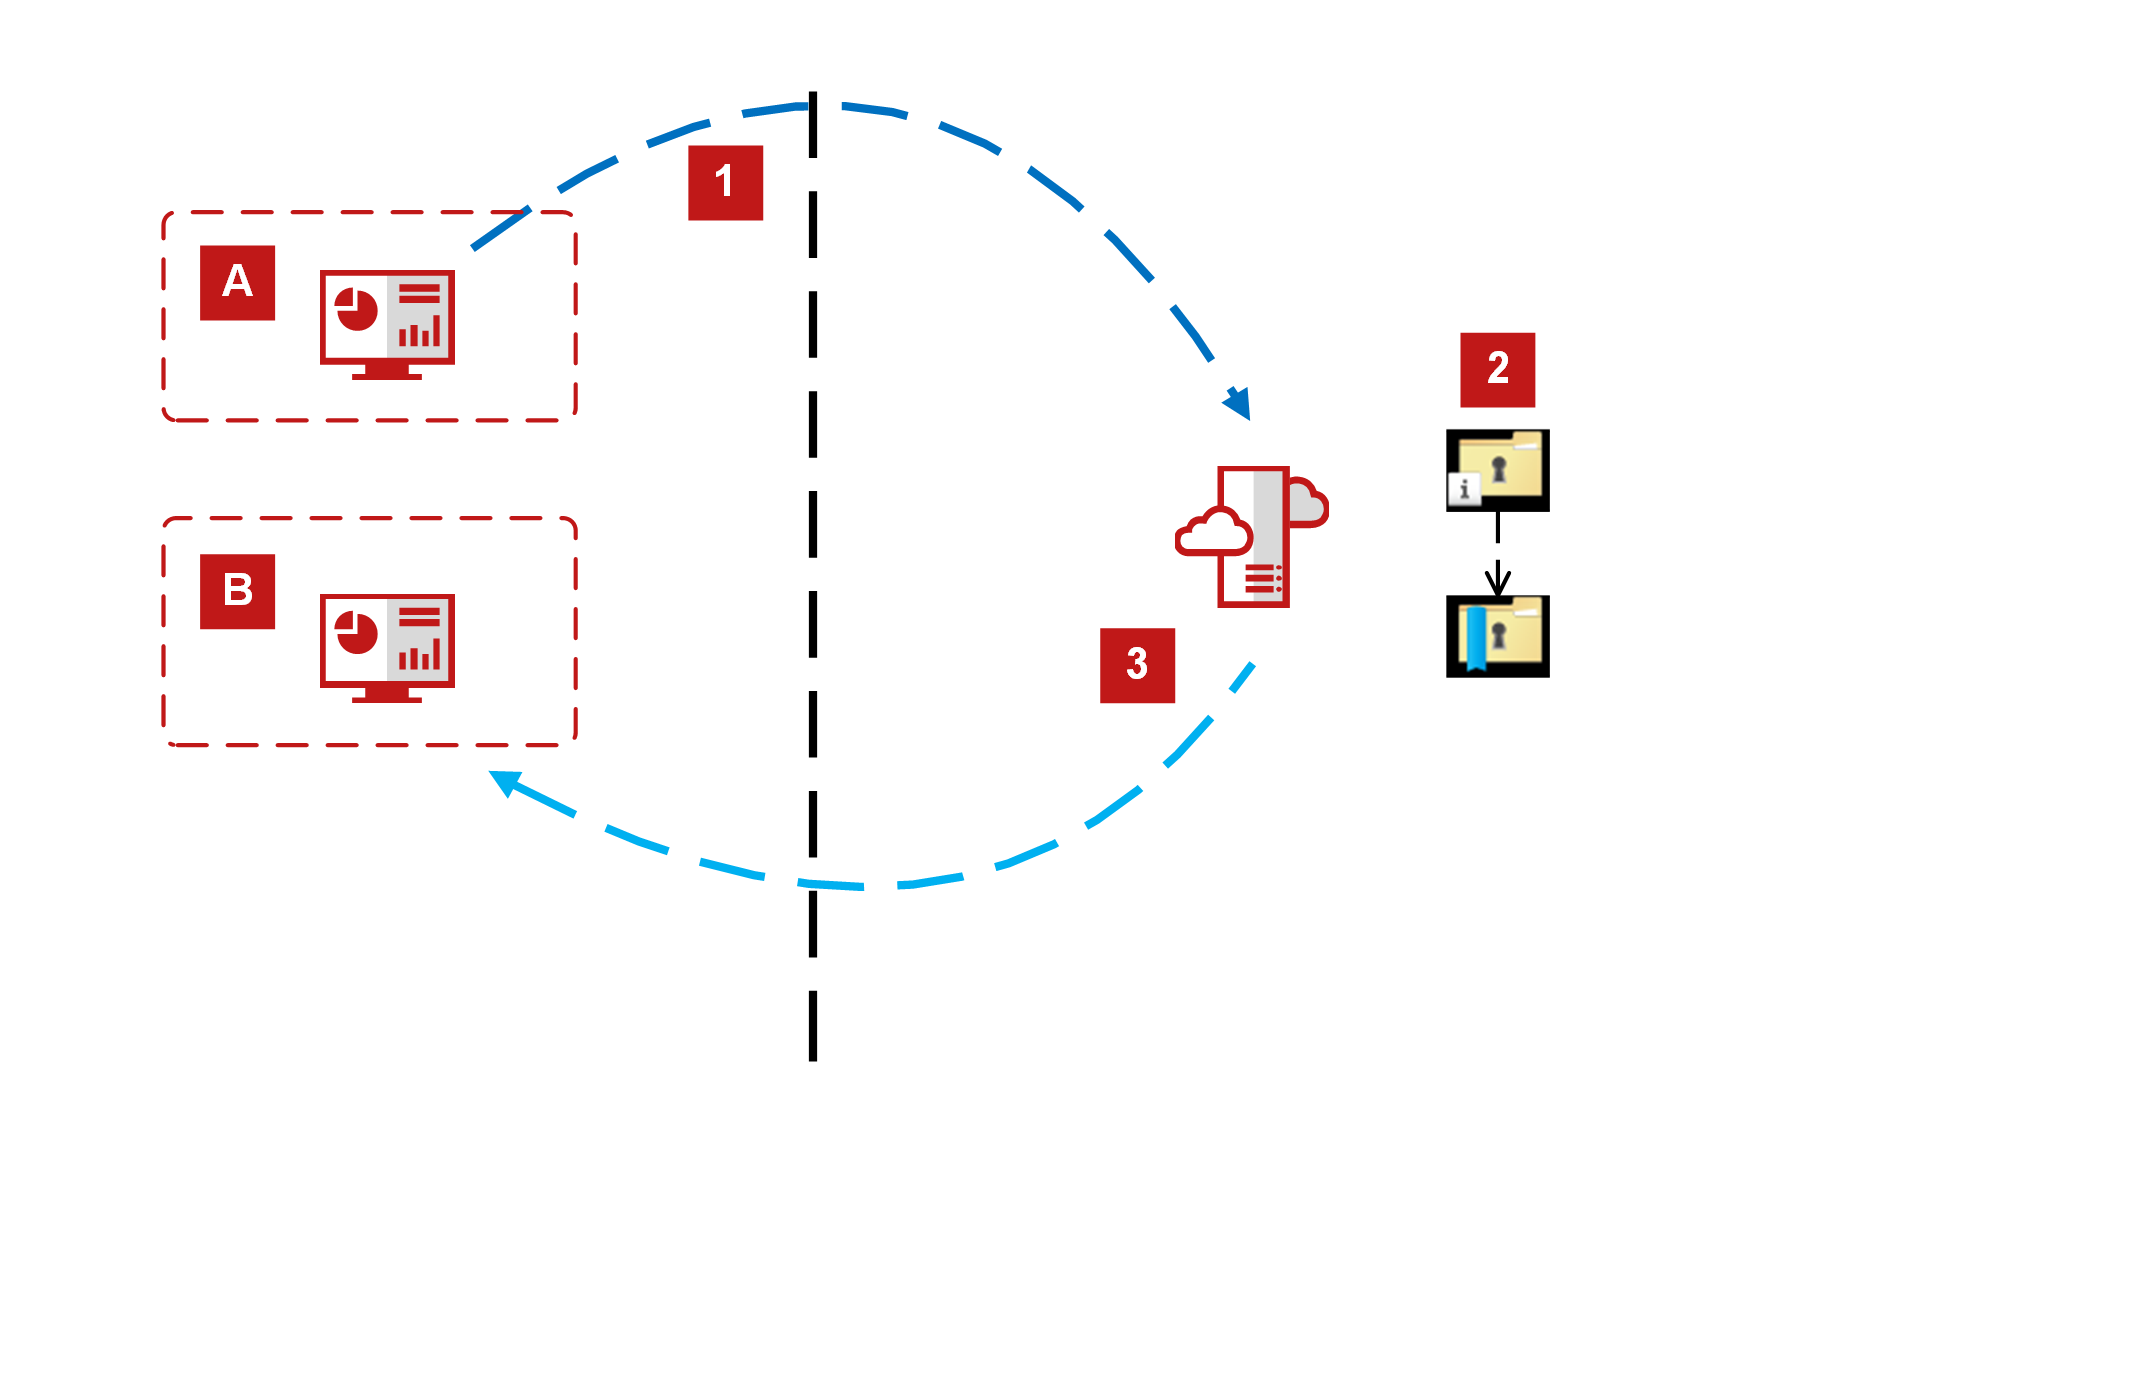
1. Customers A and B create classification definitions and synchronize them with Skyhigh Security Cloud.
2. Skyhigh Security Cloud applies the classifications to protection rules and applies them to content for users working in the cloud.
3. Incidents are synchronized with Trellix ePO and displayed in DLP Incident Manager.
Configure Skyhigh Cloud
Before you begin: Enable the Skyhigh Security Cloud integration feature by configuring the Skyhigh Security Cloud Server page in DLP Settings and enabling the Connect to Skyhigh Security Cloud service handler.
To configure Skyhigh Security Cloud in ePO:
Skyhigh Security DLP can synchronize Classification definitions with Skyhigh Security Cloud and incidents from the cloud with DLP Incident Manager. The two functions can be enabled separately.
- From the Trellix ePO menu, select Data Protection > DLP Settings.
- On the Skyhigh Security Cloud Server tab, do the following:
- Select the Connect to Skyhigh Security Cloud service checkbox.
- Enter the server path, user name, and password. Click Test Connectivity. The Connection status indicator displays success or failure.
- To synchronize Trellix ePO DLP classifications and policy, activate Push DLP policy to the Skyhigh Security Cloud and select the DLP policy name.
- To enable reporting Skyhigh Security Cloud incidents in DLP Incident Manager, select the Pull incidents from Skyhigh Security Cloud checkbox. Incidents are only pulled when the server task is enabled (steps 3 and 4).
- Click Save.
- From the Trellix ePO menu, select Automation | Server Tasks.
- Locate the task DLP Import Skyhigh Security Cloud Events and click Edit.
- On the Description page, in the Schedule status section, select Enabled.
- On the Actions page, verify that the checkbox is selected.
- On the Schedule page, accept the default settings or edit as needed.
- On the Summary page, verify the settings, then click Save.
- Go to Data Protection > DLP policy manager > Policy Assignment. Click Actions > Apply Selected Policies, and select the DLP policy Name.
- Go to Data Protection > DLP settings.
- On the {{platform}} Server tab, the Status section displays information on the synchronization. The synchronization time and number of classifications are updated.
Create a Policy in Skyhigh CASB
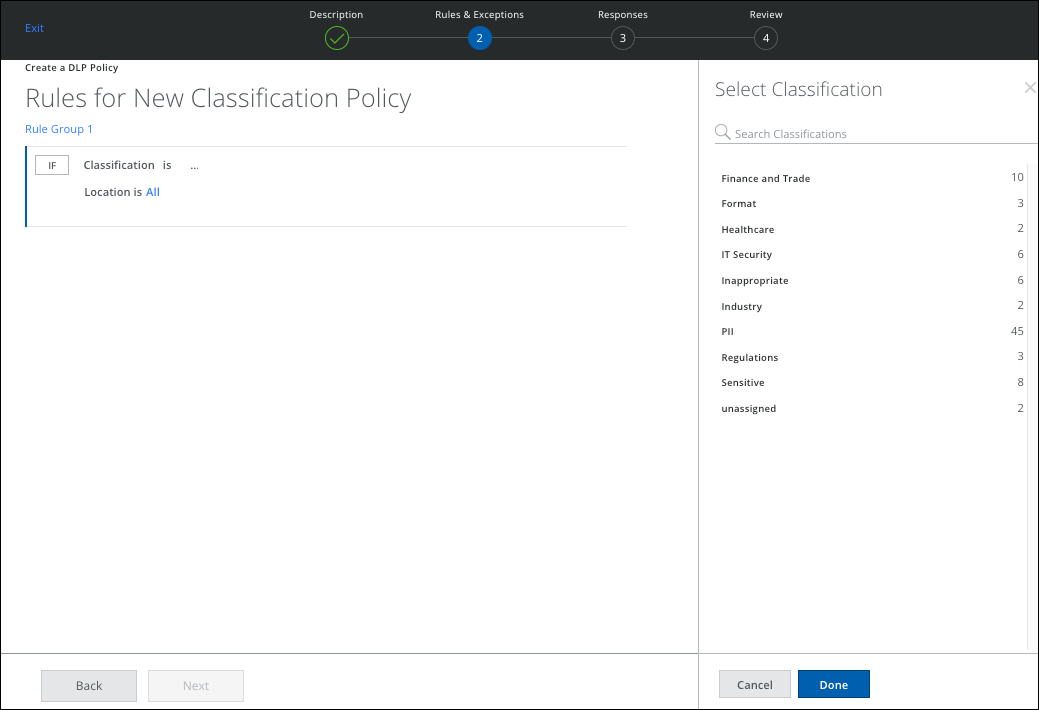
Once you've enabled Trellix ePO-Skyhigh Security Cloud integration within Trellix ePO, and allowed classifications to be synced with the cloud, a new option called Skyhigh Security Classification appears under Classification selection in the Rules section. You can select an option from the list of Classifications when creating or updating a DLP policy.
To create a Classifications DLP Policy in Skyhigh Security Cloud:
- Choose Policy > DLP Policies.
- Click Actions > Sanctioned Policy > Create New Policy.
- Enter a name for the policy, and an optional description.
- Select the Classifications as Security Service Edge.
- Click Next.
- Under Rules, click Classification, and then Select Classification.
- Click Done.
- Choose the rest of the settings in the policy, and then click Save.
Disable the Skyhigh Security Cloud and Trellix ePO Integration
If you need to disable the Skyhigh Security Cloud and ePO integration:
- Log into Trellix ePO
- Go to the {{platform}} Server tab.
- Deselect the checkbox Connect to Skyhigh Security Cloud.
- Click Save.
This will remove the integration.
NOTE: If the UI still shows a red status, it is safe to ignore it. Trellix ePO does not push any new classifications. It disables all existing policies.