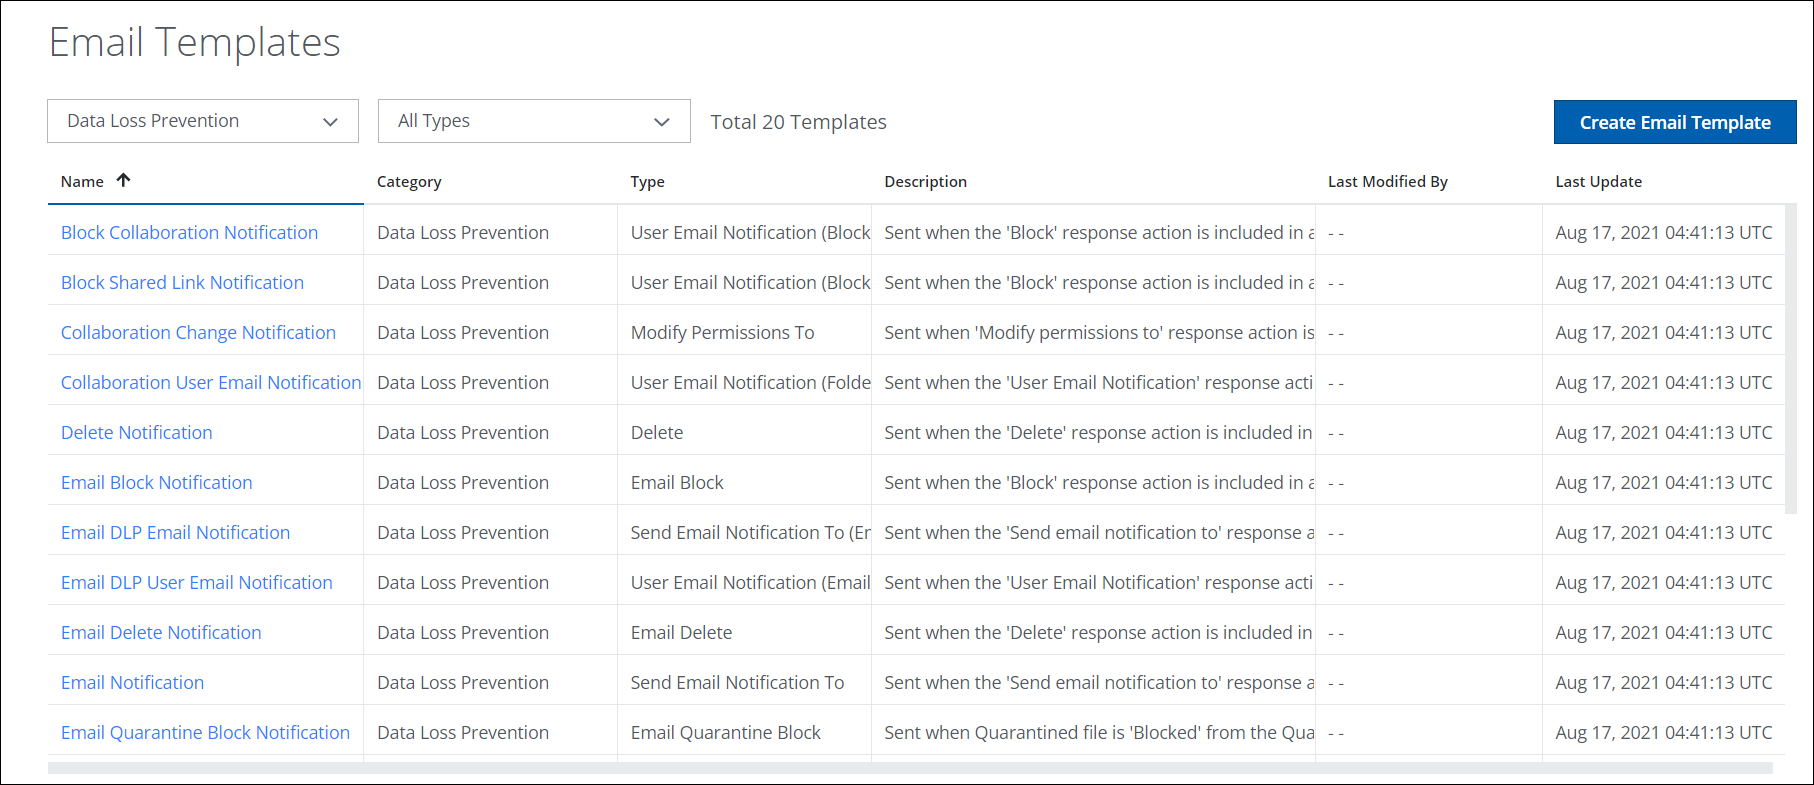
Create a Custom Email Template
You can create a Custom Email Template and associate it with one or more DLP Policies. You can also create a Custom Email Template to use with End User Remediation. You can add images to the body of an email, and you can choose to customize several fields.
To create a custom Email Template:
- Go to Policy > Policy Settings > Email Template.
- Click Create Email Template.
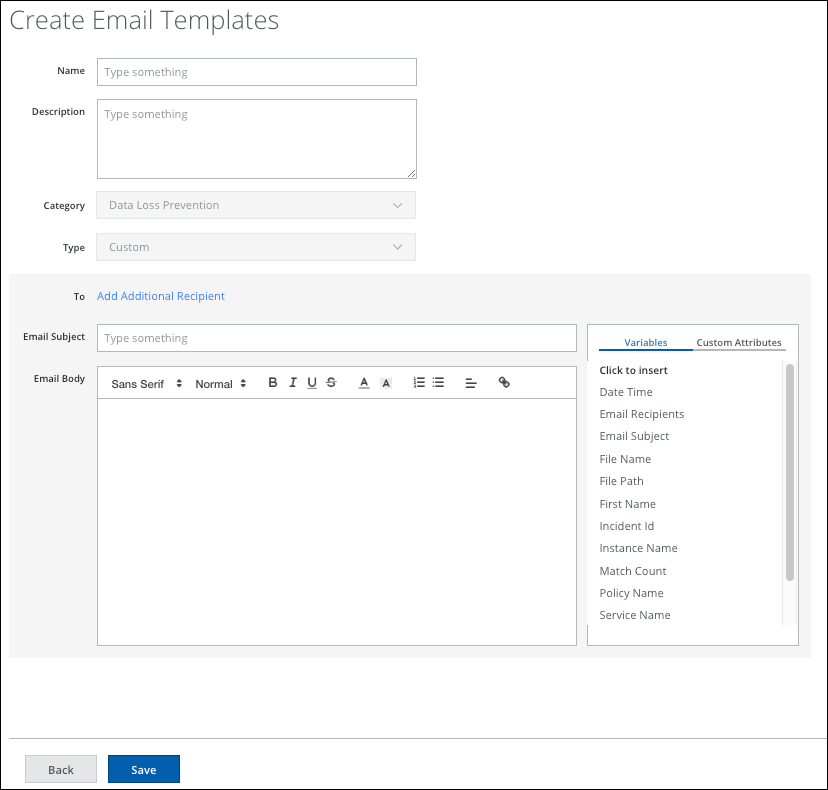
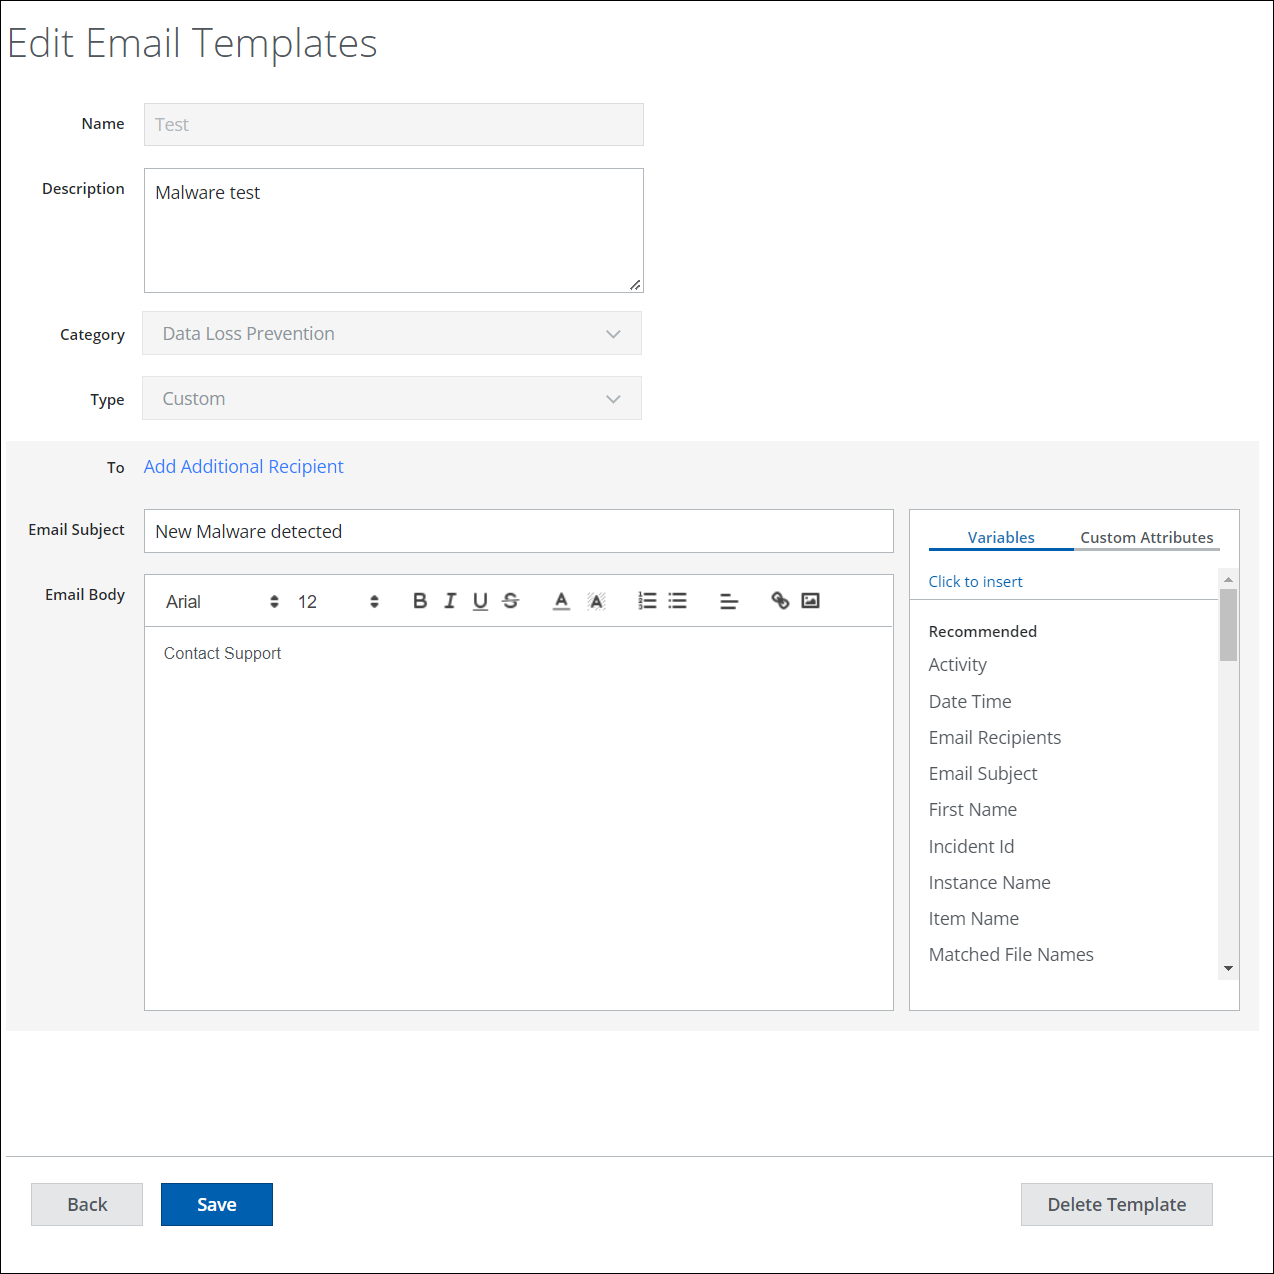
- On the Create Email Templates page, configure the following:
- Name. Enter a name for your template. This name must be unique for your tenant.
- Description. Enter a description for your template.
- Category. Select Data Loss Prevention or End User Remediation.
- Type. Custom is pre-selected by default.
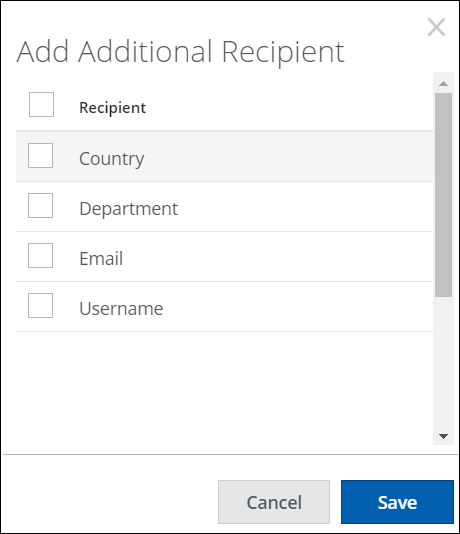
- To. Click Add Additional Recipient to select from a list of Custom Attributes. Then click Save.
- Email Subject. Enter the text you want to appear in the subject line of your email notification.
- Email Body. Enter the text of the body of the email notification, and use the formatting tools to style the text as required. You can also add links and images (.jpg, .jpeg, or .png) to your email body. Image file size is limited to 2 MB.
- Variables. To add variables to the email body or email subject, select available items from the Insert Variable list. Separate variables with a line break, space, or by punctuation, such as a comma. (Not all variables are available for all policy templates.)
IMPORTANT: Use only the available variables shown here. Do not copy and paste other variables from another template. Activity. The value for a user activity.
The available variable includes:
- Date Time. If a value for Date Time is not available, the string "N/A" is displayed.
- Email Recipients. This is the list of recipients displayed in the email. If a value for Email Recipient is not determined, the string "N/A" is displayed.
- Email Subject. This is the list of email subjects displayed in the email. If a value for Email Recipient is not determined, the string "N/A" is displayed.
- First Name. If a value for First Name is not available, the string "user" is displayed.
- Incident ID. Includes the ID of the incident in the email.
- Instance Name. The name of the instance of your Service.
- Item Name. The name of the item.
- Matched File Names.
- Path.
- Policy Name. If a value for Policy Name is not available, the string "N/A" is displayed.
- Service Name. If a value for Service Name is not available, the string "N/A" is displayed.
- Total Match Count. The number of matches identified.
- User IP. If a value for User IP is not available, the string "N/A" is displayed.
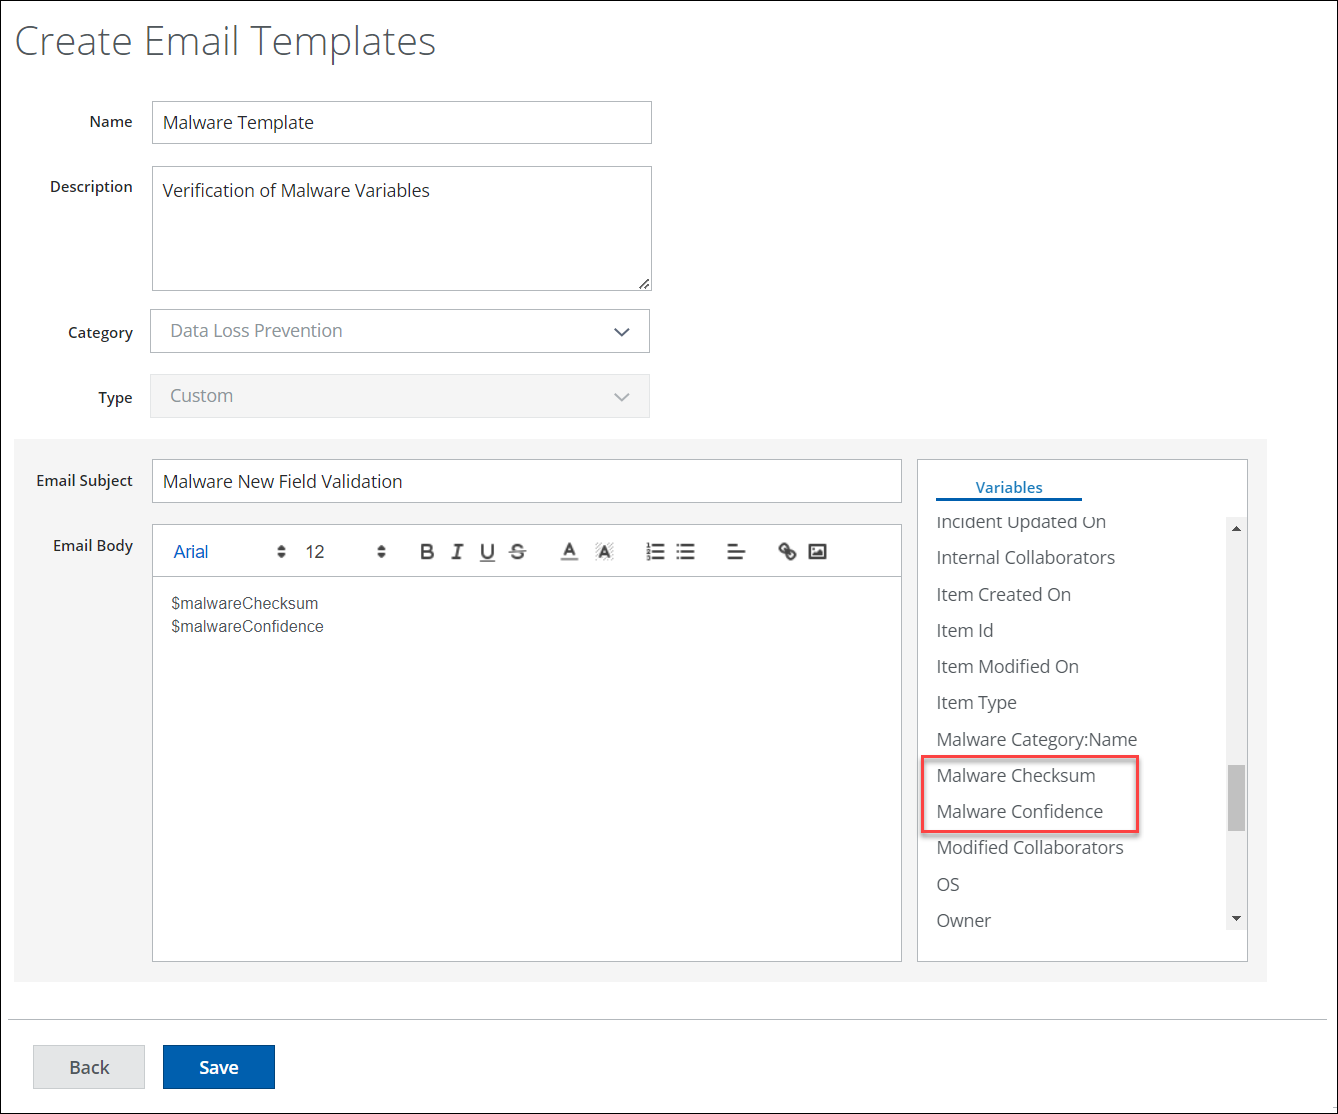
- Malware Checksum.
- Malware Confidence.
- Custom Attributes. To add Custom Attributes to the email body or email subject, select available items from the Custom Attributes list.
- Click Save.
Once your Custom Email Template is created, you can link it to a DLP Policy.
Images in Custom Email Templates
Note the following if you add an image to a custom email template:
- The content type must be set to image.
- Images that contain URLs from specific domains configured at tenant level using your organization's internal domains are supported.
- The image cannot be larger than 2 MB.
Delete a Custom Template
When you have created a Custom Template, you can also delete that template.
IMPORTANT: If a Custom Email Template is linked to a DLP policy, it cannot be deleted. You must unlink it first.
- Go to Policy > Policy Settings > Email Templates.
- Click the name of the template you want to delete from the Name column.
- On the Edit Email Templates page, click Delete Template.
- On the Delete Template confirmation dialog, click Delete.

Once the template is deleted, the action cannot be undone.