Import Policy Templates
You can export policies from one tenant and import them to other tenants. As a result, it is easy to meet compliance or security needs without recreating policies. These imported policies can also be deleted if they are no longer needed or outdated.
IMPORTANT: Skyhigh CASB does not support importing or exporting policies or policy templates that include more than 50 rule groups or that exceed 64 KB in size, whichever limit is reached earlier.
Import Policy Templates
To import a template:
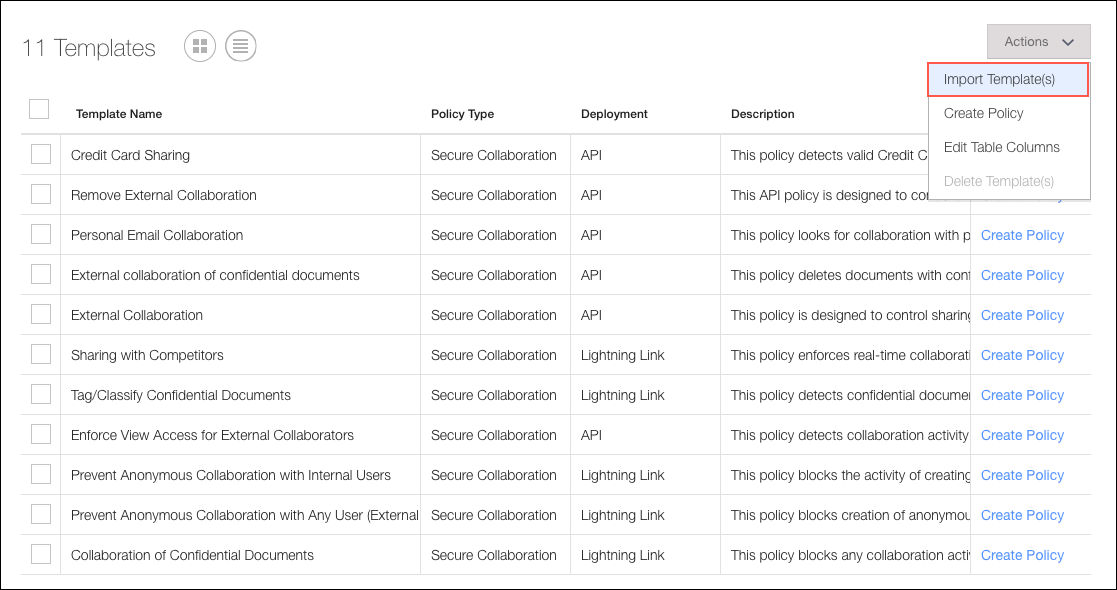
- Go to Policy > Policy Templates.
- Select the Table View.
- Click Actions > Import Template(s).
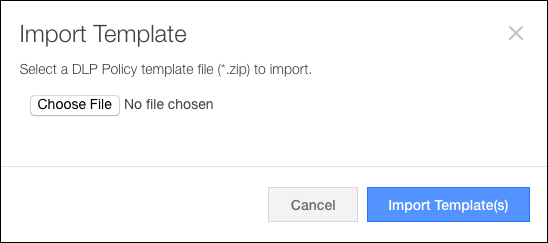
- Click Choose File and locate the .zip file containing the template or templates you would like to import. Click Import Template(s).
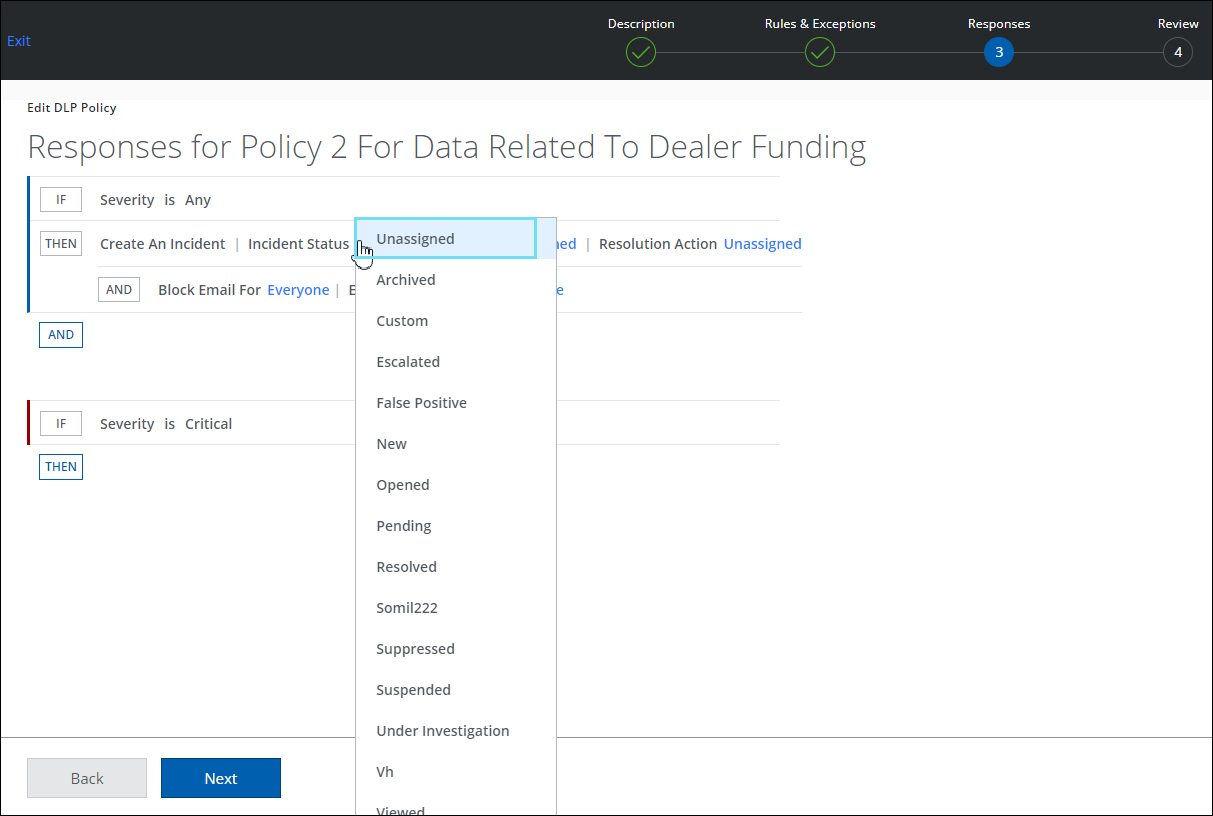
Known Issue: When importing a policy template from one tenant to another tenant, the Responses wizard displays an empty incident status and is unable to save the DLP Policy as it continuously loads. This is due to the Custom Incident Status selected in Tenant 1 not being available in Tenant 2, resulting in an empty incident status.
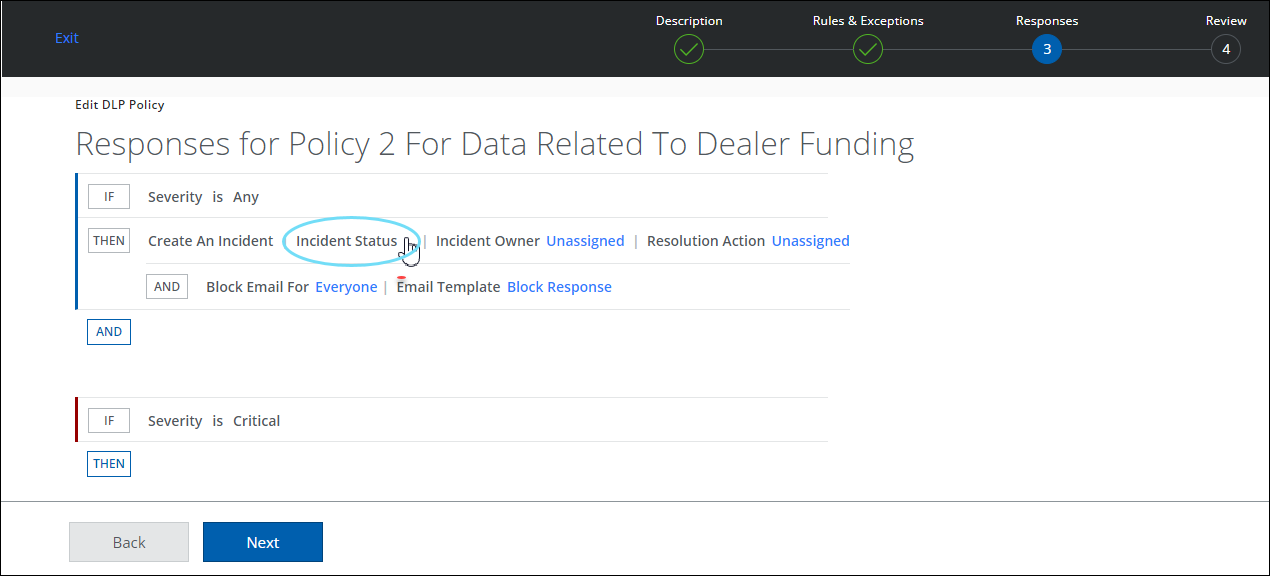
As a workaround, Unassigned is given as a new incident status on the Responses wizard which allows you to save your DLP policies without issue.
Policy Validation Improvements
While importing DLP Policies from one tenant to another, you may find validation errors. The validation error occurs because dictionaries are not synchronized from one tenant to another. If synchronization happens, you don’t see any validation errors.
To overcome these validation errors, the process has been improved for:
- Collaboration Rule
- Data Identifier Rule
- Classifications
- Bulk Activations with Invalid Classifications
- Fingerprints
Collaboration Rule
- Go to Policy > DLP Policies > DLP Policies.
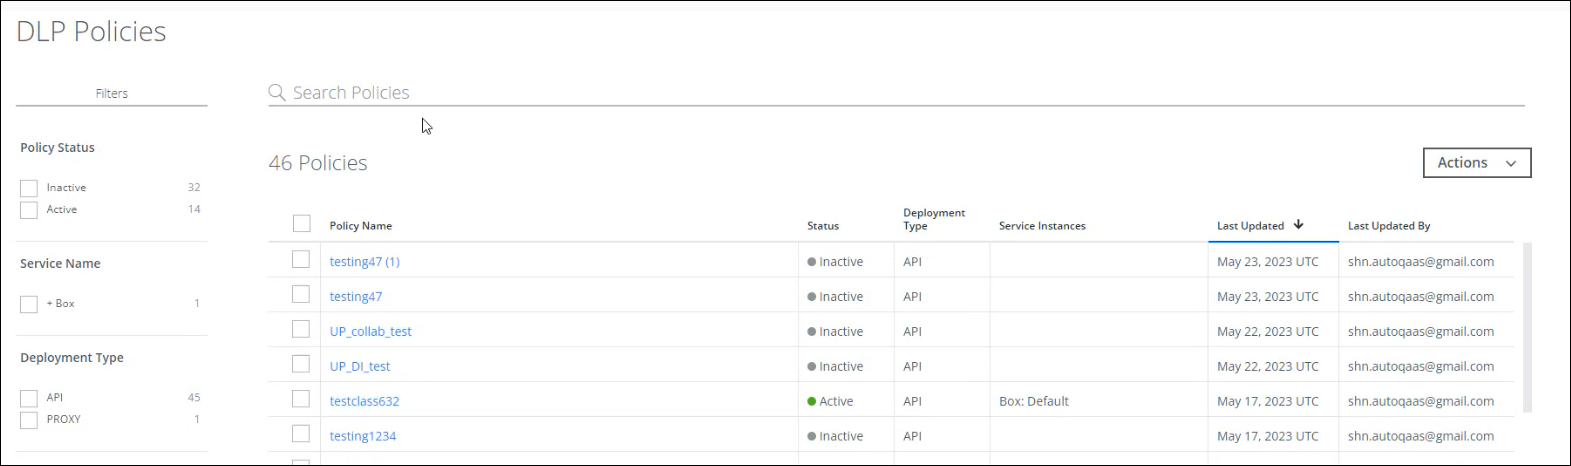
- Select the Policy you have imported and listed as Inactive, to check the Validation errors.
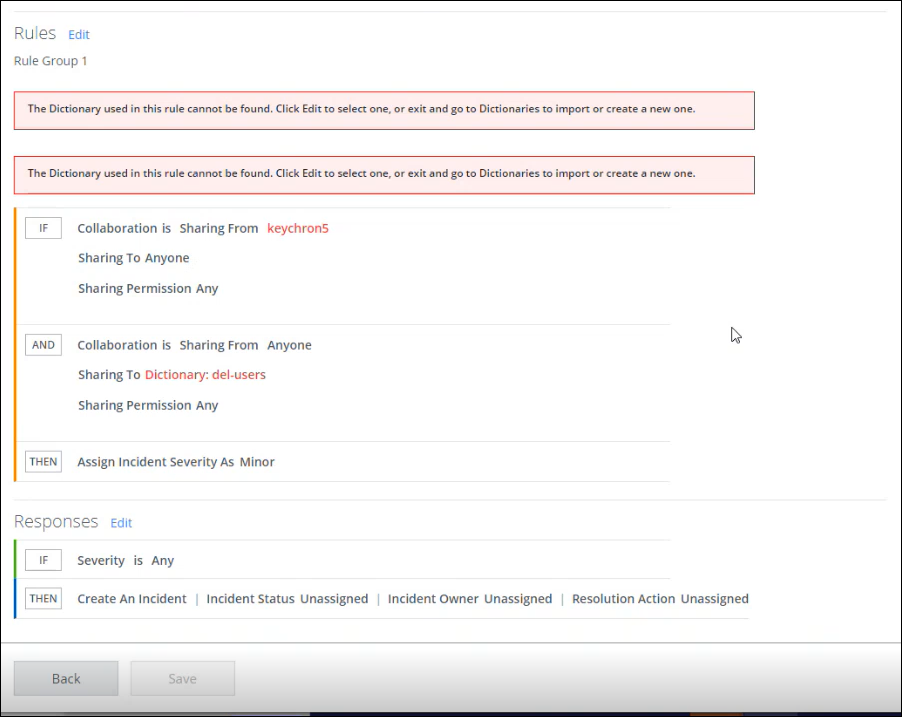
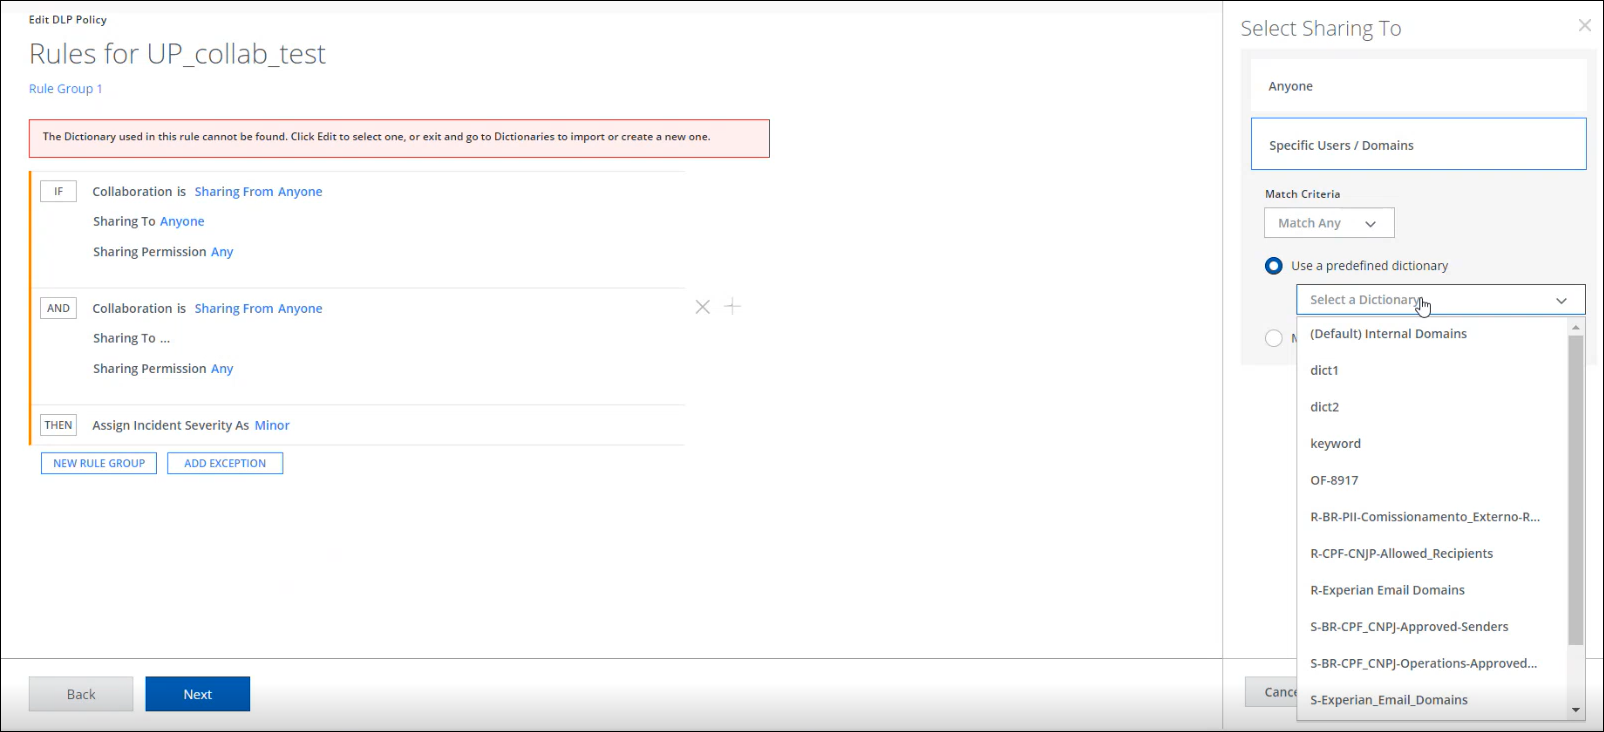
- On IF that the Collaboration Rule is using the Dictionary "keycron5" (custom dictionary) and isn't present in this particular tenant. To check if the dictionary is present in the tenant, go to Policy > DLP Policies > Dictionaries.
- To validate, go to Rules > Edit and provide a proper custom dictionary.
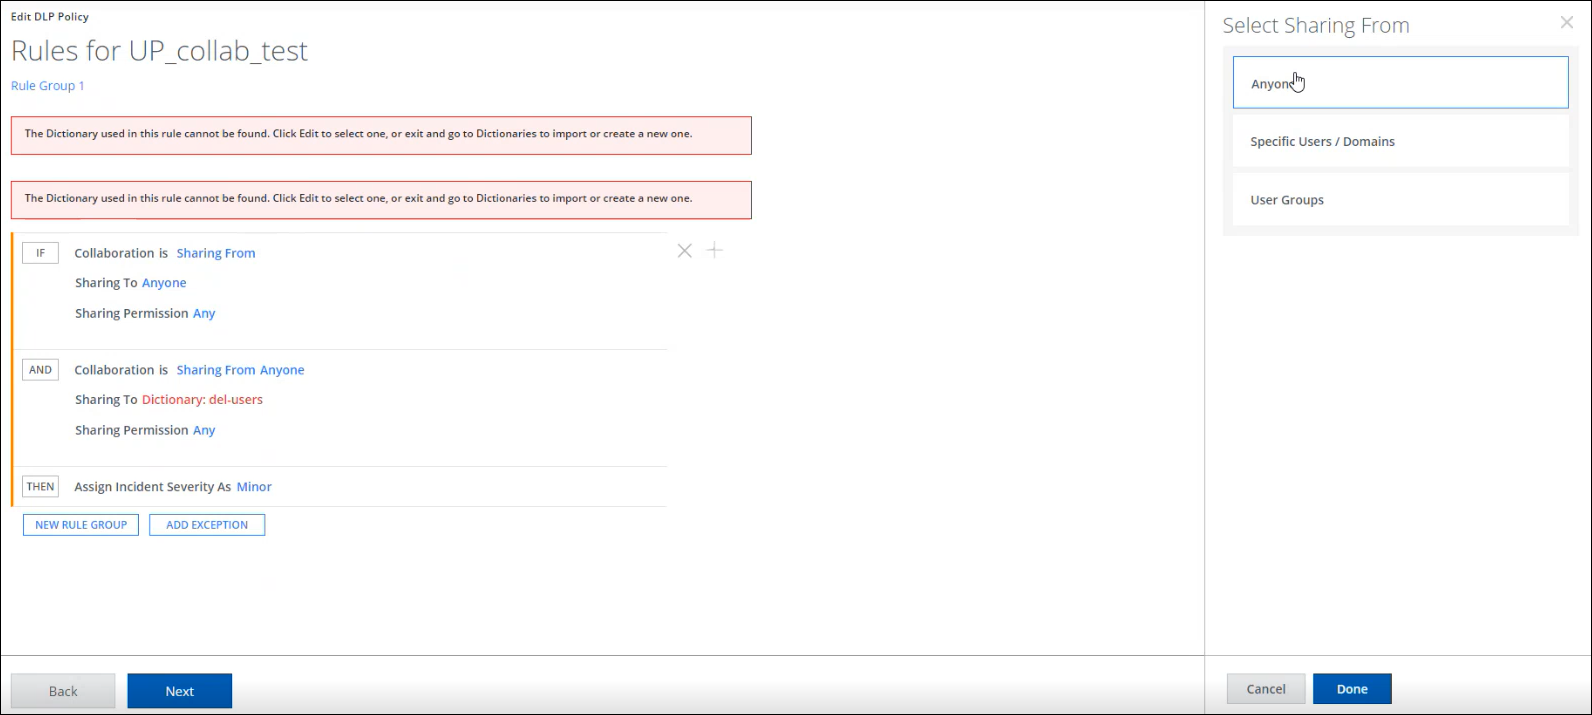
- For example, Select Anyone.
- Select Done.
- Do the same for AND, for Sharing To as the example below.
- Select Done.
- The Result is displayed.
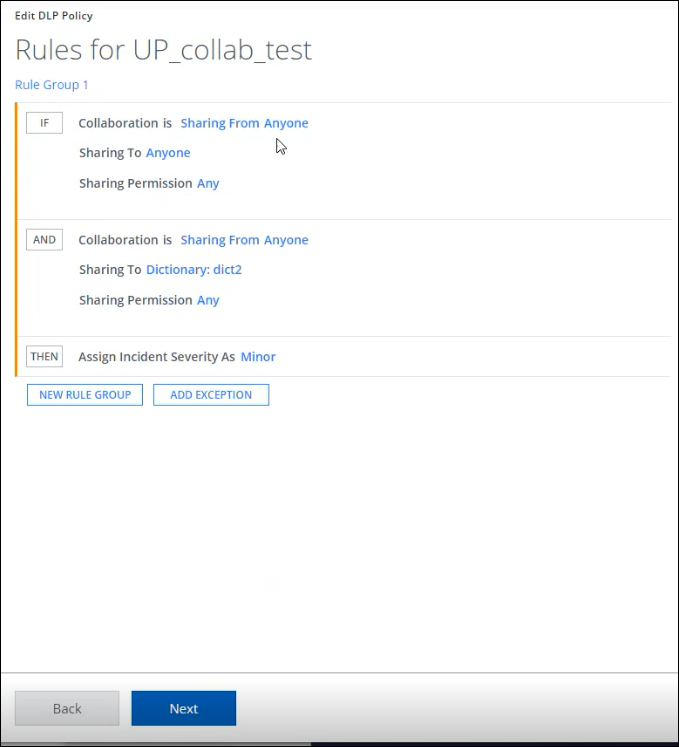
- Select Next.
- You will see no more validation errors on the next page.
- Select Save.
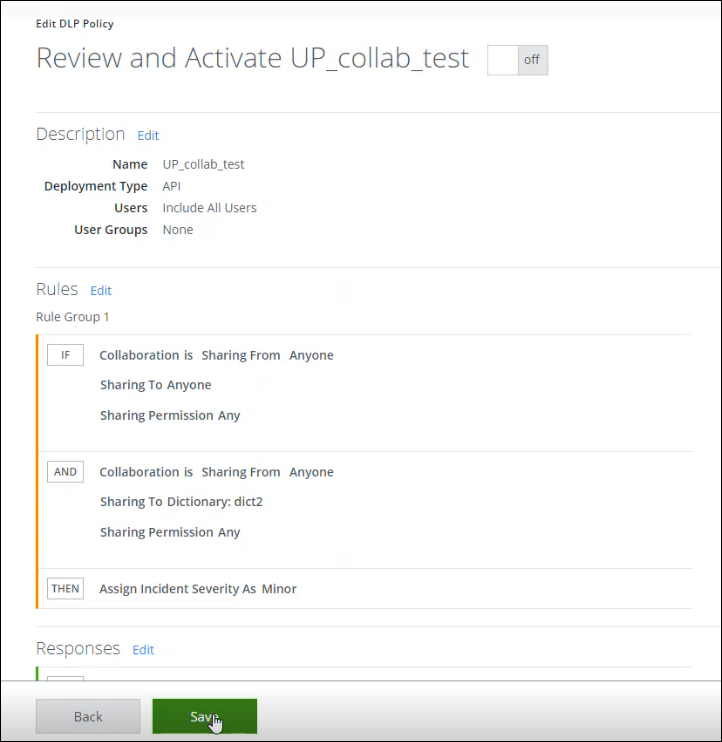
Now the Validation errors for the Collaboration Rule are resolved and to Activate Policy, go to Actions > Activate Policy.
Data Identifier Rule
- On your DLP Policies list, you see your Data Identifier Rule listed, with Inactive Status and if you select it, you will see the Validation errors.
- In this example, you have many places where you can observe those errors.
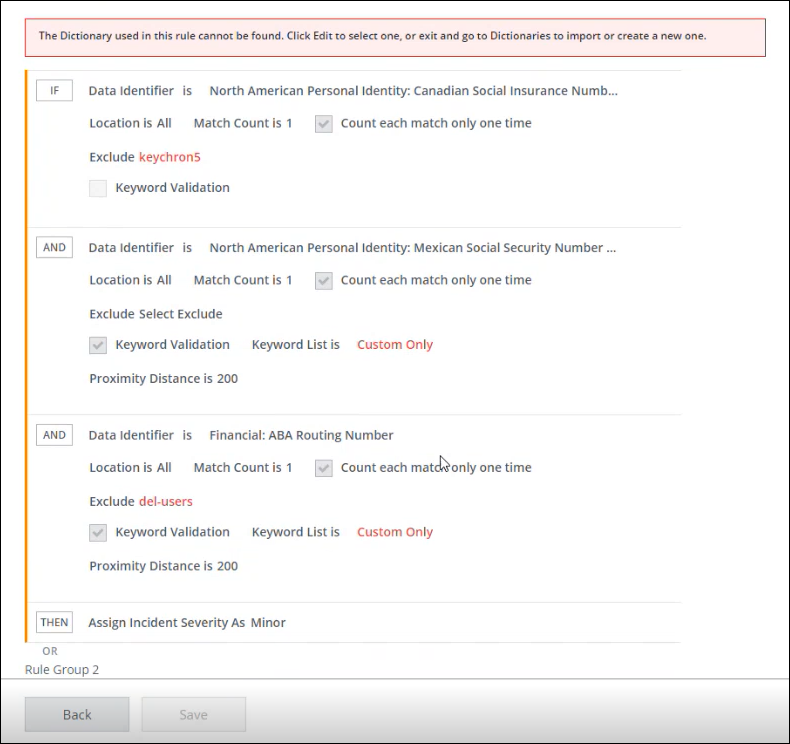
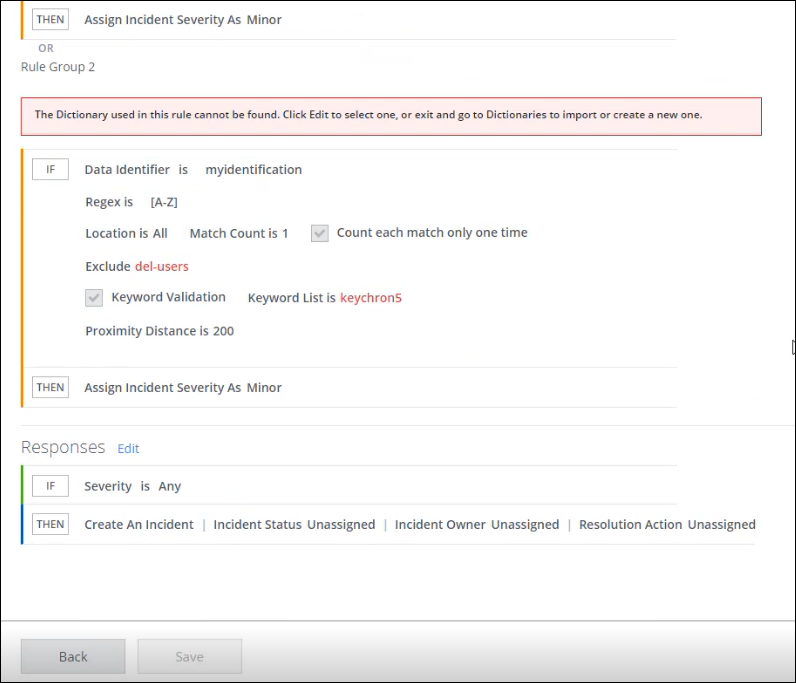
- To validate, go to Rules > Edit and provide a proper custom dictionary.
- On the right Select Exclude, click Use a predefined dictionary > Dictionary > Select a Dictionary.
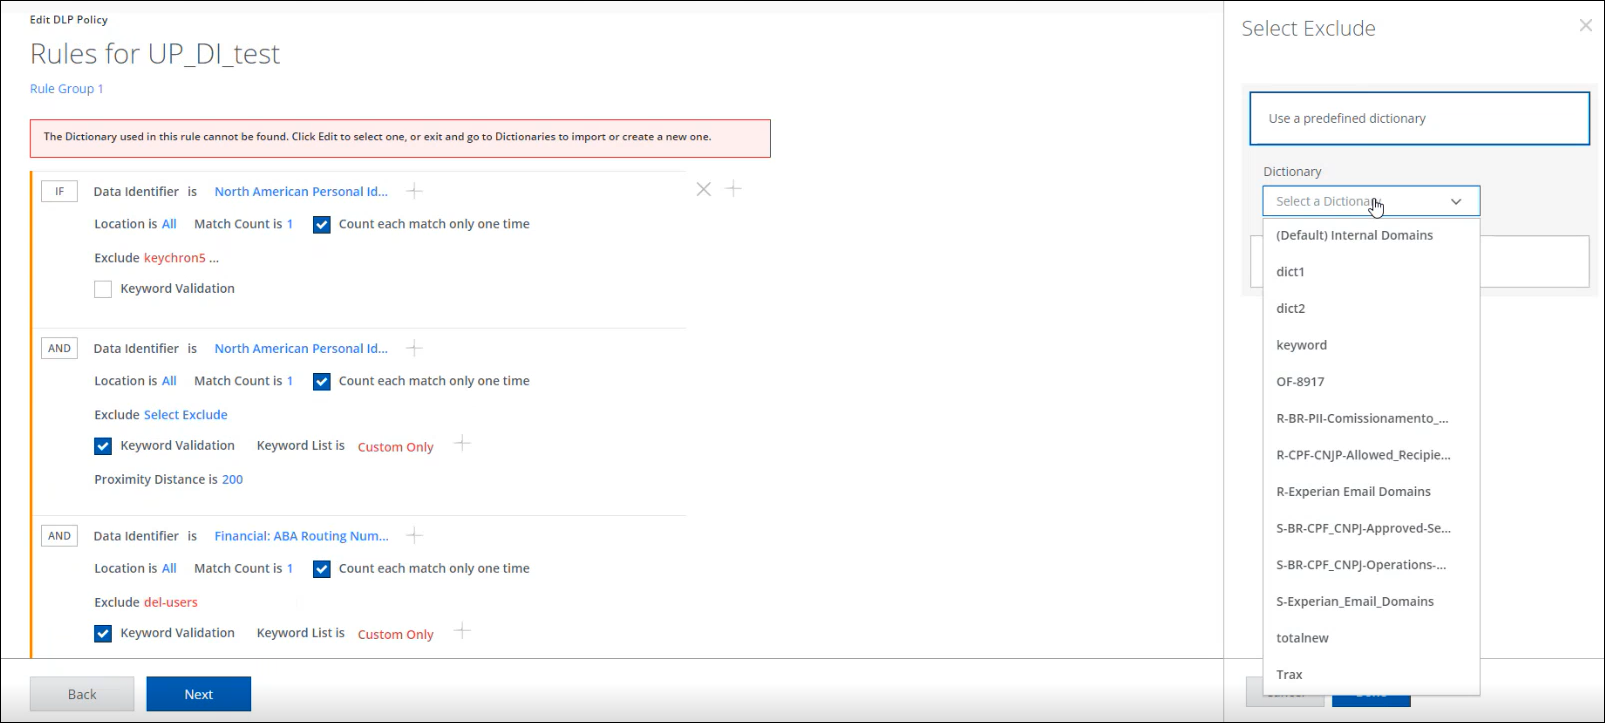
- Select Done. The validation error won't show again.
- Then go to Keyword Validation, go to Select Data Identifier > Keyword List.
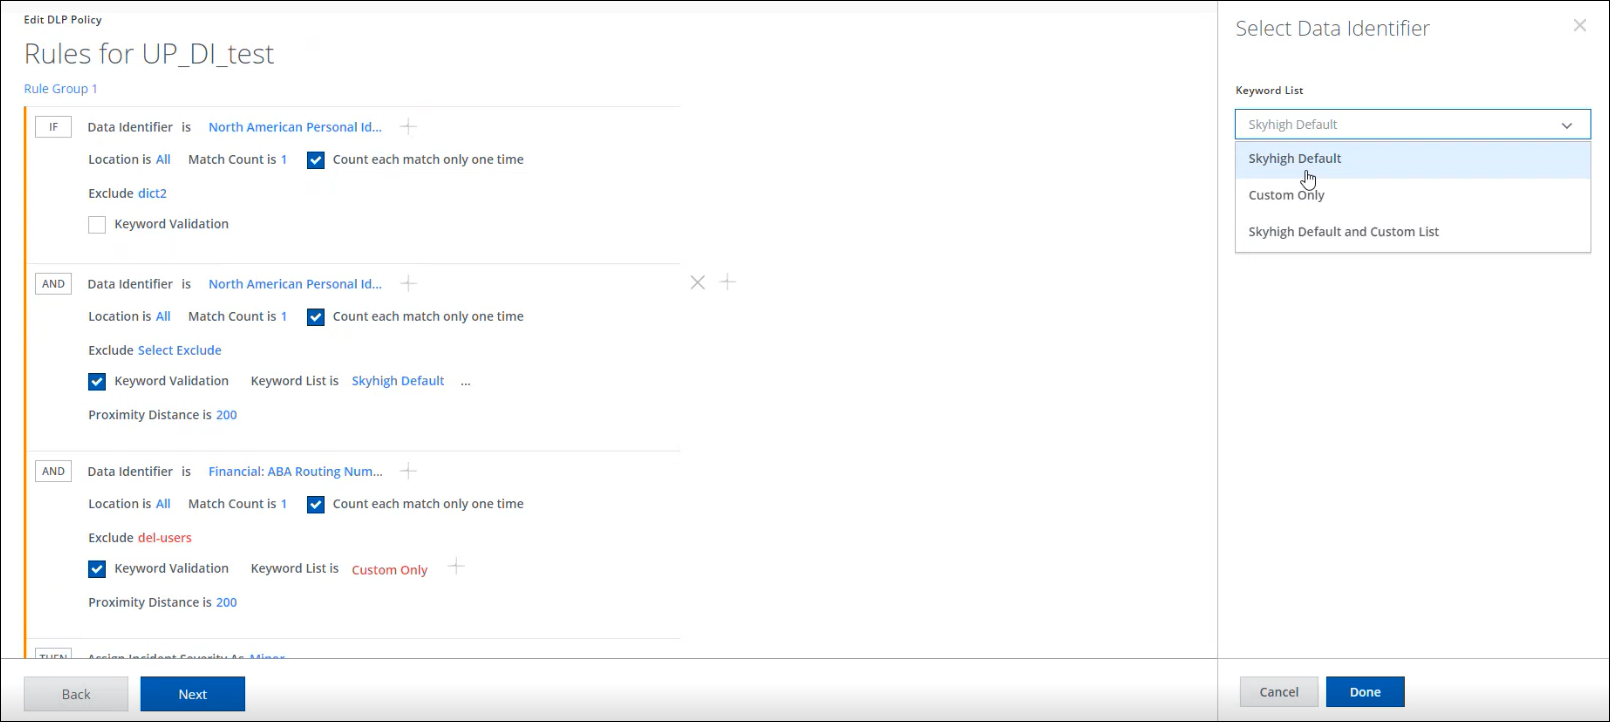
- Select Done.
- Do the same for Exclude, go to Select Exclude > Use a predefined dictionary > Select a Dictionary.
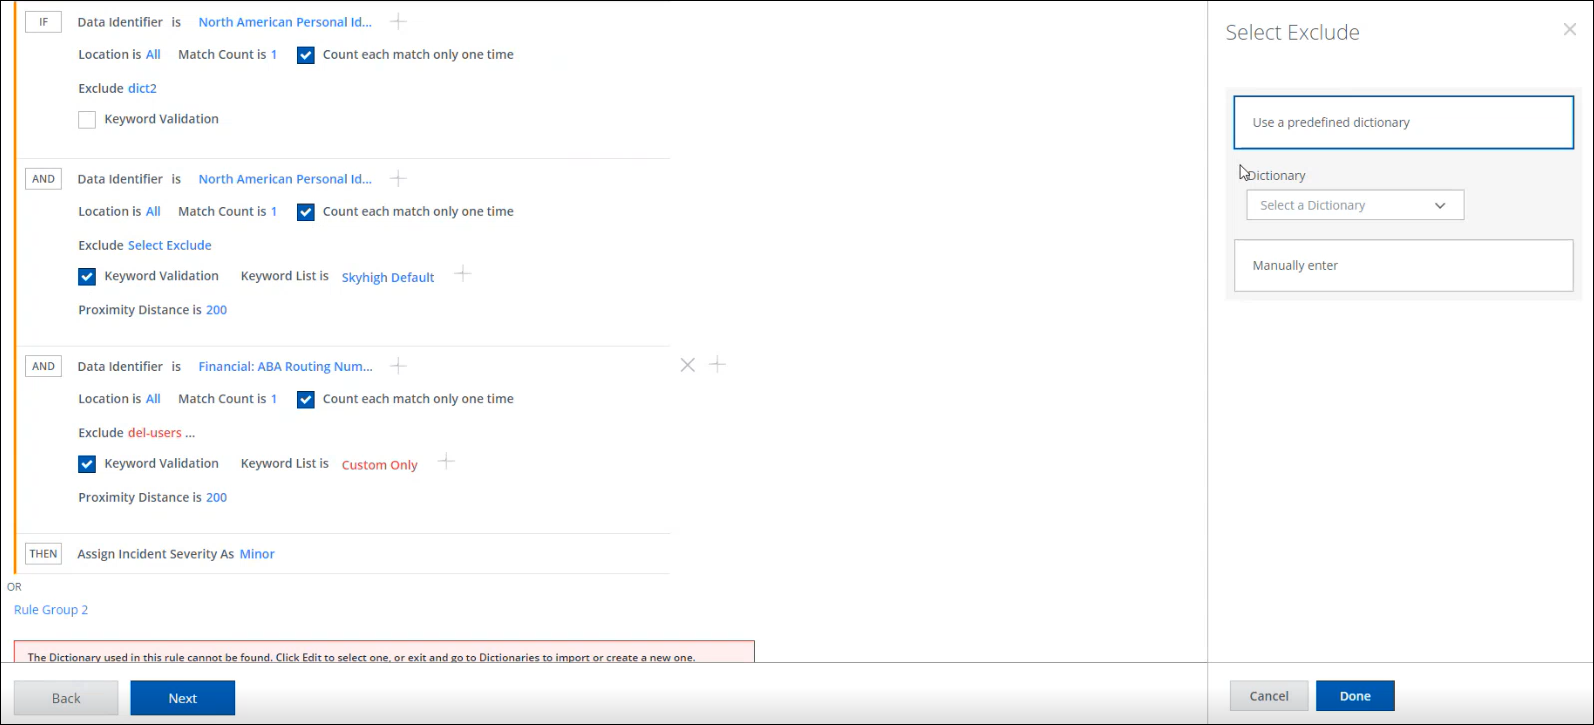
- Select Done.
- Select Next and Save.
Now the Validation errors for Data Identifier Rule are resolved and to Activate Policy, go to Actions > Activate Policy.
Classifications
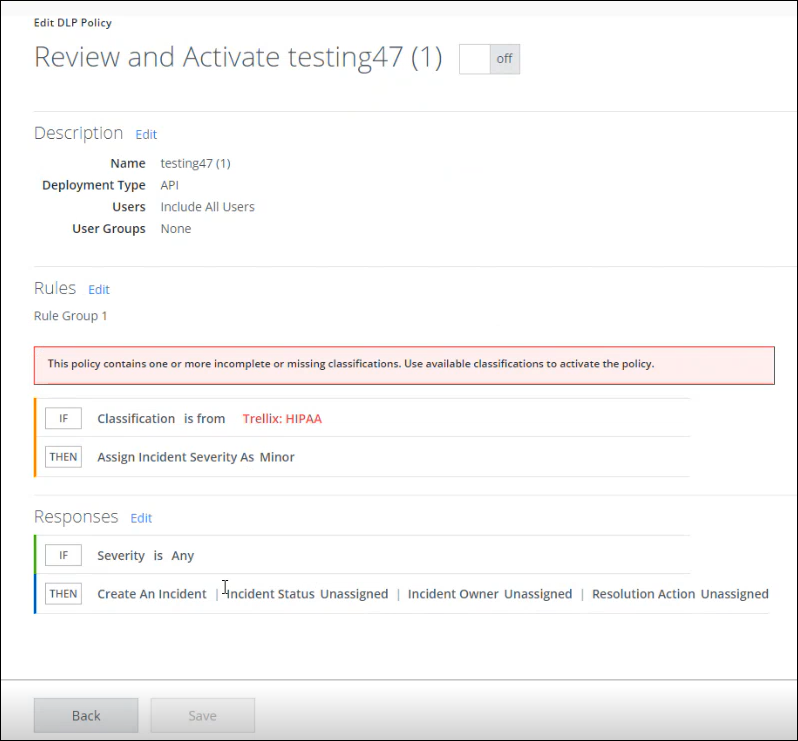
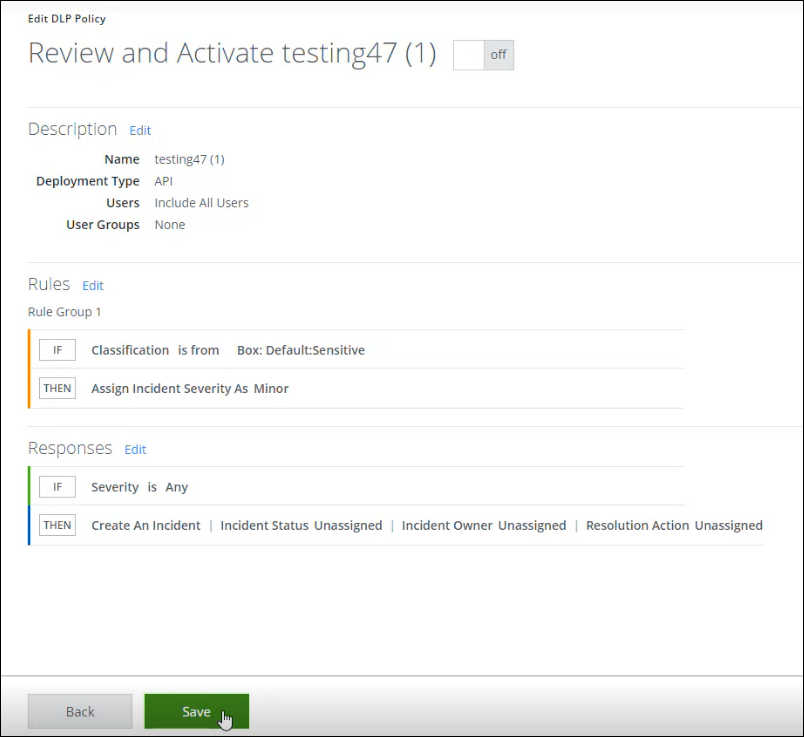
- On your DLP Policies list you will see your Classification Rule listed, with Inactive Status, and if you select it, you will see the Validation errors.
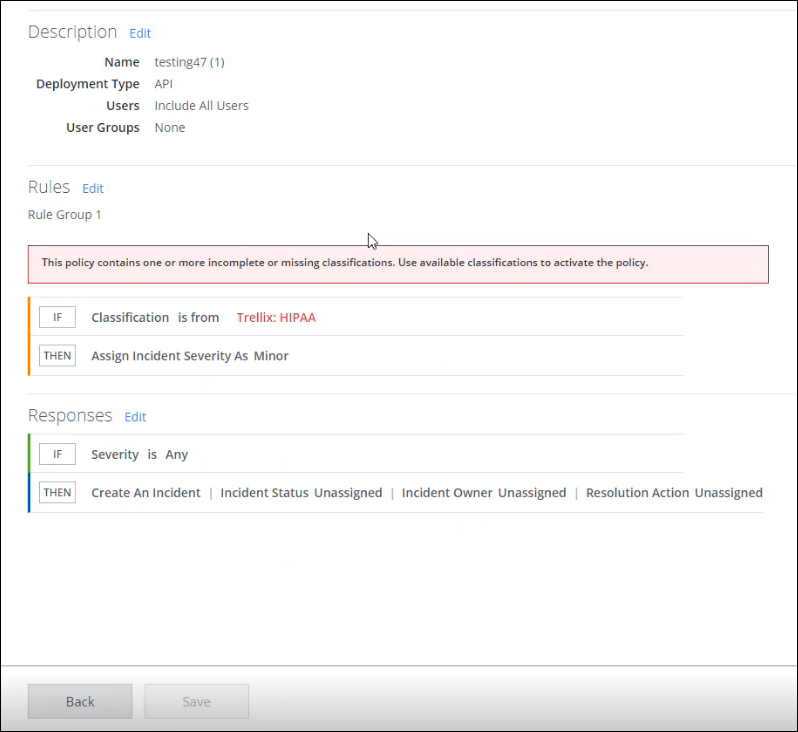
- To validate, go to Rules > Edit and provide a proper classification.
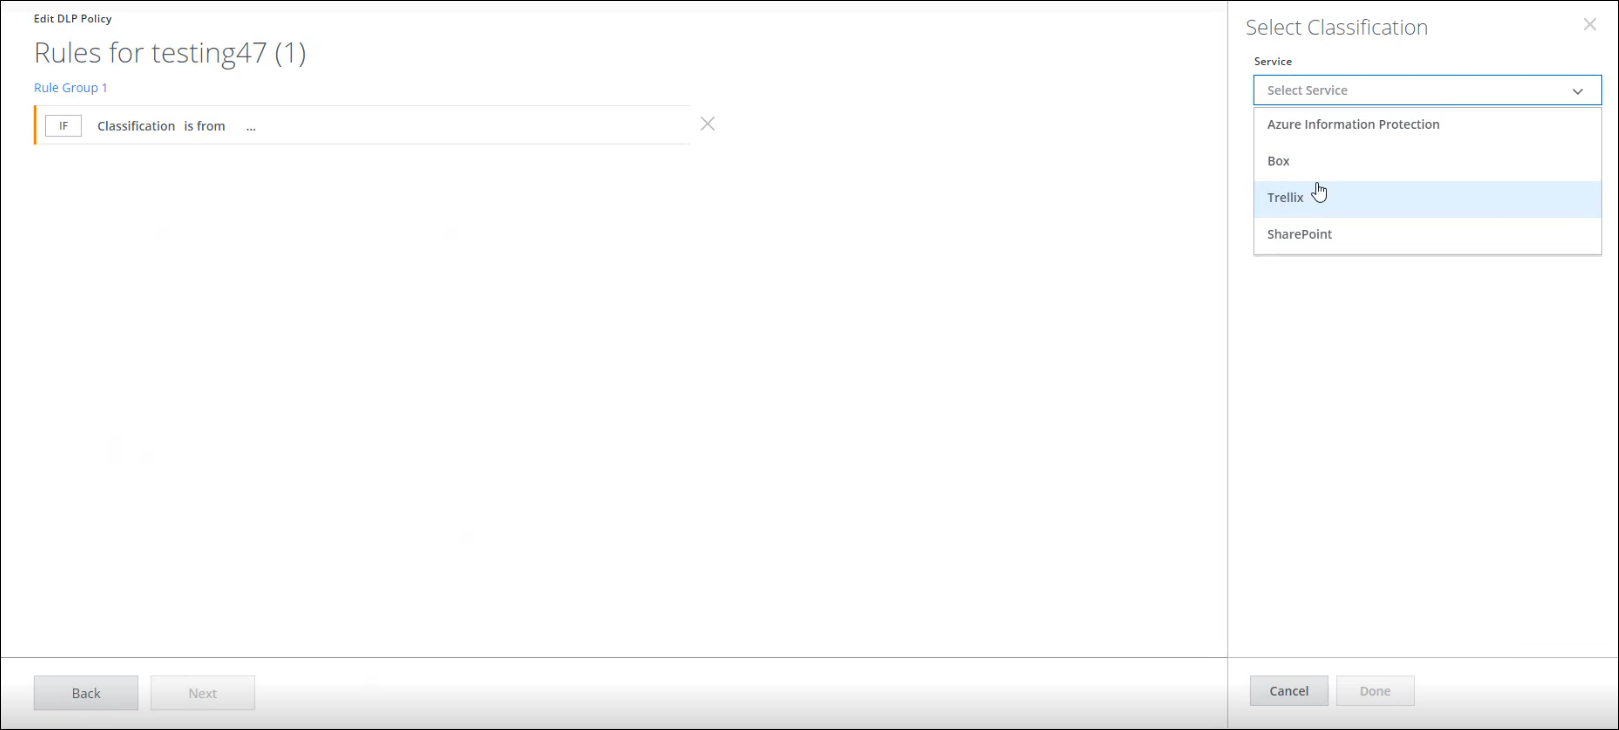
- Select Done. The validation error won't show again.
- Select Next and Save.
Now the Validation errors for Missing Classifications are resolved and to Activate Policy, go to Actions > Activate Policy.
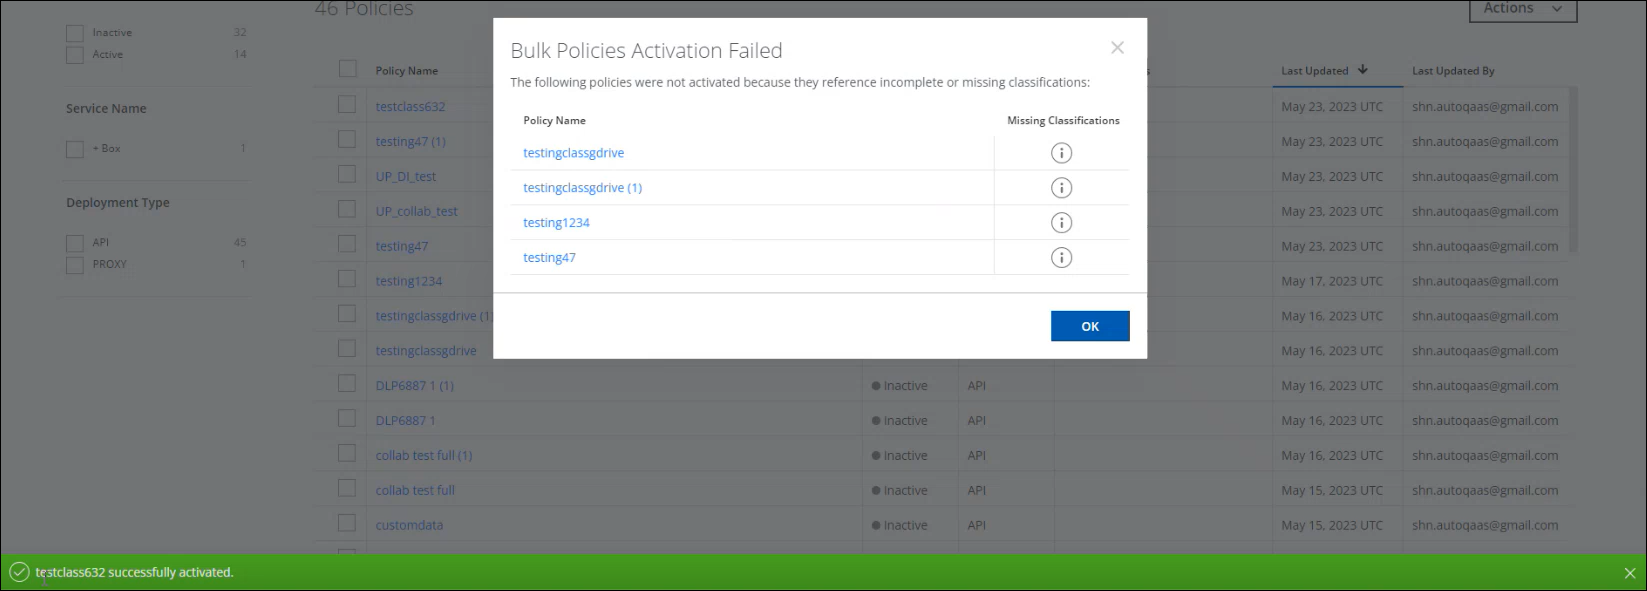
Bulk Activation with Invalid Classification
- On your DLP Policies list you see many Policies with Missing or wrong Classifications, select them, the Validation errors will be displayed.
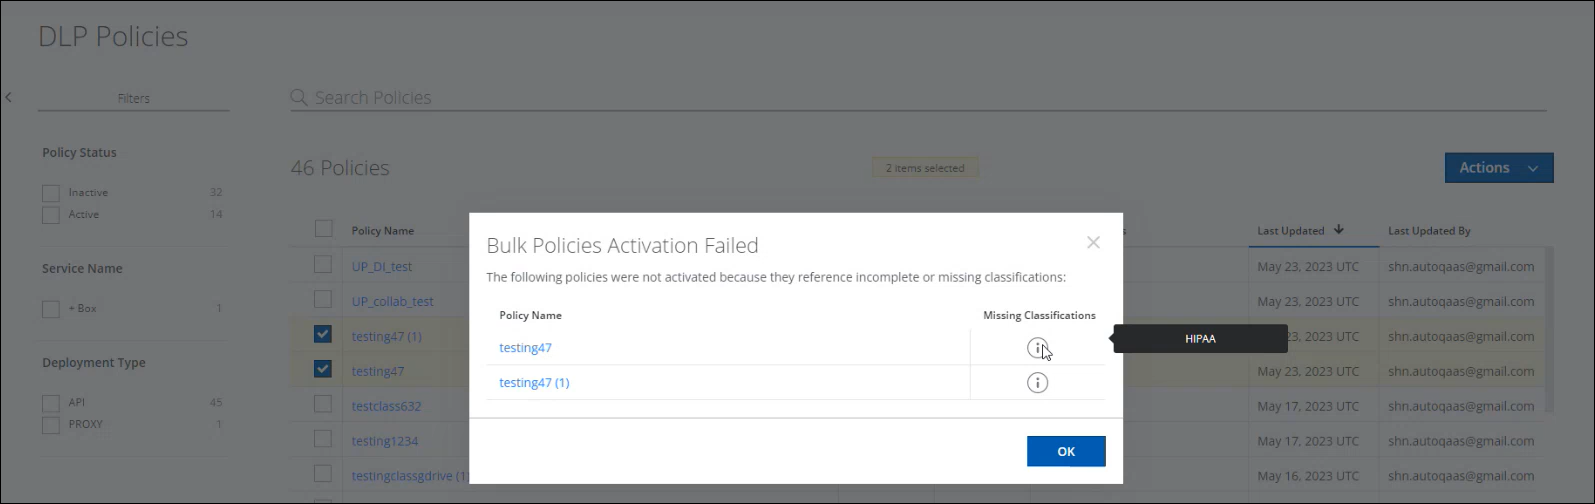
- Check Missing Classifications, the invalid Classification(s) will be displayed.
- If you want to check one of the listed Polices, select and go directly to the Edit screen.
Here you can use the same process mentioned for Classification.
- Select Done. The validation error won't show again.
- Select Next and Save.
Repeat the process for each Policy you have tried to activate using the Bulk Activation.
NOTE: If you have selected many Policies and one or more are available for activation, Actions > Activate Policy, the policy will be activated.
If the selected Policies exceed, a scroll-bar will be displayed. Now the Validation errors for Bulk Activation are resolved and to Activate Policy, go to Actions > Activate Policy.
Fingerprints
- On your DLP Policies list you see your Fingerprint Rule listed, with Inactive Status and if you select it, you will see the Validation errors.
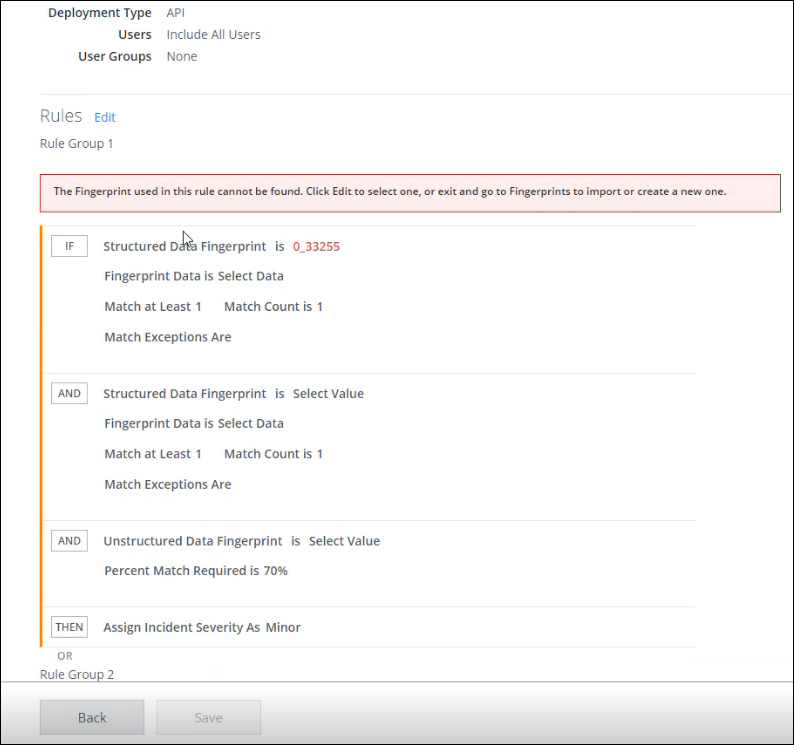
- Select Rules > Edit.
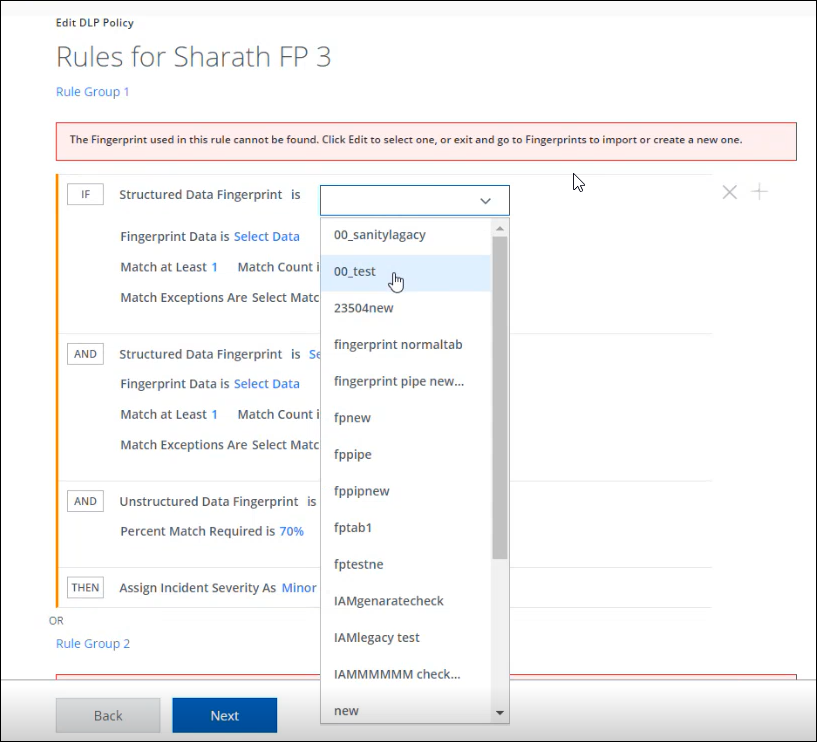
Repeat the same process for Fingerprint Data and for all in red, until the error messages disappear.
- Select Next.
- Select Save. You can always select the policy again and check if any errors are still waiting to validation.
Now the Validation errors for Fingerprints are resolved and to Activate Policy, go to Actions > Activate Policy.
Delete Policy Templates
To delete imported templates:
NOTE: Deleting an imported template does not delete any DLP policies created from the template.
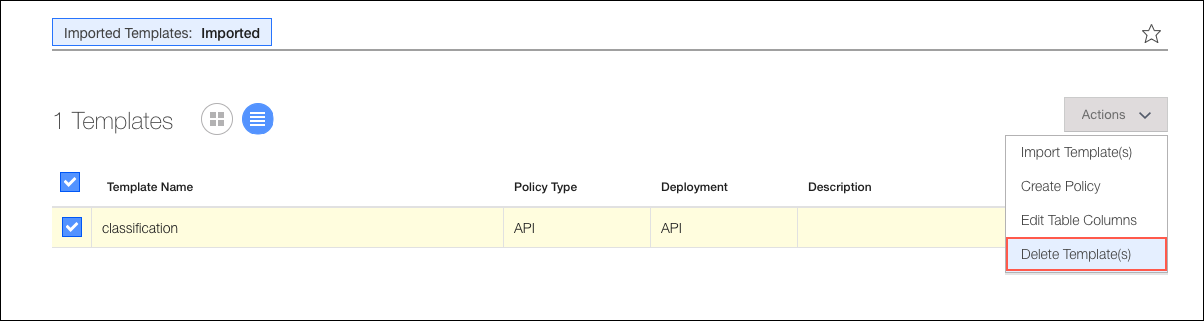
- In the Policy Templates page, select one or more imported templates.
- Click Actions.
- Choose Delete Template(s) to delete the selected templates from the tenant.