About Unmatched Uploads
-
 Watch the visual story about Unmatched Uploads
The Unmatched Uploads page displays any data moving outbound from the organization to a destination that is not mapped in the Cloud Registry. The data could be a new (unmapped cloud service) or a potentially suspicious destination. This page provides information about the number of users and volume of data being sent to these destinations with enrichment information like reputation, IP address, and location.
This improved version of the Unmatched Uploads page provides granular information about the users accessing these destinations as well as the risk (or reputation) of these destinations. There are new workflows that allow users to update the status of the URLs if that is a trusted unmatched cloud service and request new cloud services to be added to the Registry.
This page provides powerful search and filtering capabilities and exports detailed information on users responsible for unmatched uploads that to a CSV file. The Saved View can be created for your search query and you can add dashboard cards from Saved View. In addition, the status of multiple unmatched uploads can be modified simultaneously. The Unmatched Uploads data is stored for 90 days. The users with Usage Analytics or Compliance Manager role can access the Unmatched Uploads page.
Find the page at Analytics > Unmatched Uploads.
Table View
The Unmatched Uploads Table view is the default view.![]()
The Unmatched Uploads table provides the following information and actions:
- Search. Search via the Omnibar. You can search for IP addresses, URLs, Users, and Keywords added to notes in the Unmatched Uploads Cloud Card.
- Filters. Select options on the Filters tab to scope down your search.
- Views. Select Saved Views created by you or shared with another user to reuse specified search parameters from a previous search on current data.
- Date Picker. Use the Date Picker to specify a date range to display data.
- Save View. Click to create a Saved View from your search query. You can also use Saved Views to create Dashboard cards.
- Reputation. Provides the risk associated with detected service at a glance. For details, see Global Threat Intelligence Site Ratings.
- Red. High
- Yellow. Medium
- Green. Low
- White. Unverified
- Status. Displays the status of unmatched uploads. To change the status of unmatched uploads, go to Actions and select the required status.
- Unassign
- Block
- Exempt
- URL. The web address of the detected service.
- Category. The category of the detected service.
- Users. The number of users using the detected service. Click the Users link to go to the Users page.
- Upload Count. The number of unique upload events to the service.
- Upload Data. The amount of data uploaded to the service.
- Last Used. The date on which the user last used the detected service.
- First Used. The date on which the user first used the detected service.
- Actions. Click Actions to:
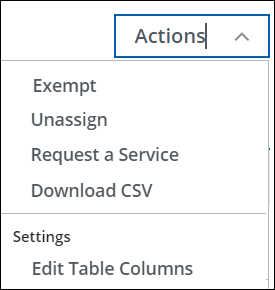
- Exempt. Click to exempt the URLs or IP addresses of the detected service.
- Unassign. Click to change the status from Exempt to Unassign. This is the default status of unmatched uploads.
- Request a Service. Click to add service to the Skyhigh CASB registry.
- Download CSV. Select the required data from the table and click to download the user details CSV file into your system. The download begins immediately.
- Settings
- Edit Table Columns. You can edit and select the required table columns to view the Unmatched Uploads table.
Sorting Columns
In order to find specific clusters of data within this table, you can click certain columns to sort the list.
- Click the column heading of the list you wish to sort by.
- Click the up arrow to sort the column in ascending order.

- Click the down arrow to sort the column in descending order.
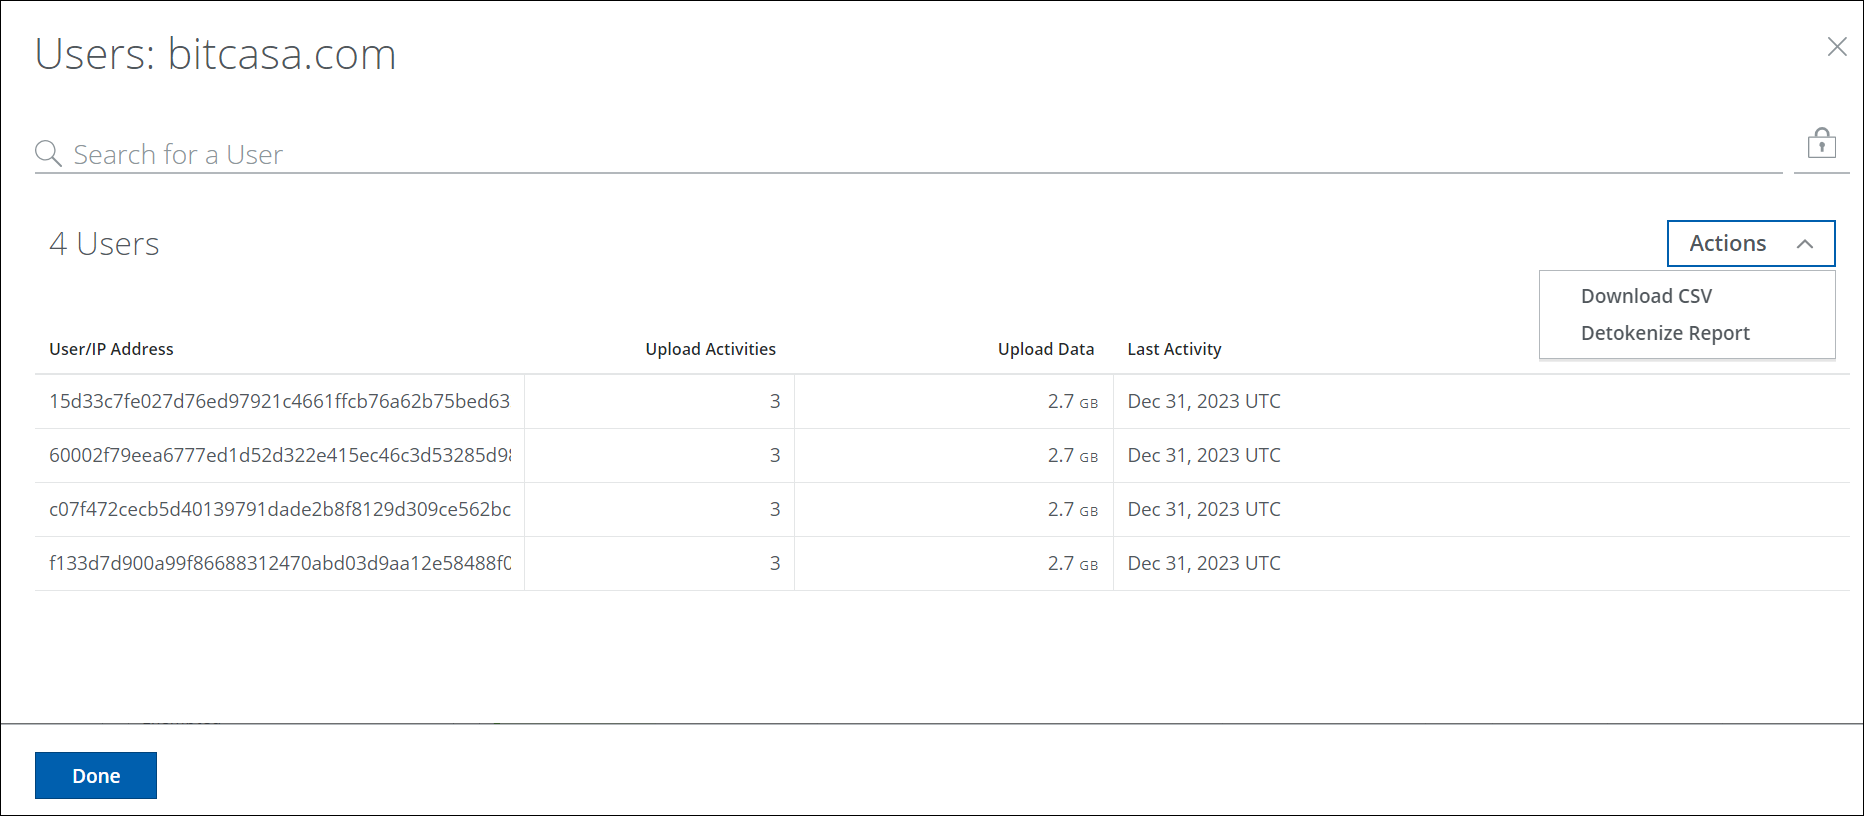
Users
The Users page provides the following information:
- User /IP Address. The username or IP address of the service.
- Upload Activities. The number of activities uploaded to the service.
- Upload Data. The amount of data uploaded to the service.
- Last Activity. The date on which the last activity was performed.
- Actions. Click Actions to:
- Download CSV. Click to download the user details CSV file into your system. The download begins immediately.
- Detokenize Report. Click to download the detokenized report into your system. However, you must have the detokenization privilege.
Download Detokenized Report
To download the detokenized report, perform the following steps:
- Click Actions > Download CSV. A CSV file downloads into your system.
- Click Actions > Detokenize Report.
- On the Detokenizing a Report dialog, click Browse.
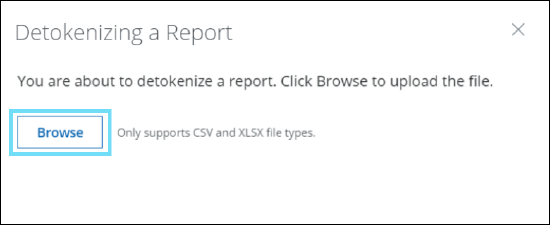
- Upload the CSV file that was downloaded in Step 1 from your system.
- On the Detokenizing a Report dialog, click Detokenize. The detokenized report downloads into your system immediately.
If the detokenization fails, an error message appears. It can be due to the file size, unavailability of the Cloud Connector, or connectivity issues. For details, see Known Issues.
NOTES:
- The upload file limit for detokenizing a report is one MB.
- The supported file format for detokenizing a report is CSV. Upload only CSV file format to detokenize the report.
- You can detokenize only the Unmatched Uploads data.
Unmatched Uploads Cloud Card
To view Unmatched Uploads Cloud Cards:
Click any row in the Unmatched Uploads table to view the Unmatched Uploads Cloud Card:
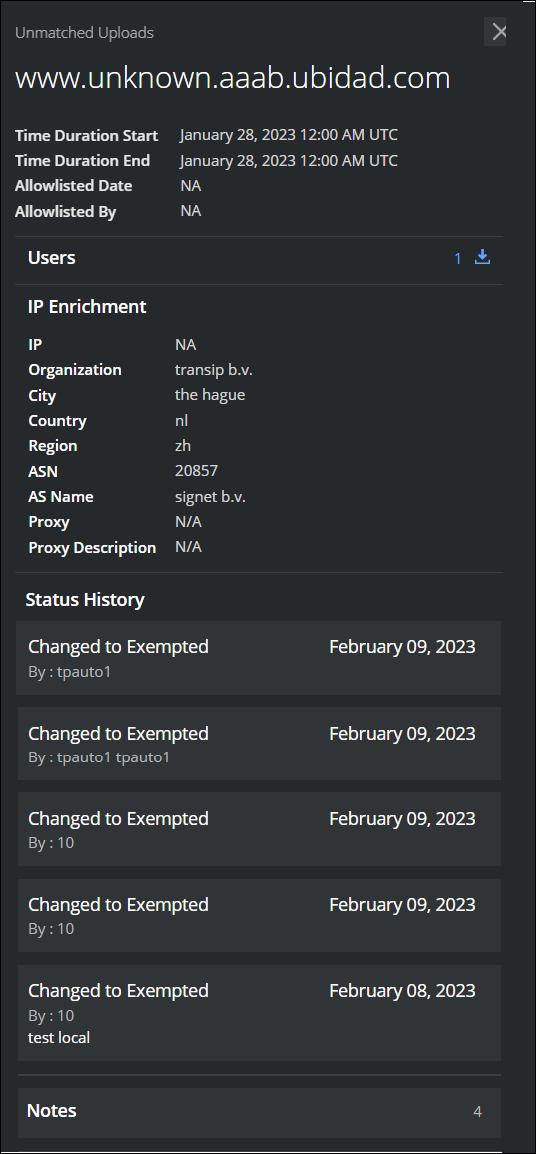
The Unmatched Upload Cloud Card provides the following information:
- URL. The web address of the detected service.
- Time Duration Start. The start date and time when the URL or IP address of the detected service was accessed.
- Time Duration End. The end date and time when the URL or IP address of the detected service was accessed.
- Allowlisted Date. The date and time when the URL or IP address of the detected service was added to the allowlist.
- Allowlisted By. The name of the tenant who added the URL or IP address of the detected service to the allowlist.
- Users. The number of users using the detected cloud service. Click the arrow
 to download the user details CSV file into your system. The download begins immediately.
 - IP Enrichment. Displays the geographical data of the detected service including IP, Organization, City, Country, Region, ASN, AS Name, Proxy, and Proxy Description.
- Status History. Lists the most recent changes made to the status of the unmatched uploads by the user with the recent history of 10 records.
- Notes. Enter a note for the Unmatched Uploads and click Add. Each note added is visible separately below the Notes field. For notes that you have added, you can Edit or Delete them. For notes written by other users, you might only view them. The default limitation is 20 notes per Unmatched Uploads, and 300 characters per note. To use the Unmatched Uploads Notes feature, you must use your own Data Storage. You can't use Skyhigh CASB Data Storage. For details about the configuration, see Data Storage.
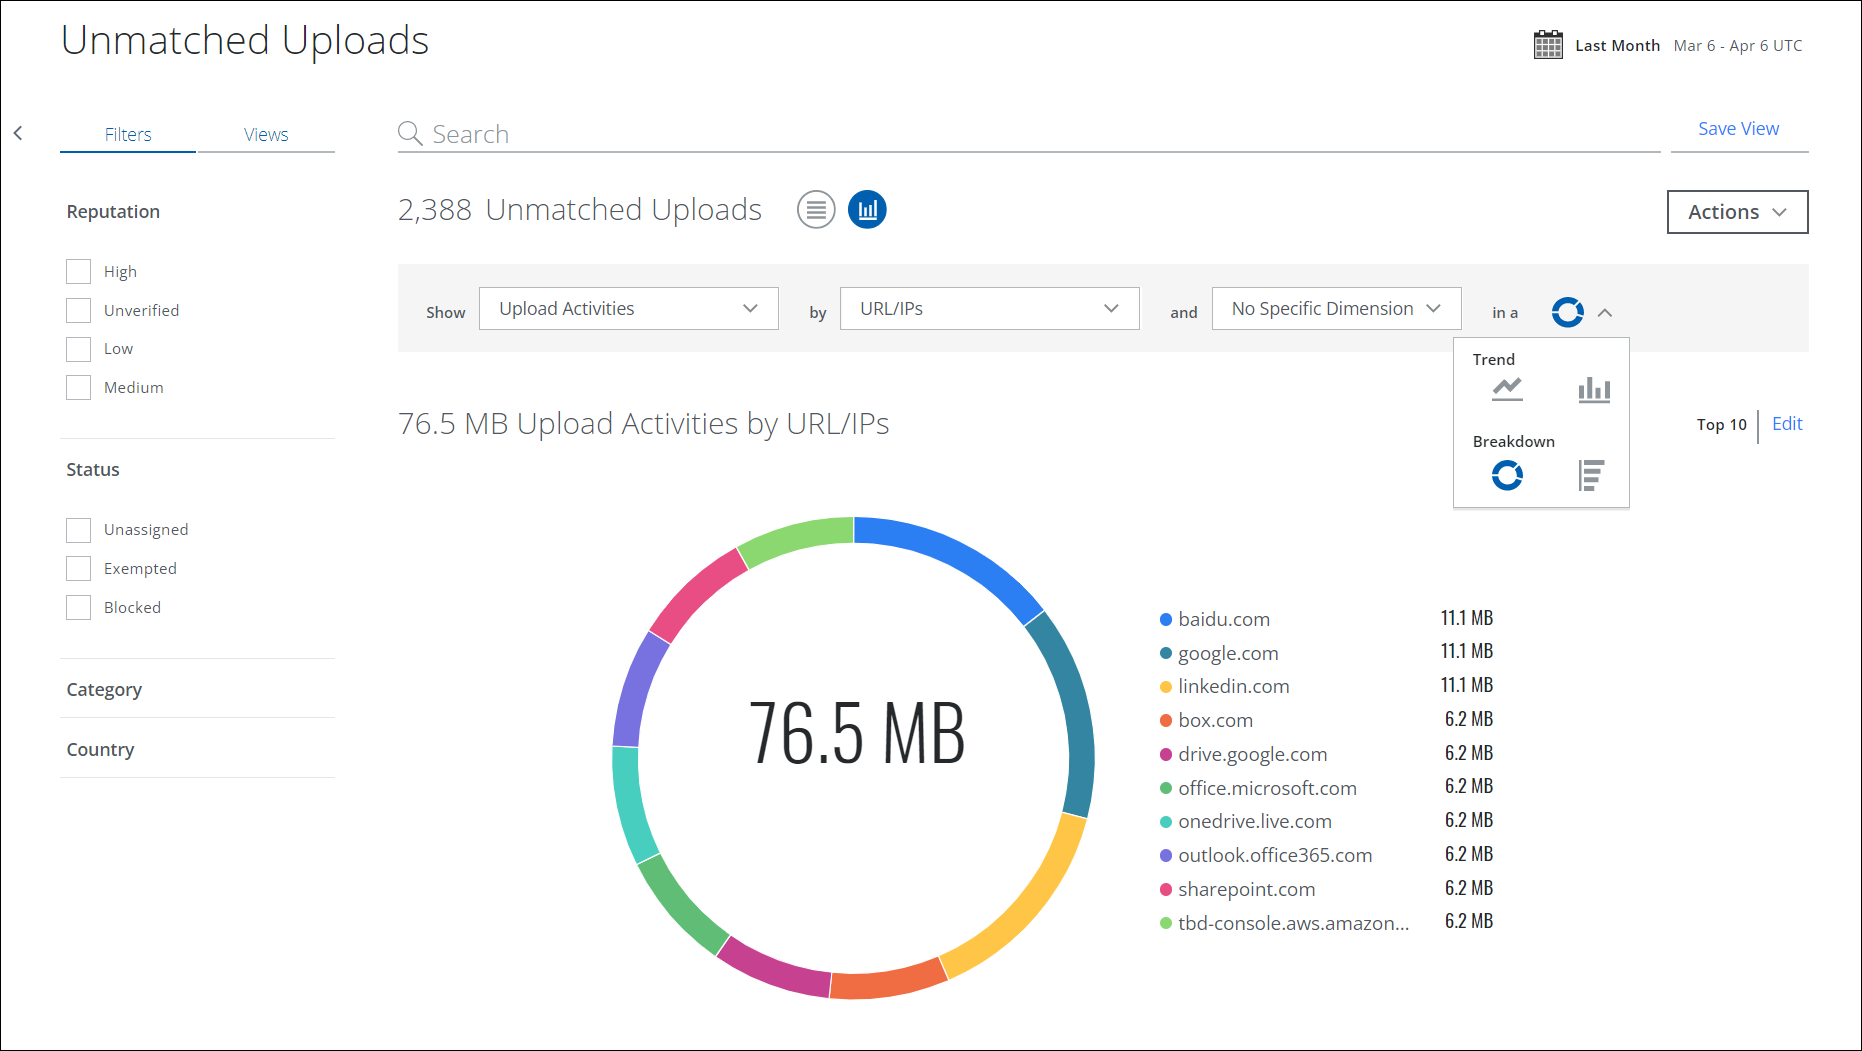
Chart View
To display your Unmatched Uploads data in a chart, click the Chart icon, under the Omnibar.
To display Activities data in a chart:
- Show. Select an item from the Show list to determine the X-axis of your chart.
- By. Select an item from the by list to determine the Y axis of your chart.
- And. In the and dialog, select the second parameter, if available. Select No Specific Dimension, Reputation, or Status.
- In a. From the In a list, select your chart type, if available:
- Trend. Line or vertical bar chart.
- Breakdown. Donut or horizontal bar chart.
Your data is displayed in the chart.