Cloud Firewall Settings
The Client Proxy policy redirects traffic to Cloud Firewall based on the list configured in the proxy bypass list. You can configure process names, domains, destination IP, or ports in the proxy bypass list to redirect the outbound traffic to the Cloud Firewall.
Enable the Firewall option and configure the list of domains, destination IP address, destination ports, and process names. These components determine the type of firewall traffic and furthermore managed by the Cloud Firewall policy.
Go to the Admin tab by selecting the same Client Proxy policy > Additional Blocks > clear (uncheck) the UDP traffic on ports 80 and 443 checkbox to allow the Cloud Firewall traffic that uses UDP port 443.
Complete the following to do the firewall settings:
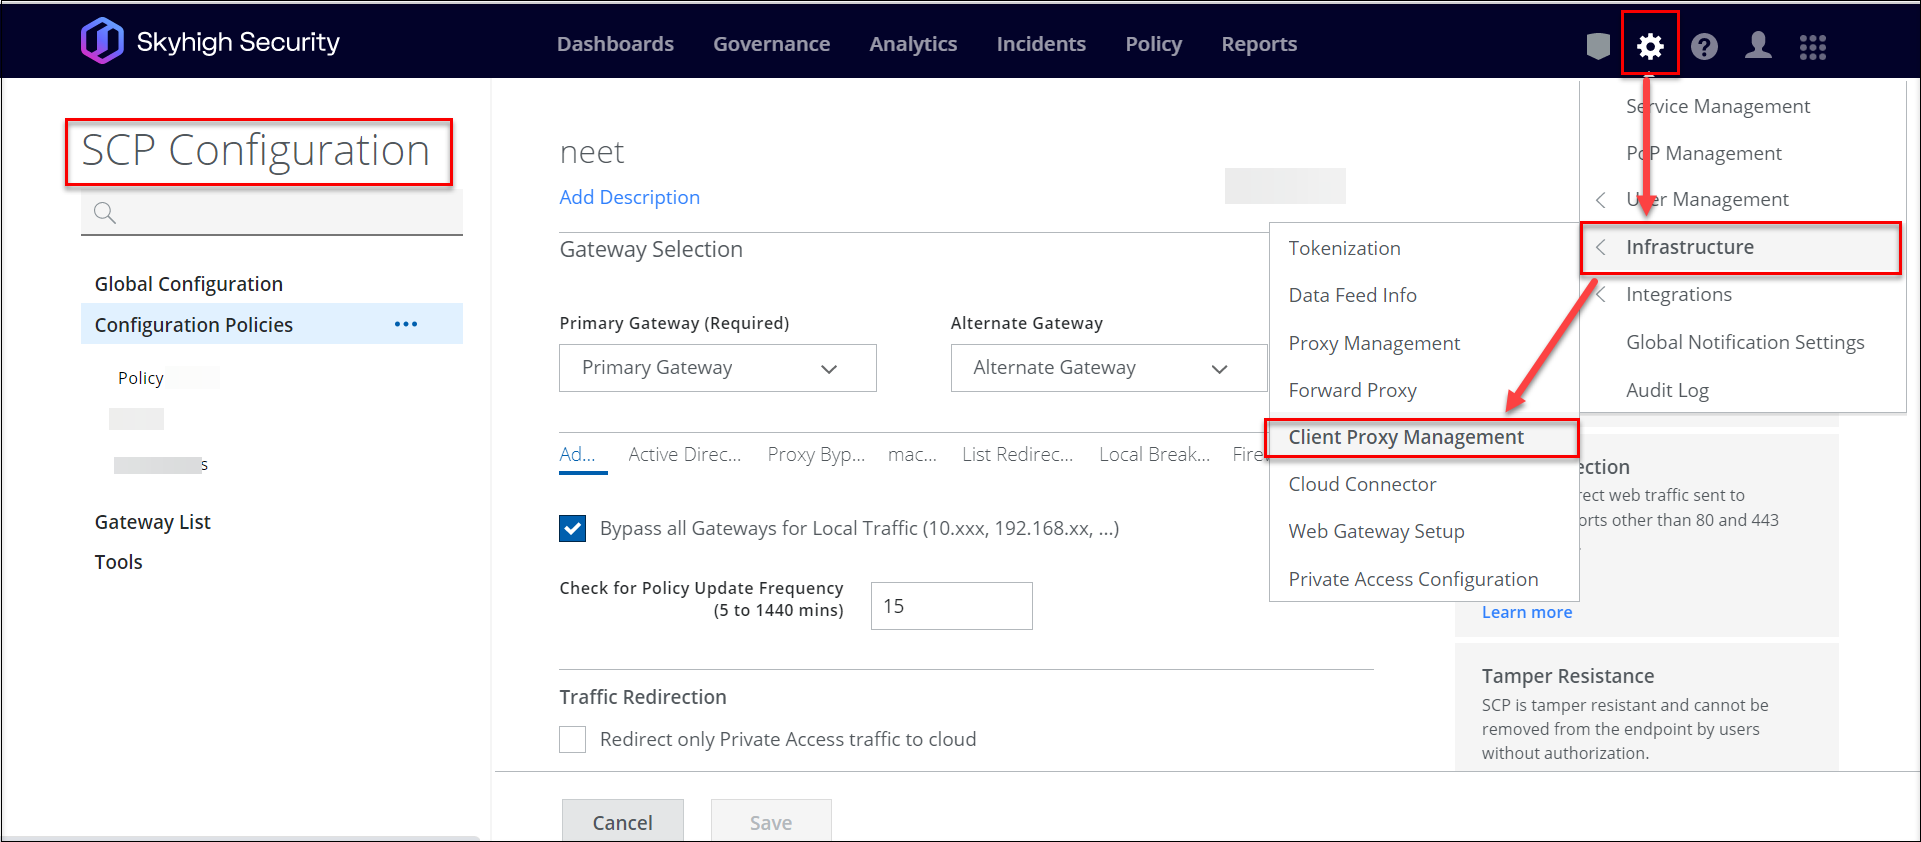
- On the Skyhigh SSE navigation bar, click Settings.
- Select Infrastructure > Client Proxy Management.
- In Proxy Bypass, select the Client Proxy policy in which you have configured the bypass list.
- Go to the Admin tab and select Additional Blocks.
- Clear the UDP traffic on ports 80 and 443 checkbox to allow the traffic that uses UDP port 443.

- Clear the UDP traffic on ports 80 and 443 checkbox to allow the traffic that uses UDP port 443.
- Click Firewall Settings.
- In the Firewall Redirection mode section, select one of the following:
- Send All Traffic to Firewall — Sends all traffic to Cloud Firewall. You can configure domains, IP addresses, ports, and processes in the Firewall Exception List to bypass the Cloud Firewall.
- Exclude All Traffic from Firewall — No traffic is passed to Cloud Firewall. When you select this option, Cloud Firewall policy stands down and all traffic is managed by Client Proxy policy. However, you can configure domains, IP addresses, ports, and processes in the Firewall Exception List to redirect traffic through the Cloud Firewall.
For information about configuring exception list, see Firewall Exception List.
- In the Client Authentication section, select Use an HTTP proxy to authenticate with Cloud Firewall to enable the client to authenticate with Cloud Firewall over TLS using a corporate web proxy. When a user is outside the corporate network, a direct connection to the internet is used to authenticate with Cloud Firewall.
- Hostname or IPv4 — Enter the hostname of the corporate web proxy.
- Port — Enter the port number.
- In the Traffic Forwarding section, select Enable SOCKS Proxy to relay tunneled traffic to Cloud Firewall. When you select this option, your on-premise SWG acts as a SOCKS proxy and relays the tunneled traffic to Cloud Firewall. When the SOCKS proxy is enabled, connectivity with the cloud is attempted first with the proxy. Connects with the Cloud directly when it fails to connect with the proxy. For information about configuring SOCKS proxy, see Configure a SOCKS Proxy. The SOCKS proxy is supported on all SWG versions except the SWG versions that has entered EOL and EOS. For details, End-of-life (EOL) Dates for Secure Web Gateway.
- Hostname or IPv4 — Enter the hostname of the on-premise SWG.
- Port — Enter the port number.
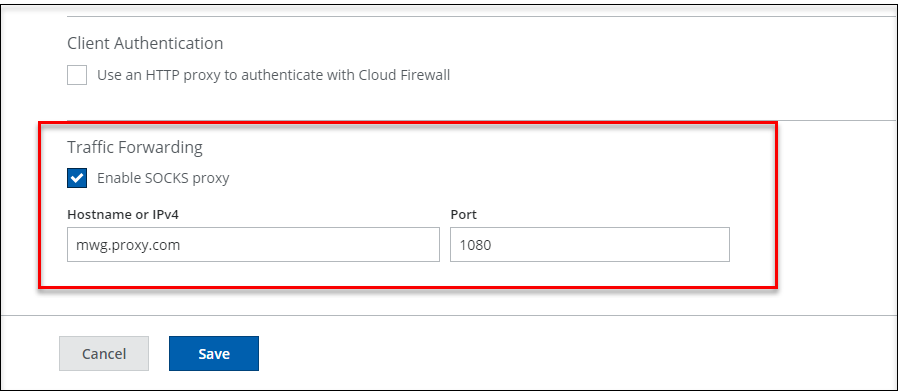
- Click Save.
You can publish saved changes to the cloud now or keep working and publish later.