Create an In VPC Scan for Azure
A POP must be properly configured before you can run an In-VPC scan. Also, an IAM role must have permissions to allow the scan to run. An IAM role is created while configuring roles in Azure.
In-VPC scans are supported for AWS, Azure, and Google Cloud Platform (GCP).
Prerequisites
Make sure you have the following prerequisites in place before you configure a PoP for Azure:
- Minimum 4 core CPU-intensive nodes.
- Configure Azure roles to allow Skyhigh CASB to access your Azure resources. For details, see Configure Roles in Azure.
- Enable Microsoft Azure Service Instance in Skyhigh CASB. For details, see Enable Azure.
- A deployed Azure PoP. For details, see Deploy Azure PoP.
Configure PoP
Configure the PoP to run the In-VPC scan for Azure and perform the following activities:
Upload the PoP Deployment Package
- Download the PoP Deployment package PoPPackage.tar from the Azure managed service instance in Skyhigh CASB.
- Extract the PoPPackage.tar to get PoPDeployment.tar and Infrastructure.tar. Expand the Infrastructure.tar further to get the Azure_ExistingInfra.json and RunAzureDeployment.sh files in the Azure folder.
- Log in to Azure and upload PoPDeployment.tar and RunAzureDeployment.sh to any storage account. The storage accounts are used in the next steps.
Create and Deploy Azure Template
- Go to the Templates section and create a new Template. For example, azure-dlp-pop is the template name.
- Replace the ARM template default content with content from the Azure_ExistingInfra.json file. This JSON file is extracted from the Infrastructure > Azure folder.
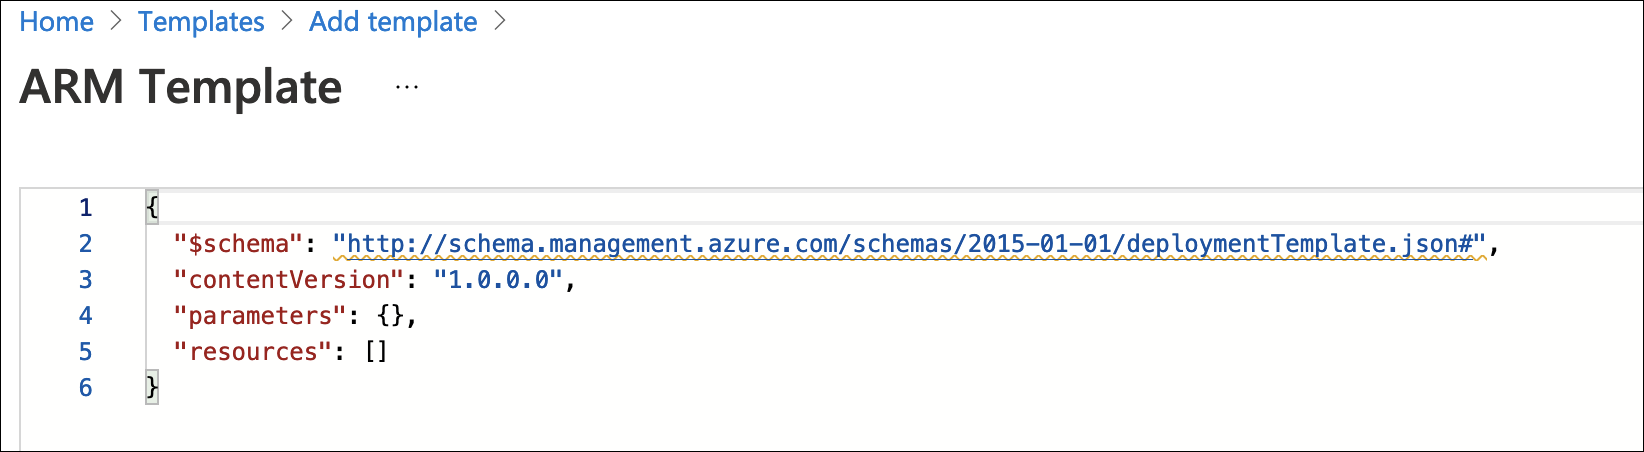
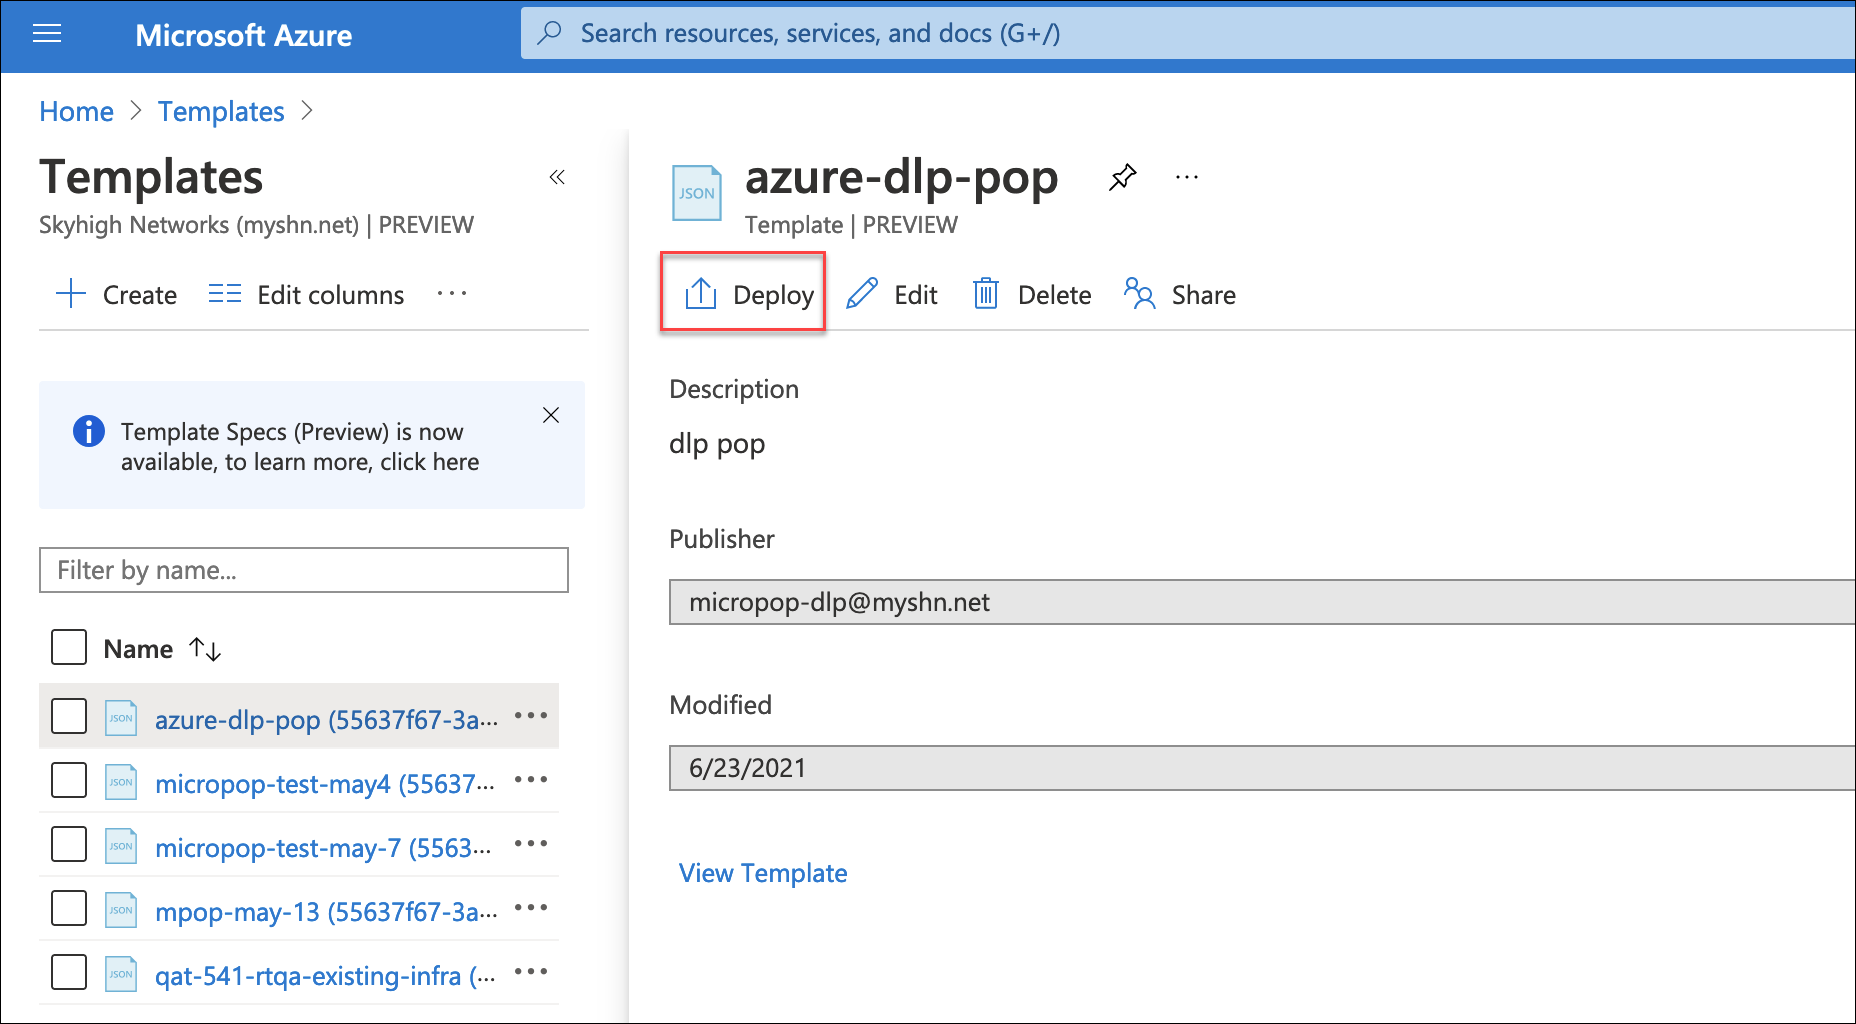
- Save the template.
- Click Deploy.
Deployment from the Custom Template
Deployment Prerequisites
- Make sure to keep the PoPDeployment.tar and Infrastructure.tar in a storage bucket.
- Change the access level to the container for the above storage bucket before the deployment.
To deploy the MicroPoP, provide the required input parameters in the custom template:
NOTE: Most of the input parameters are created during the New or Existing Infra deployment. Make sure to provide the same input parameters below.
- Under BASICS, configure these fields:
- Subscription. Select the Azure Subscription account name from the menu.
- Resource Group. Select the Resource group name from the menu.
- Location. Auto-Populated according to the resource group.
- Under SETTINGS, configure these fields:
- Pop Name. Enter the Pop name in lower case. Avoid any special characters, user alphabets, and numeric combinations.
- Pop Virtual Network Name. This is obtained from the resource group.
- Pop Subnet Name. This is obtained from the resource group.
- Pop Network Security Group Name. This is obtained from the resource group.
- Virtual Machine Size. CPU intensive VM instances are recommended for DLP pop. Select 4 core CPU intensive type Standard_F4s_v2. For production use, 8 core instances type Standard_F8s_v2.
- Admin Username. Enter the desired username for the virtual machine.
- Admin Password or Key. Go to the SSH key created in the prerequisite step, copy the Public key value and provide it as input here.
- Disk Volume Size. Enter the disk volume size as 50. This allocates 50 GB of disk space for both main and secondary VMs. You can add more disk size as per the deployment requirements.
- Desired Secondary Node Capacity. Enter the desired capacity of nodes, or the number of secondary machines/Virtual machine scale sets. [Min=1, Max=10]. For example, set the capacity to 2. This means one main and two secondary nodes for this Pop setup.
- Cwpp Package URL. Copy the PoPDeployment.tar file path uploaded in the storage account and paste it inside the '<tar-file-url>' with single quotes.
- Cwpp Deployment Script. Copy the RunAzureDeployment.sh file path and paste it here. Do not enclose the value in single quotes.
- Install Dlp Pop. If you want to deploy the DLP Pop, set the option to Yes.
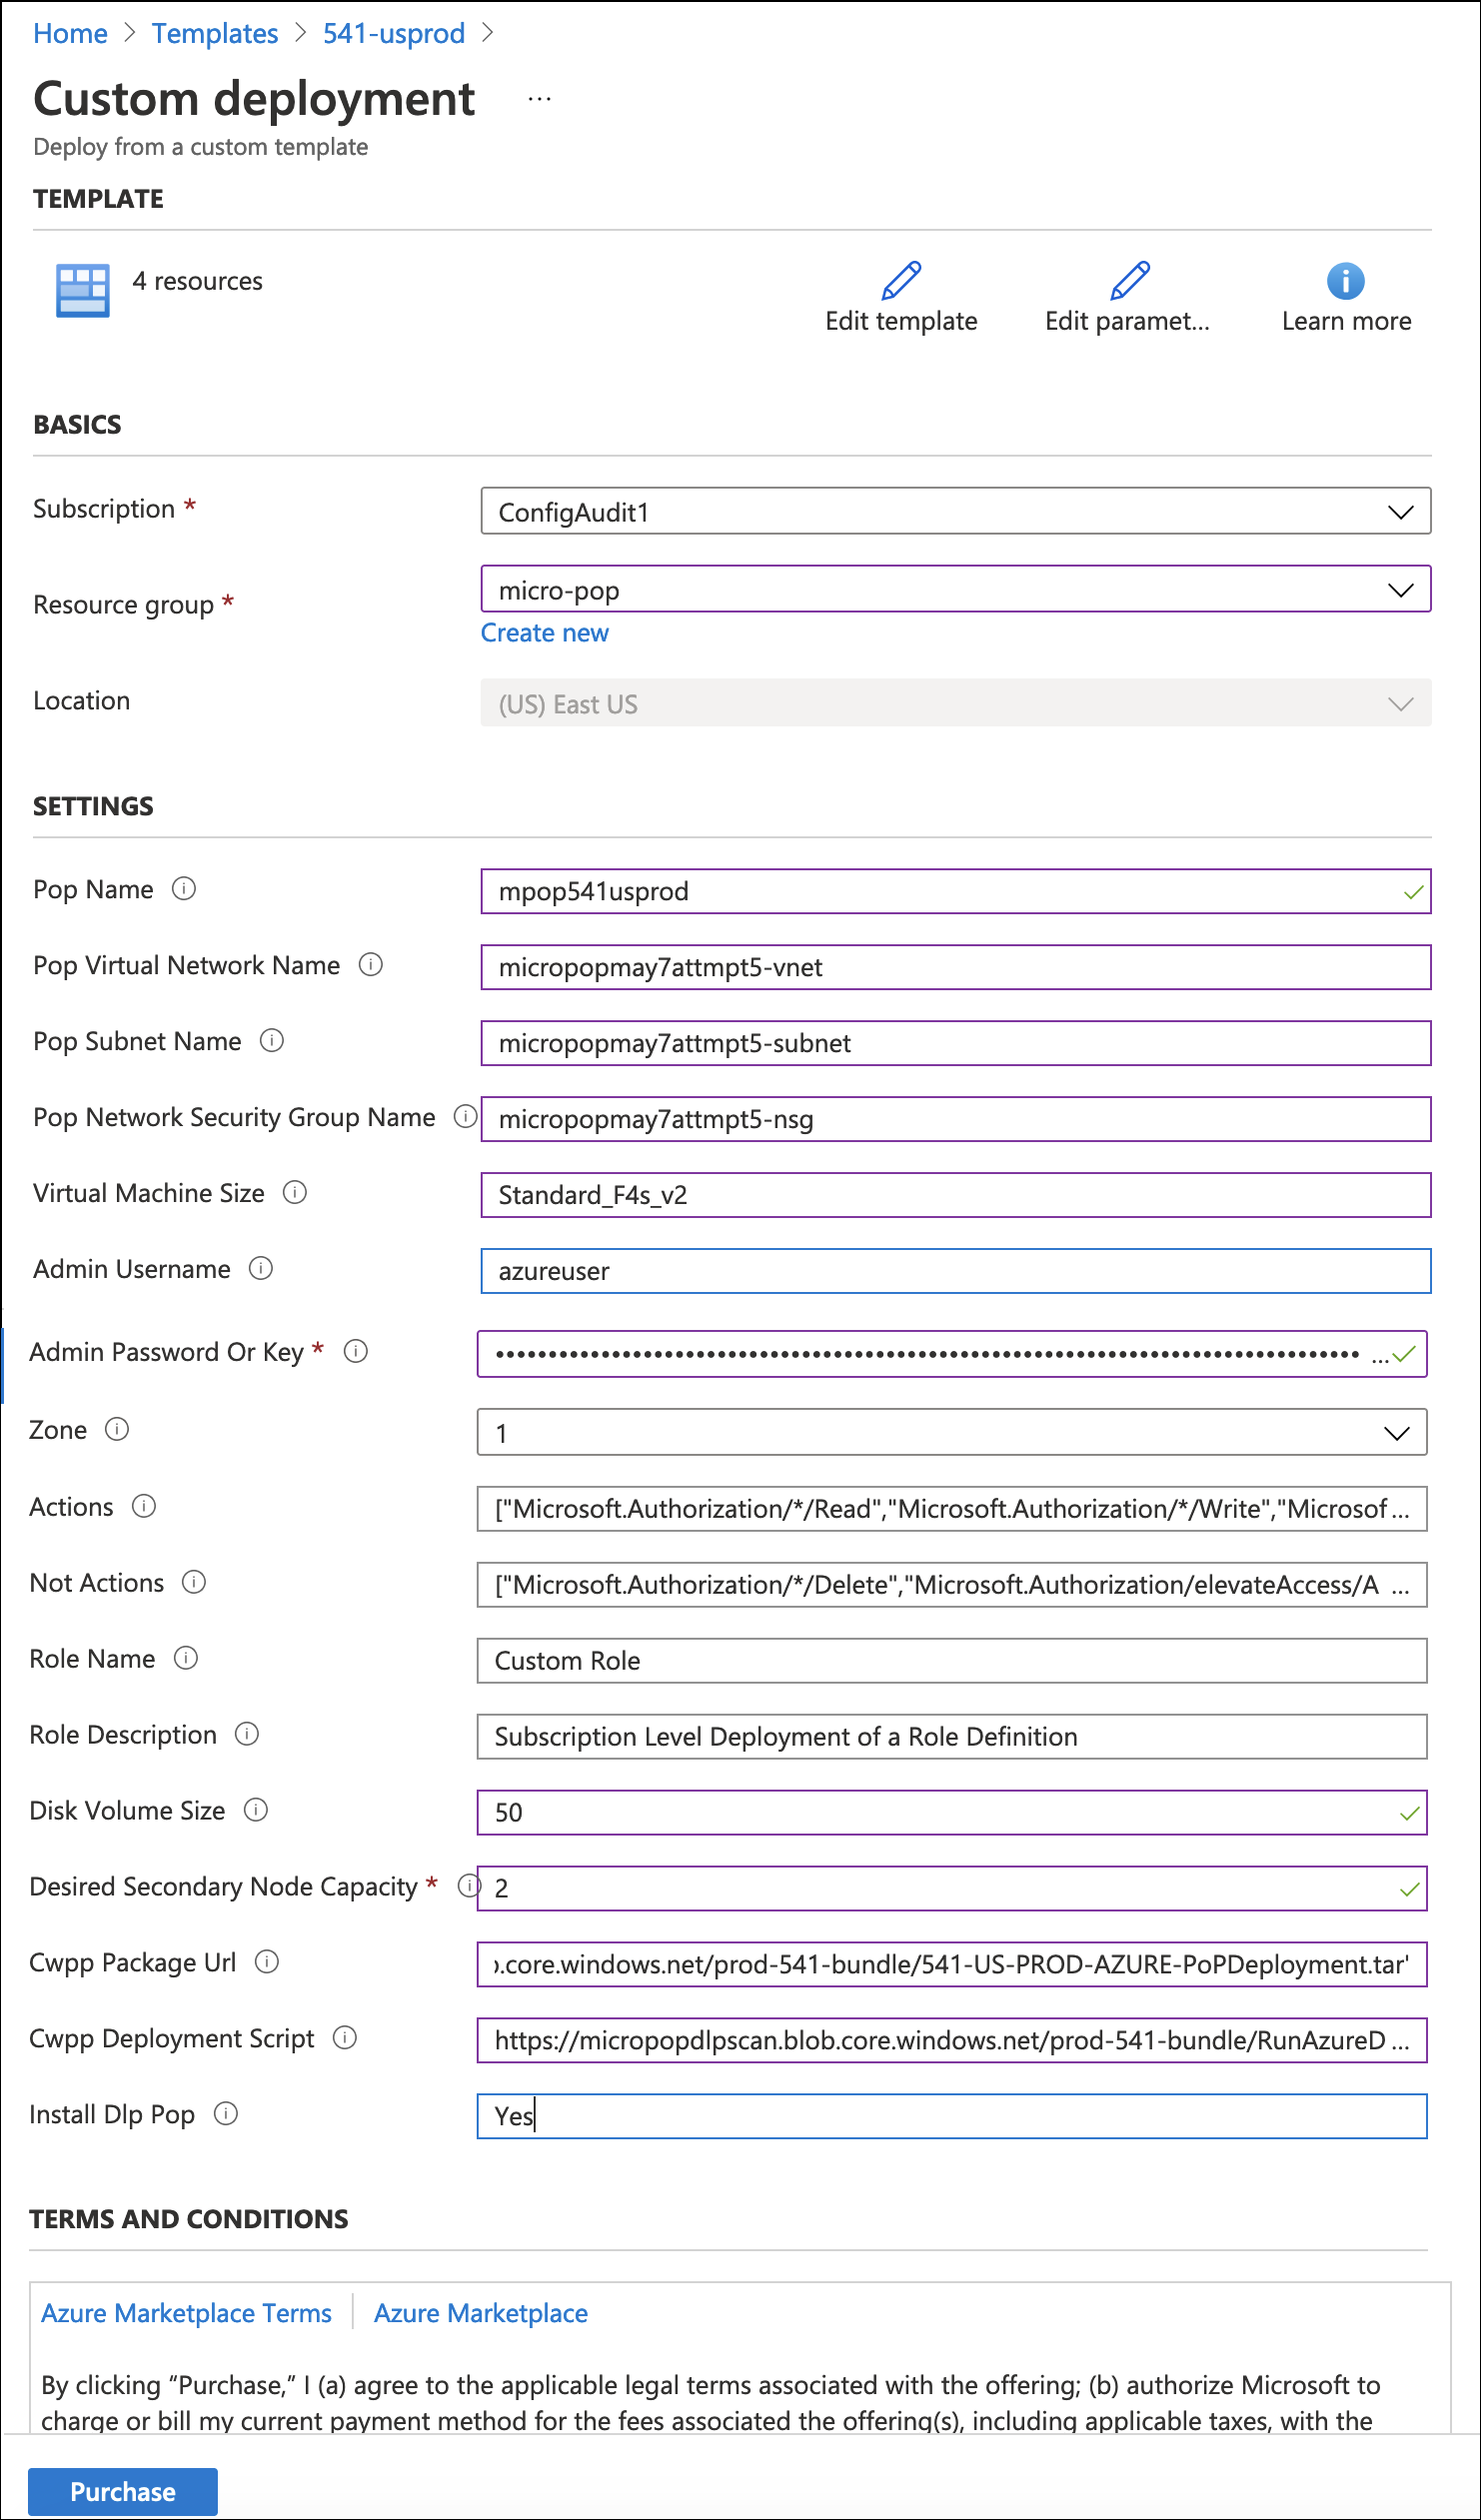
- Click Purchase.
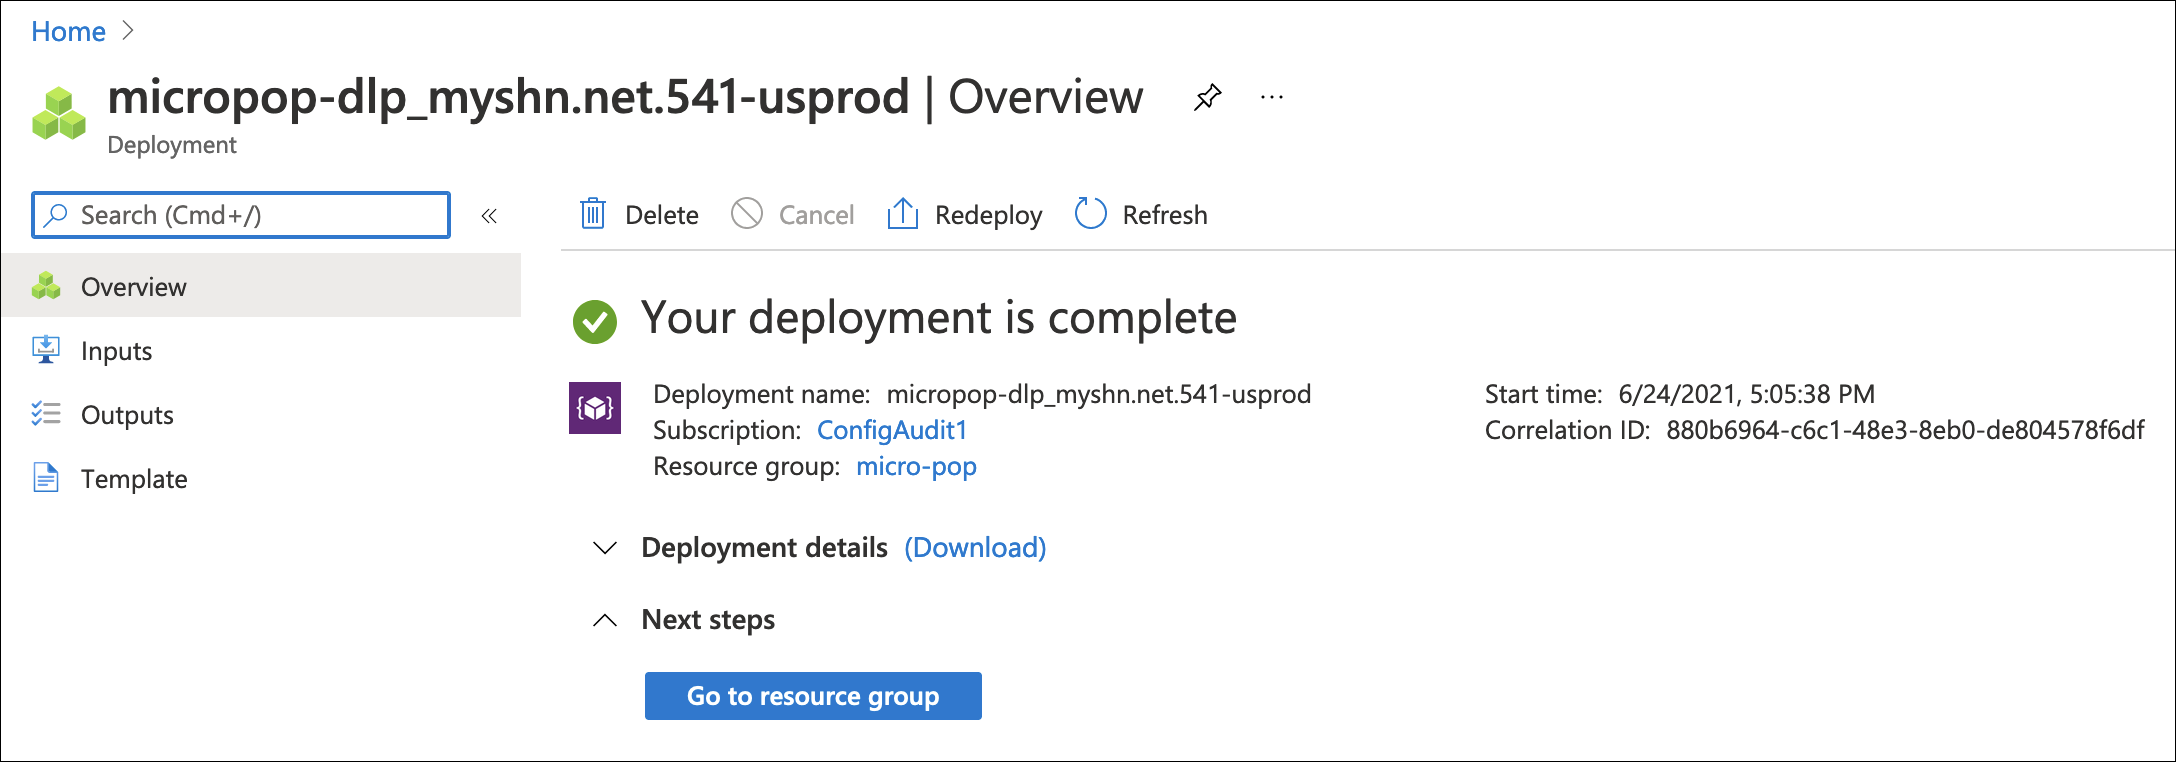
- In the Deployment section, you can view the status of the deployment as in progress. Once the MicroPoP is successfully created, you can view the successful message. Wait for at least 5 minutes to access the master node and use the DLP Pop.
Create a Scan
To create an In VPC Scan:
- Go to Policy > On-Demand Scan.
- Click Actions > Create a Scan.
- The Scan Creation Wizard is displayed. On the General Info page enter the following:
- Scan Type. Select DLP & Malware. For In VPC scans, Malware is not supported.
- Name. Enter a unique identifier so that you can rerun the scan later.
- Description. Enter an optional description for the scan.
- Service Instance. Select the Azure instance you want to scan.
- Hosted. Select In Tenant.
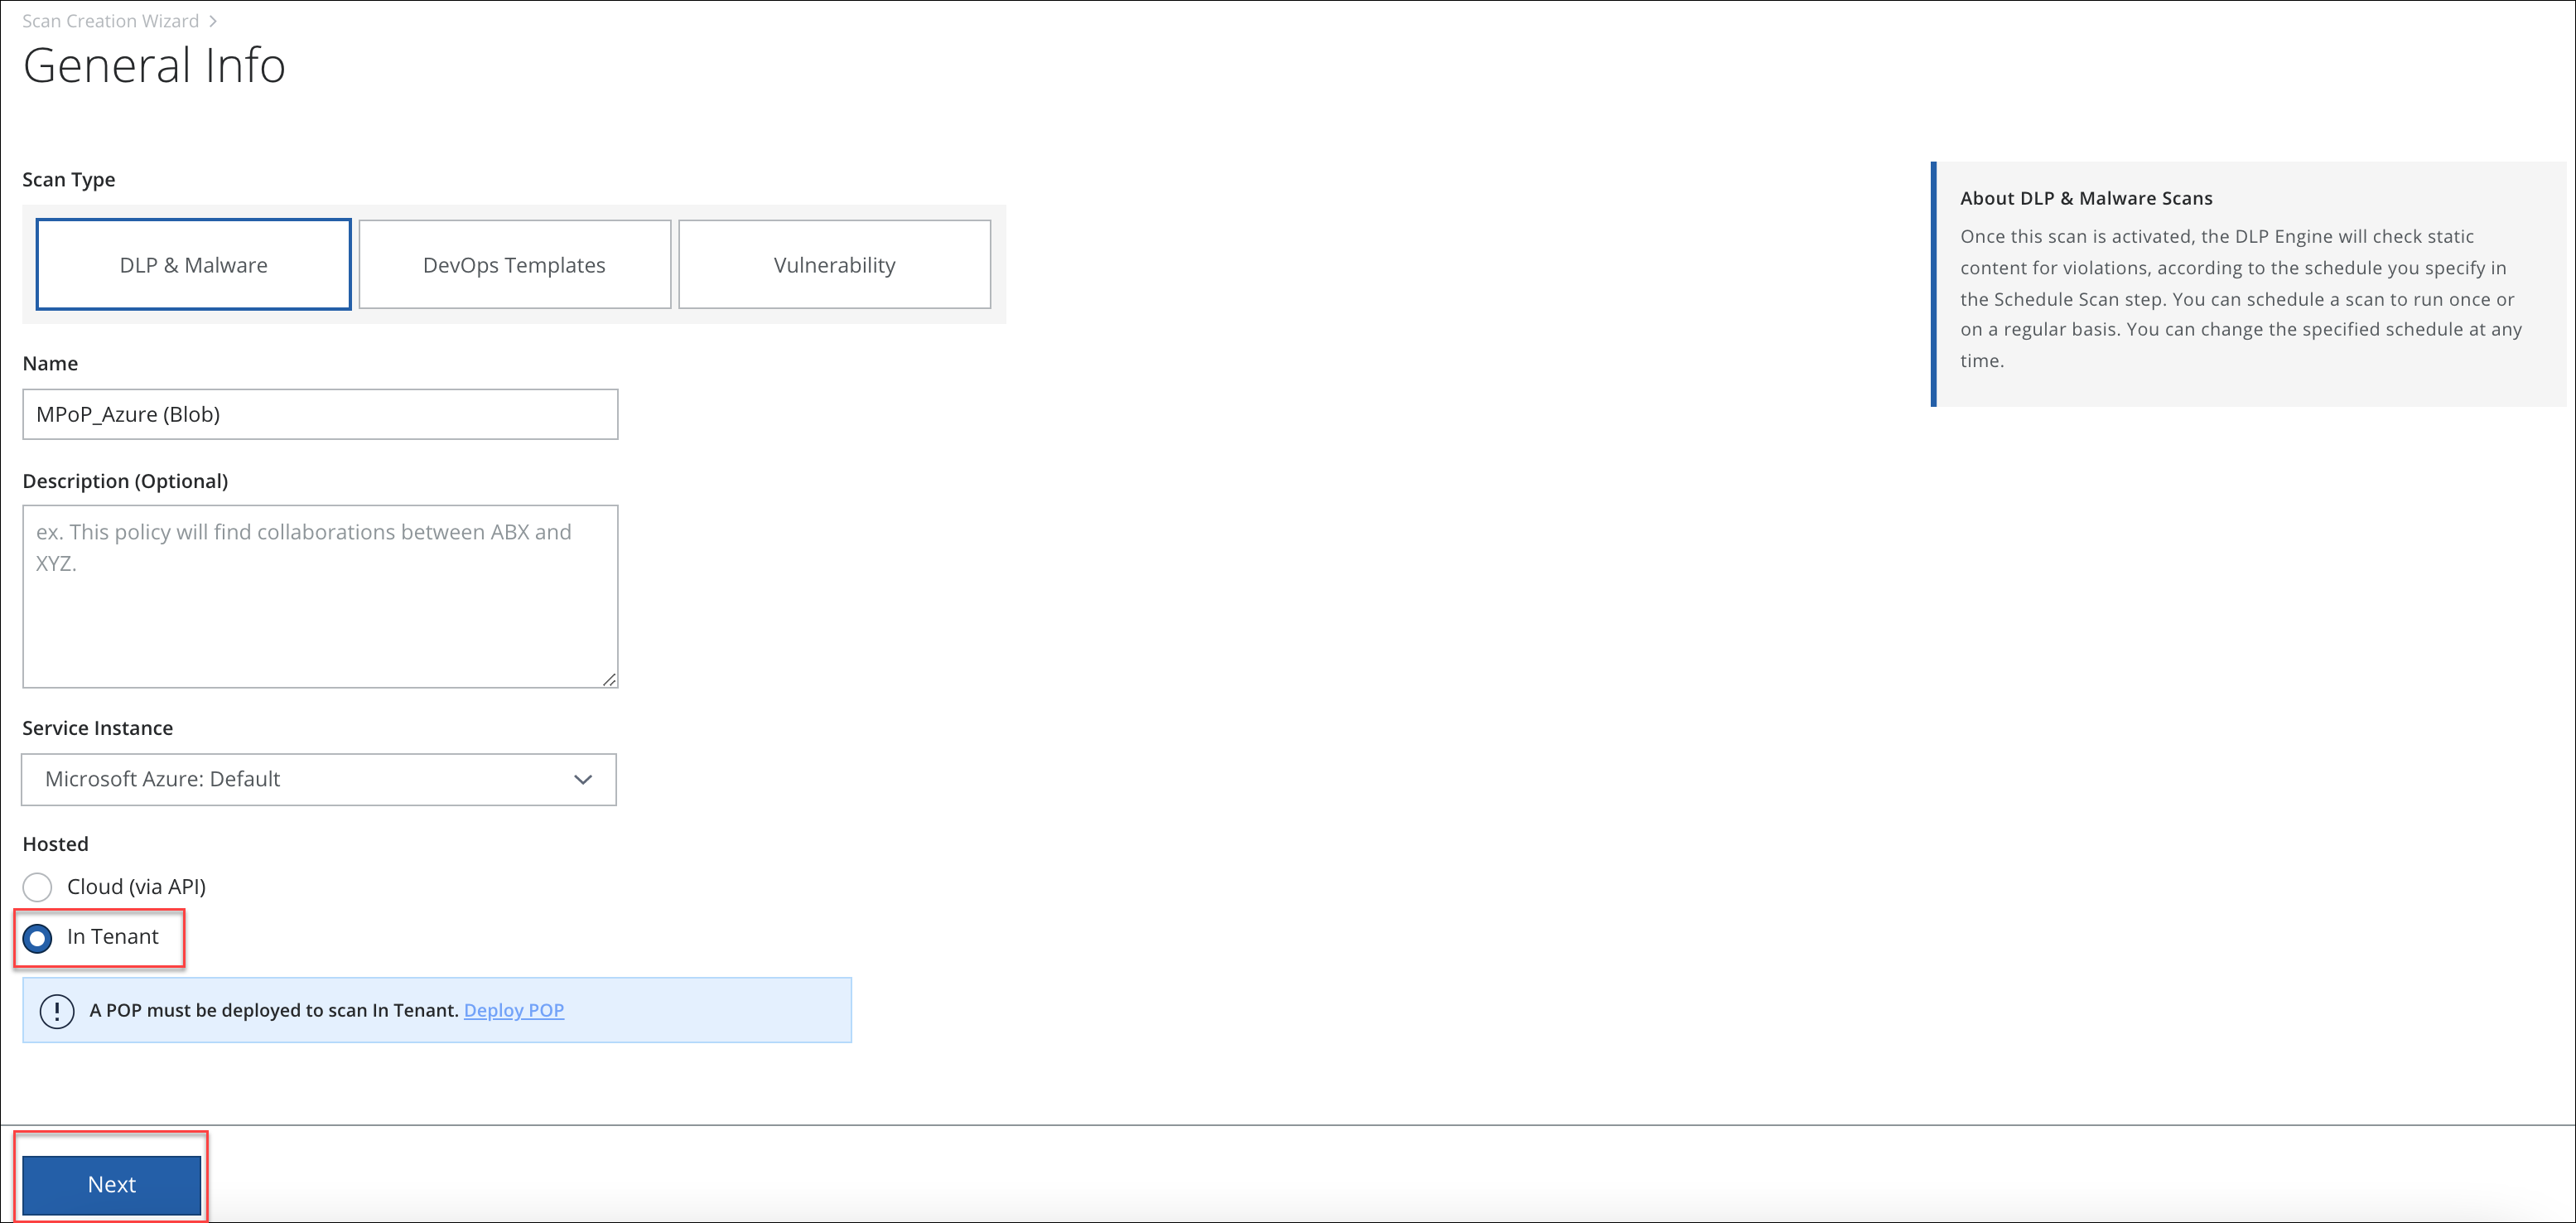
- Click Next.
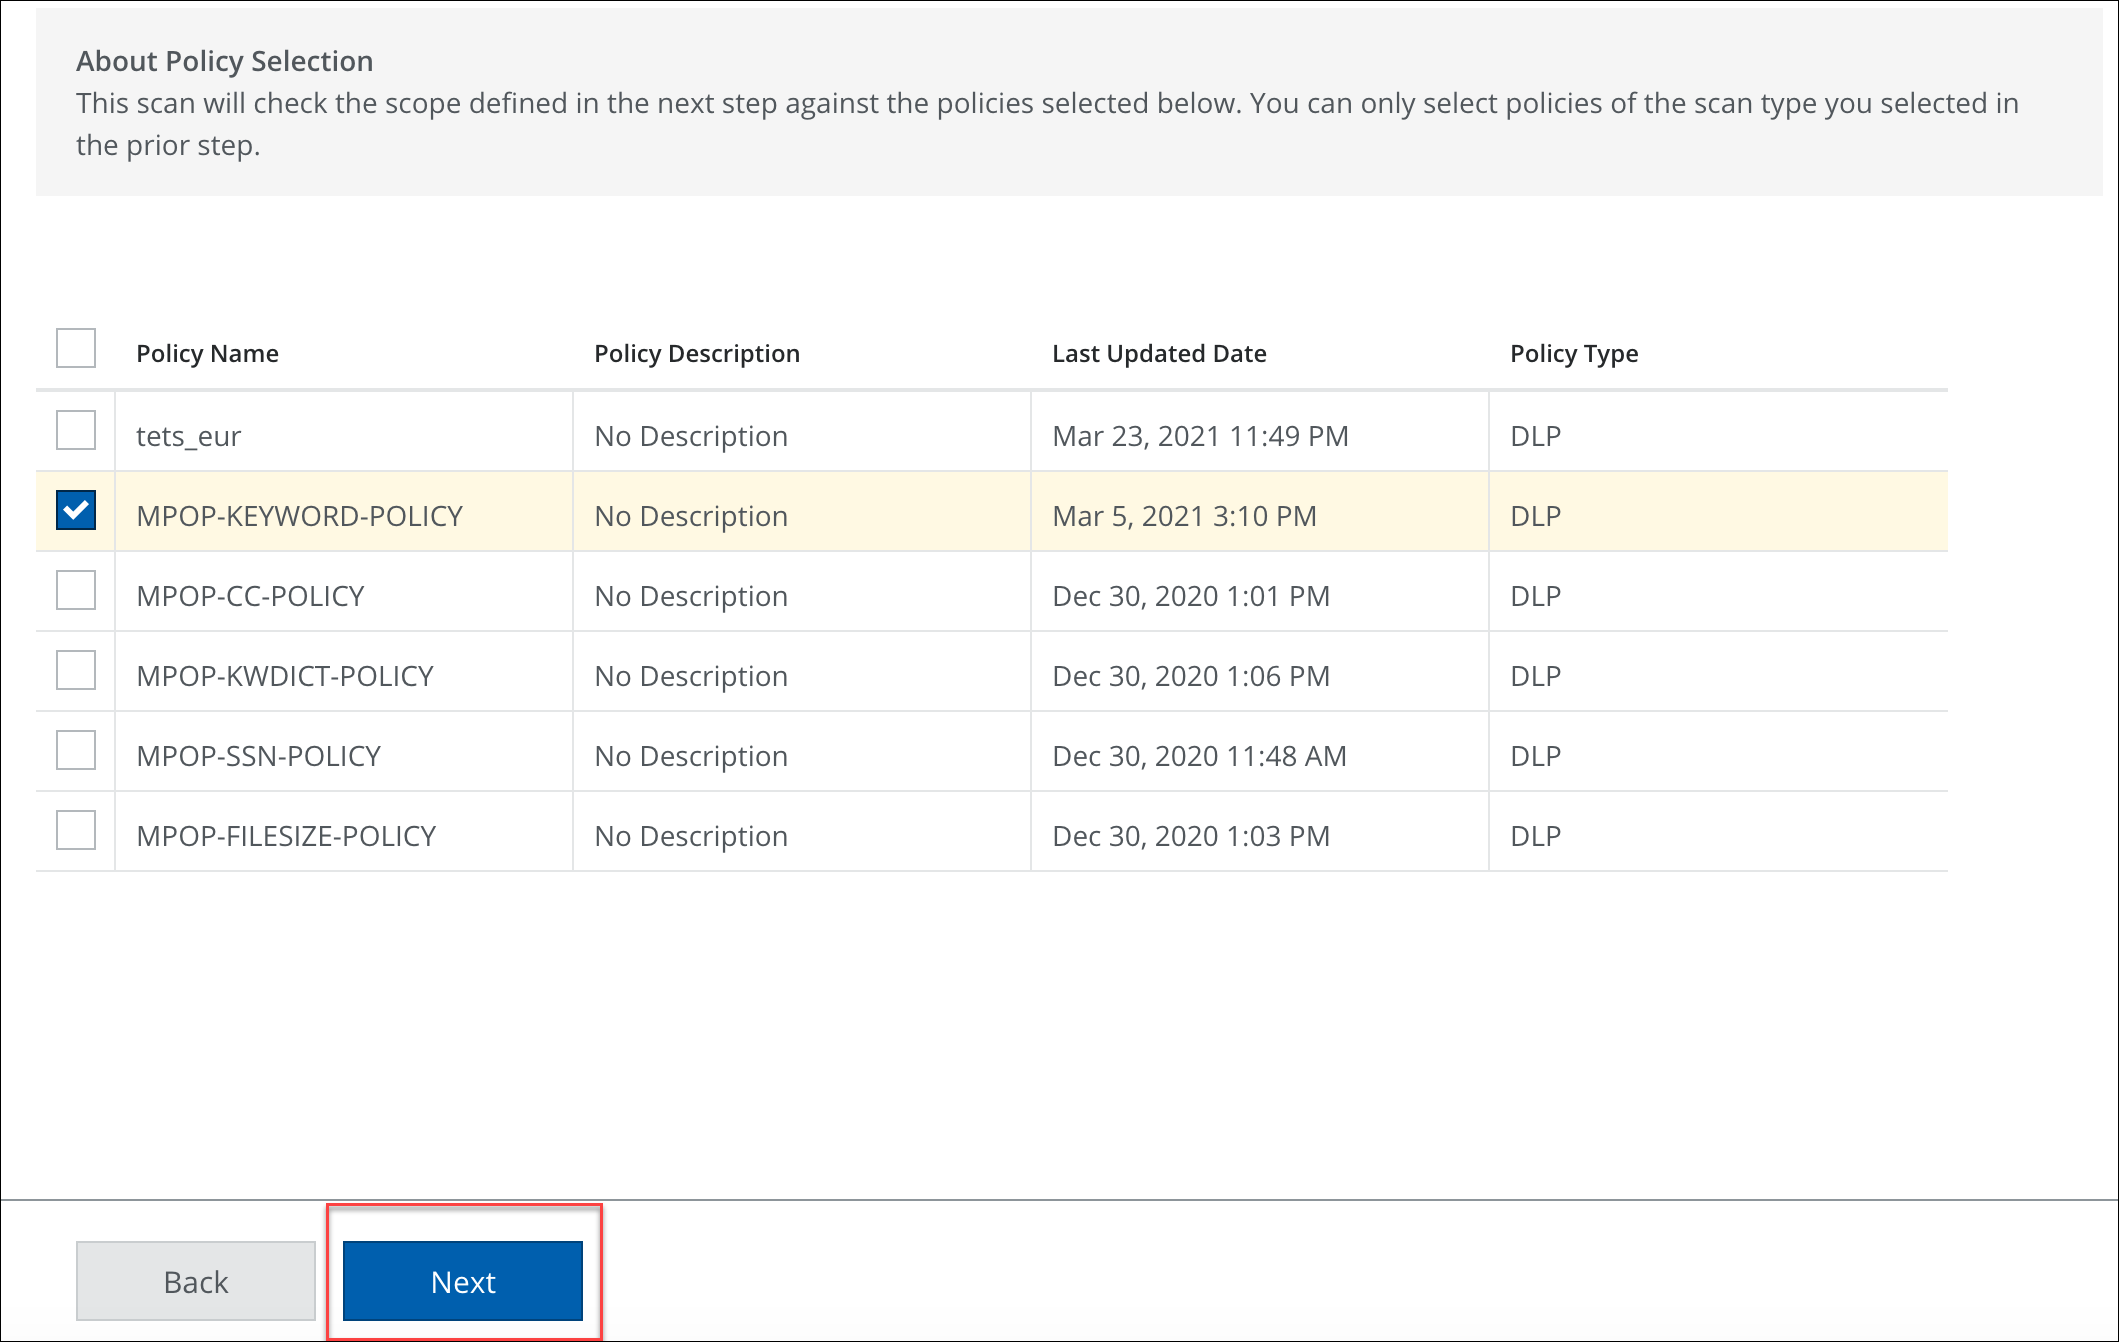
- The Select Policies page displays the active DLP policies supported for In VPC scans. Select the policies you want to use, and click Next.
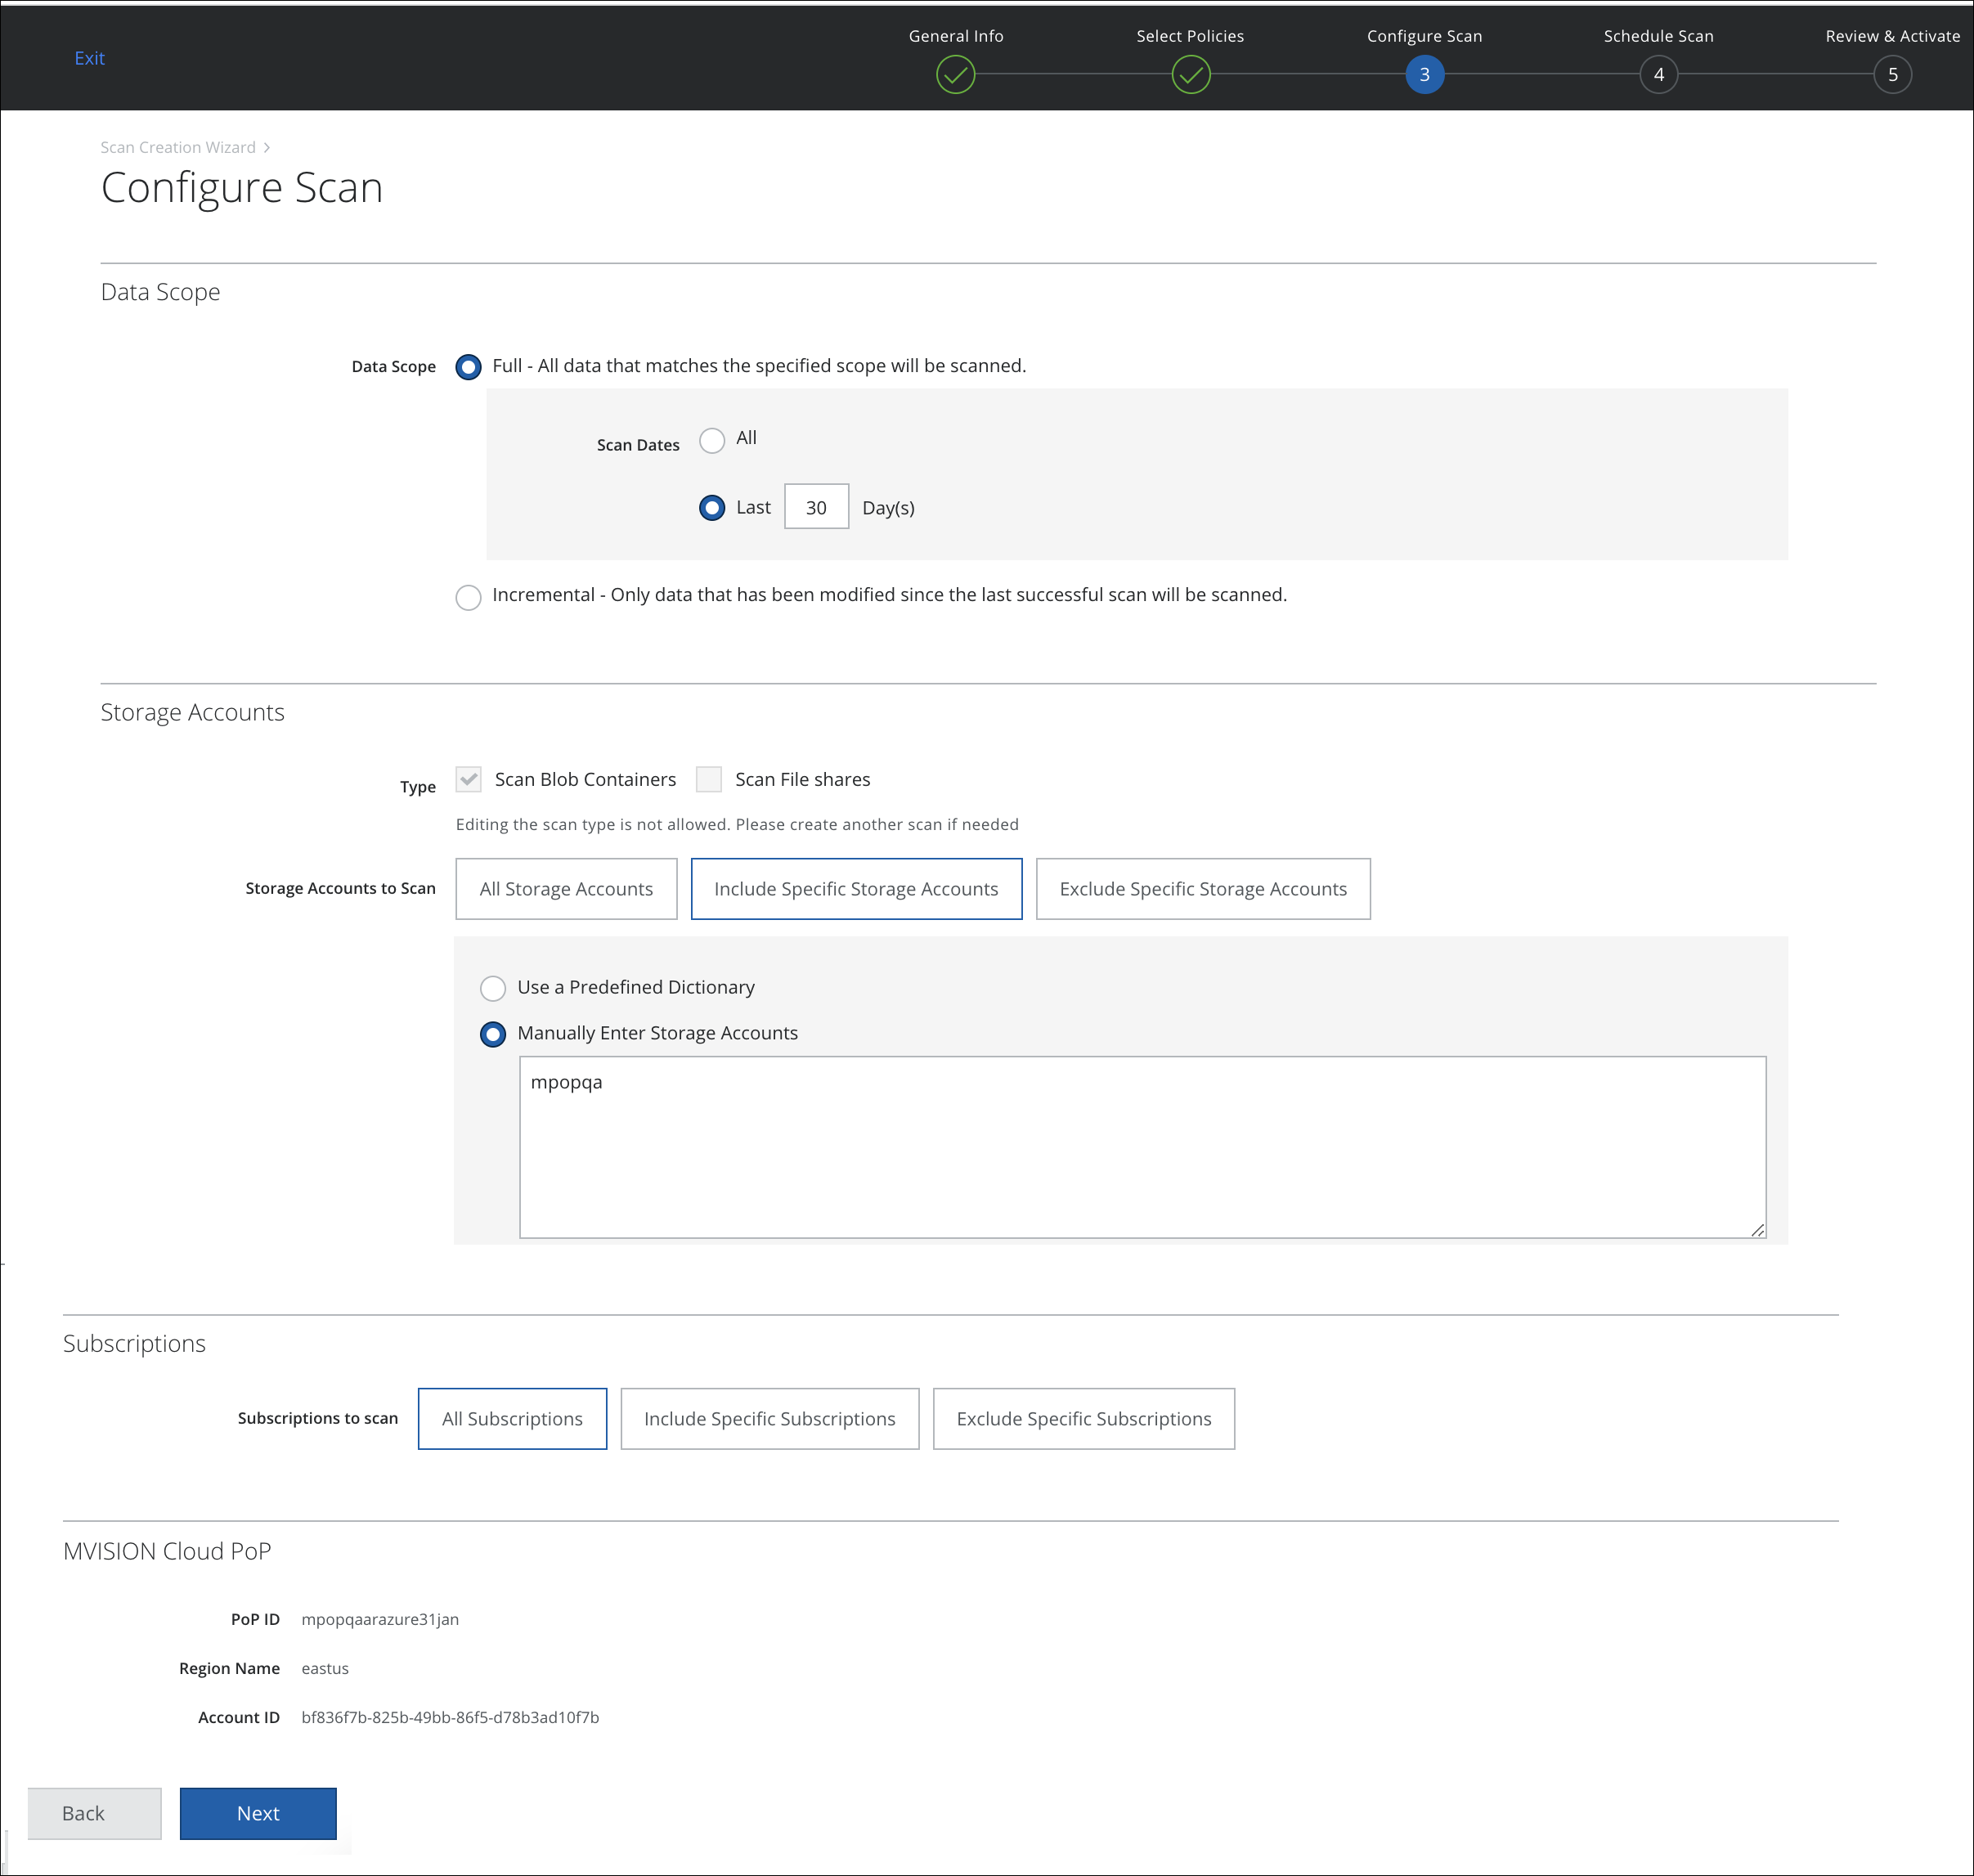
- In the Configure Scan screen, set the following:
- Data Scope. Choose one of the following:
- Full. Scans all content every time the scan is run.
- Incremental. Scan only content that has changed since the last successful scan.
- Scan Dates. Select All, to scan all data. Or select Last X Days to limit the scan to the specified time period.
- Storage Accounts:
- Type. Choose Scan Blob Containers or choose Scan File Shares, depending on the type of data you would like to scan.
- Storage Accounts to Scan. Choose one of the following:
- All Storage Accounts. Scan all storage accounts.
- Include Specific Storage Accounts. To include only specific storage accounts, select a Predefined Dictionary, or enter users manually enter in a comma-separated list, or you can use a wildcard (*) in the text box below.
- Exclude Specific Storage Accounts. To exclude only specific storage accounts, select a Predefined Dictionary, or enter users manually enter in a comma-separated list, or you can use a wildcard (*) in the text box below.
- Use a Predefined Dictionary. Select a Predefined Dictionary from the menu. For more information, see this topic.
- Manually Enter Buckets. Enter the buckets you want to scan in the box below.
- Subscriptions:
- All Subscriptions. Scan all subscriptions.
- Include Specific Subscriptions. To include only specific Azure subscriptions, or specify the users manually in a comma-separated list.
- Exclude Specific Subscriptions. To exclude only specific Azure subscriptions, or specify the user manually in a comma-separated list.
- For Skyhigh CASB PoP, click Select PoP, then choose an available pre-configured option from the side panel, and click Done.
- Data Scope. Choose one of the following:
NOTES:
- One or more subscriptions can be scanned. If existing On-Demand scans are updated to include specific subscriptions, they continue to provide an incremental scan and will not revert to a full scan.
- If you choose All Subscriptions, then new subscriptions are picked up automatically when they are added. If you chose specific subscriptions in the scan configuration, when new subscriptions are added, you will have to add them manually to the scan.
- Click Next.
- On the Schedule Scan page, select the schedule to run your scan and click Next:
- None (On-Demand Only). Run the scan once now.
- Daily. Run the scan once a day. Configure the time and time zone.
- Weekly. Run the scan once a week. Configure the day, time, and time zone.
- On the Review and Activate page, review your settings for the On-Demand Scan, and click Save. Click Back to make changes.