Create a Vulnerability Scan for Virtual Machines
Vulnerability Scans support scanning virtual machine hosts, including Amazon Elastic Compute Cloud (EC2), Azure Virtual Machines (VMs), and Google Cloud Platform (GCP) VM instances. You can also scan containers running on a VM for vulnerabilities. (This only identifies vulnerabilities that are introduced into the runtime containers in comparison to what is identified in the image.)
As part of the VM Instances selection, you can also scan Amazon EKS Kubernetes, Azure Kubernetes Service (AKS), and Google Kubernetes Engine (GKE) main and secondary nodes for vulnerabilities when you select VM instances. The main node is scanned by default, and you can add Tags to specify any secondary nodes.
Prerequisites
Prerequisites for AWS
The following minimum permissions are needed in the RoleARN policy JSON:
"ecr:GetAuthorizationToken",
"ecr:ListImages",
"ecr:BatchGetImage",
"ecr:DescribeImages",
"ecr:DescribeRepositories",
"ecr:GetRepositoryPolicy",
"ecr:BatchCheckLayerAvailability",
"ecr:GetDownloadUrlForLayer",
"ec2:DescribeRegions"
Any existing RoleARN policy can be modified and the corresponding RoleARN can be linked with CVS scans.
Prerequisites for Azure Container Registry (ACR)
For Vulnerability Scans to run, the following role is required:
- Reader
Configure a Vulnerability Scan for VMs
Perform the following activities to configure a Vulnerability Scan:
- Choose Policy > On-Demand Scan.
- Click Actions > Create a Scan.
- The Scan Creation Wizard is displayed. On the General Info page enter the following:
- Scan Type. Select Vulnerability.
- Name. Enter a unique identifier so that you can rerun the scan later.
- Description. Enter an optional description for the scan.
- Service Instance. Select the cloud service instance you want to scan.
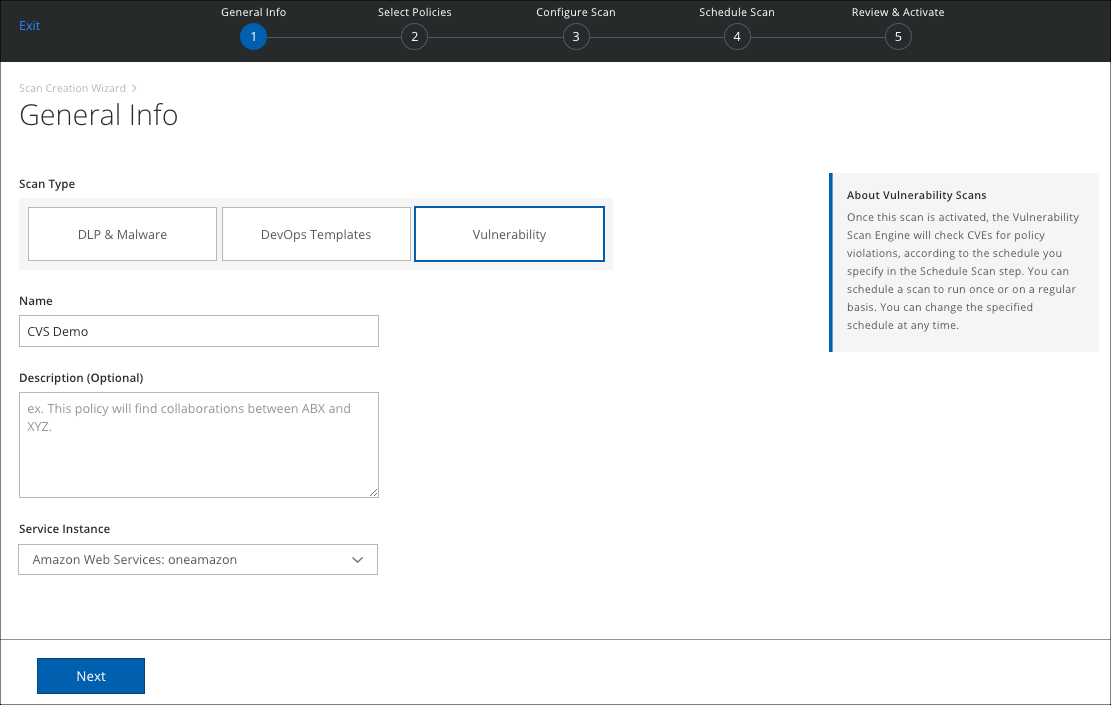
- Click Next.
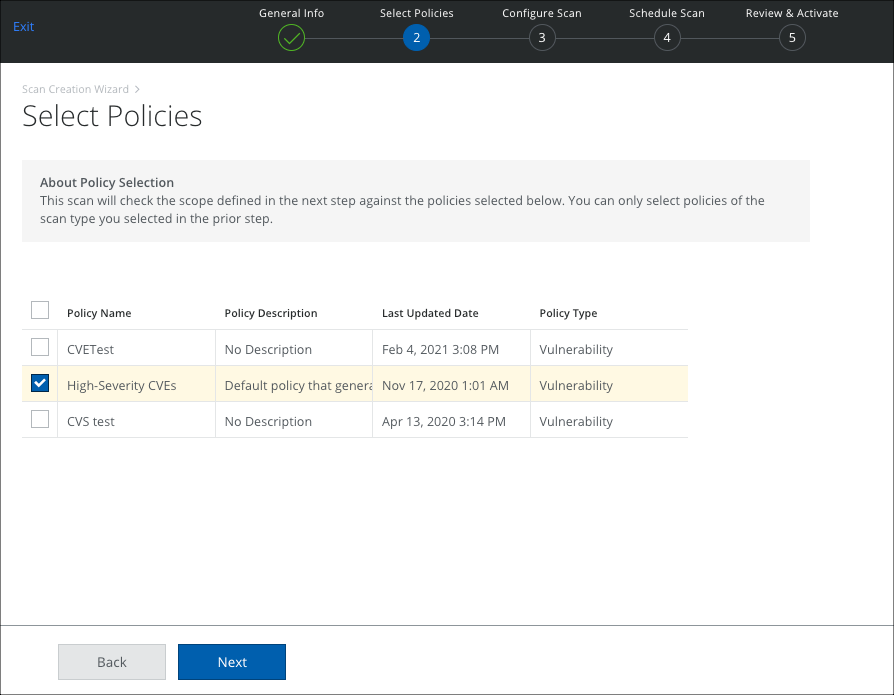
- The Select Policies page displays the active Vulnerability policies. Select the policies you want to use, and click Next.
- On the Configure Scan page, select VM Instances, and configure the scope of your scan.
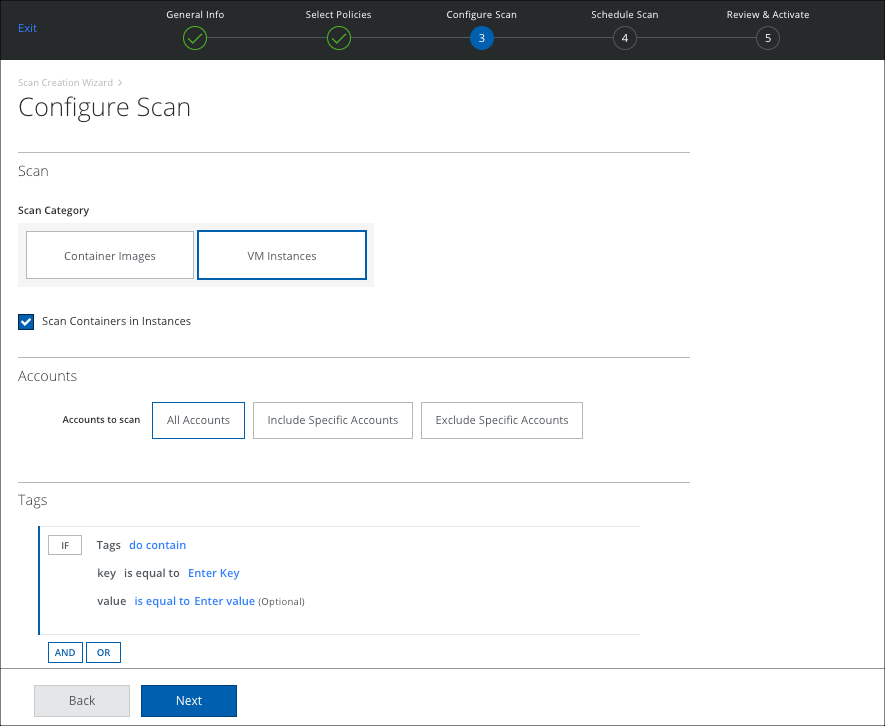
NOTE: You can scan Amazon EKS main and secondary nodes for vulnerabilities when you select VM instances. The main node is scanned by default, and you can add Tags to specify any secondary nodes.
- Scan Containers in Instances. Select to also scan containers within a VM for vulnerabilities. This only identifies vulnerabilities that are introduced into the runtime containers in comparison to what is identified in the image.
- Accounts:
- All Accounts. Scan all accounts.
- Include Specific Accounts. To include only specific accounts, click Edit and select the applicable Account checkbox.
- Exclude Specific Accounts. To exclude only specific accounts, click Edit and select the applicable Account checkbox.
- Tags. Select any tags you want to use for your rule, and enter the key-value pair.
- Click Next.
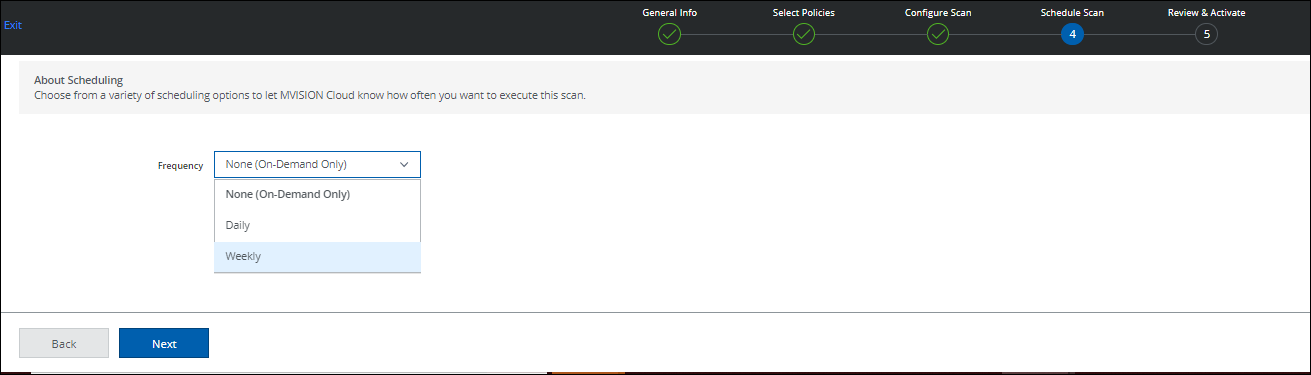
- On the Schedule Scan page, select the schedule to run your scan and click Next:
- None (On-Demand Only). Run the scan once now.
- Daily. Run the scan once a day. Configure the time and time zone.
- Weekly. Run the scan once a week. Configure the day, time, and time zone.
- On the Review and Activate page, review your settings for the On-Demand Scan, and click Save. Click Back to make changes.
When a scan is complete, you can view the results or return to scan on the Policy > On-Demand Scan page.
You can view policy incident violations on the Policy > Policy Incidents page. Filter for Incident Type > Vulnerability Violation.