Create a Classification for a Location in a Word or PowerPoint File
You can create a custom classification to detect sensitive keywords found in the header and/or footer of Word or PowerPoint files. Then, use this classification in your data loss policies to protect sensitive data sent outside your organization.
NOTES:
- To create this classification, you must select the Location in File and File Extension conditions in the Classification editor.
- The Location in File condition is enabled in the Classifications editor only when you select the match condition as Dictionary, Advanced Pattern, or Keyword.
To create a classification for content in Word or PowerPoint:
- Log In to Skyhigh CASB.
- Select Policy > DLP Policies > Classifications.
- Under Actions, click Create Classification.
- Classification Name. Enter a name for this classification. For example, Top Secret Classification. Enter an optional description to describe its use or purpose.
- Category. Select a Category from the list. For this example, select Sensitive.
- Conditions. For IF, select Dictionary. The Select Dictionaries cloud card displays.
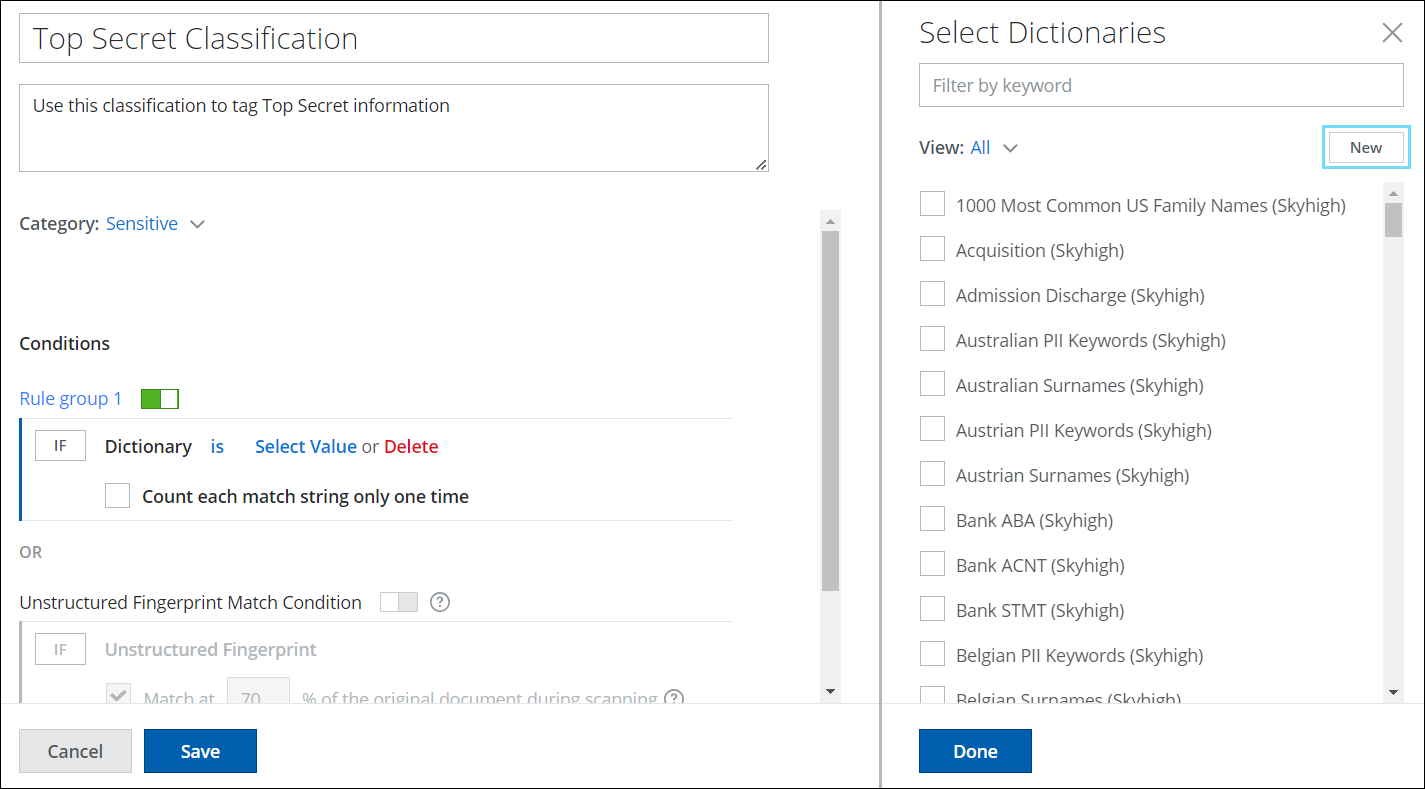
- To create a custom dictionary with the keywords to detect as classified information, click New. The Dictionary cloud card opens.
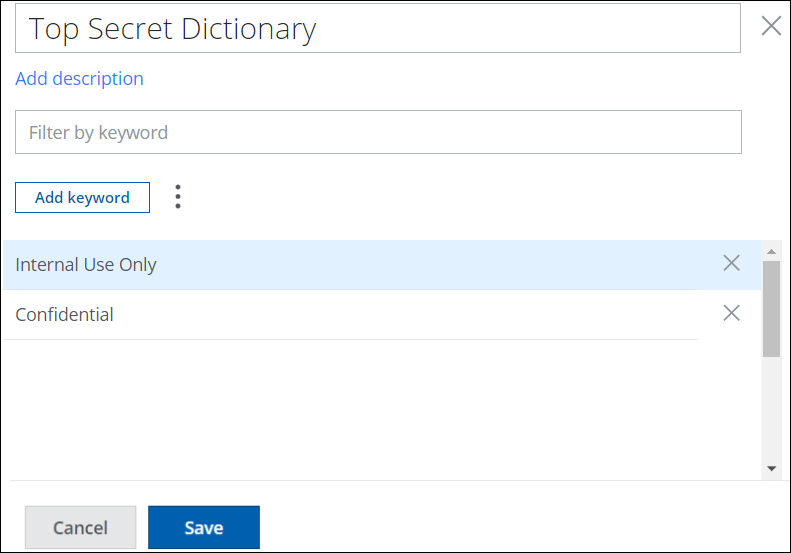
- Name and Description. Enter a name and optional description for the dictionary. For example, Top Secret Dictionary.
- Click Add to enter keywords into your dictionary. For example, Confidential, and Internal use only.
- Click Save. The dictionary Top Secret is added to the dictionary list.
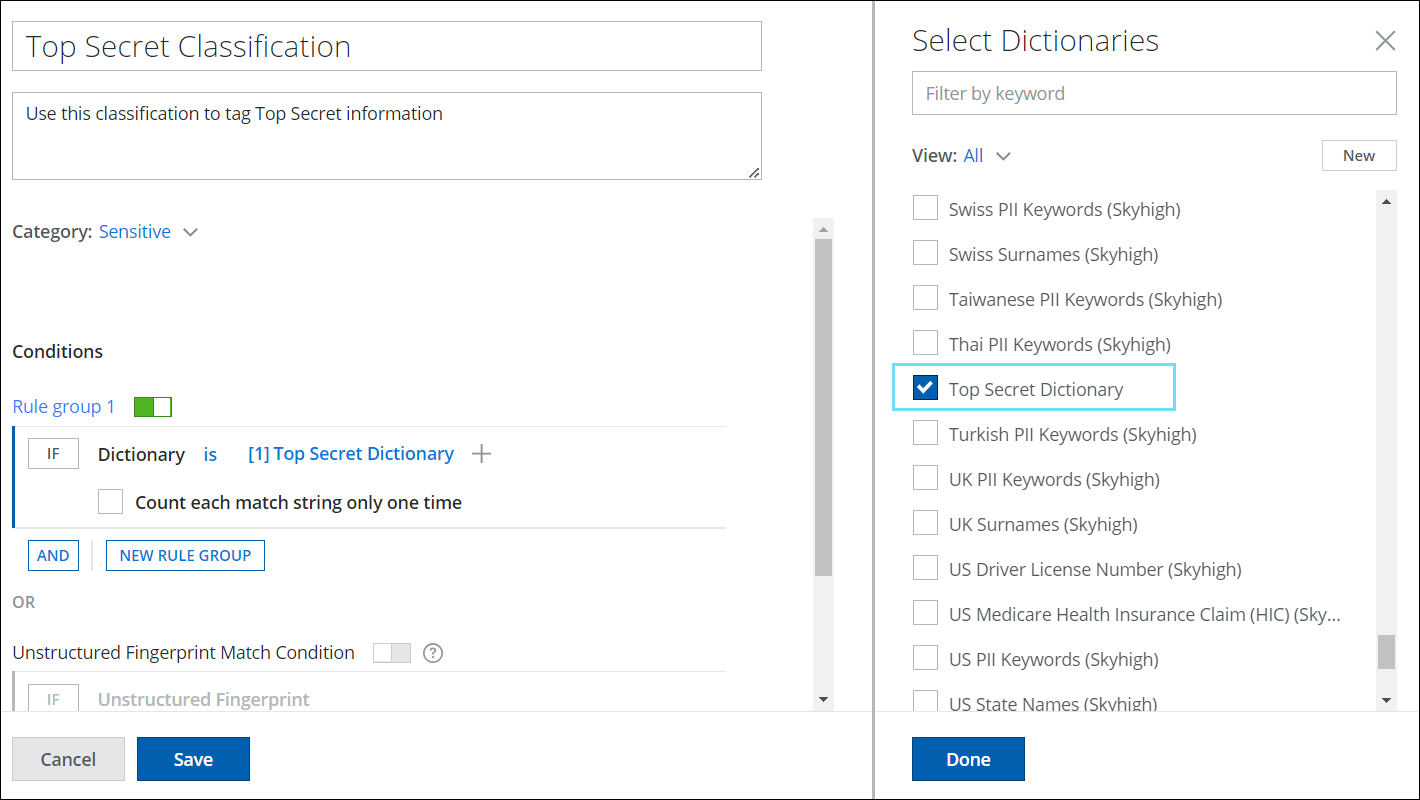
- From the Select Dictionaries cloud card, search and select the Top Secret Dictionary and click Done.
The Top Secret Dictionary is added to your classification criteria. Leave the default score as [1].
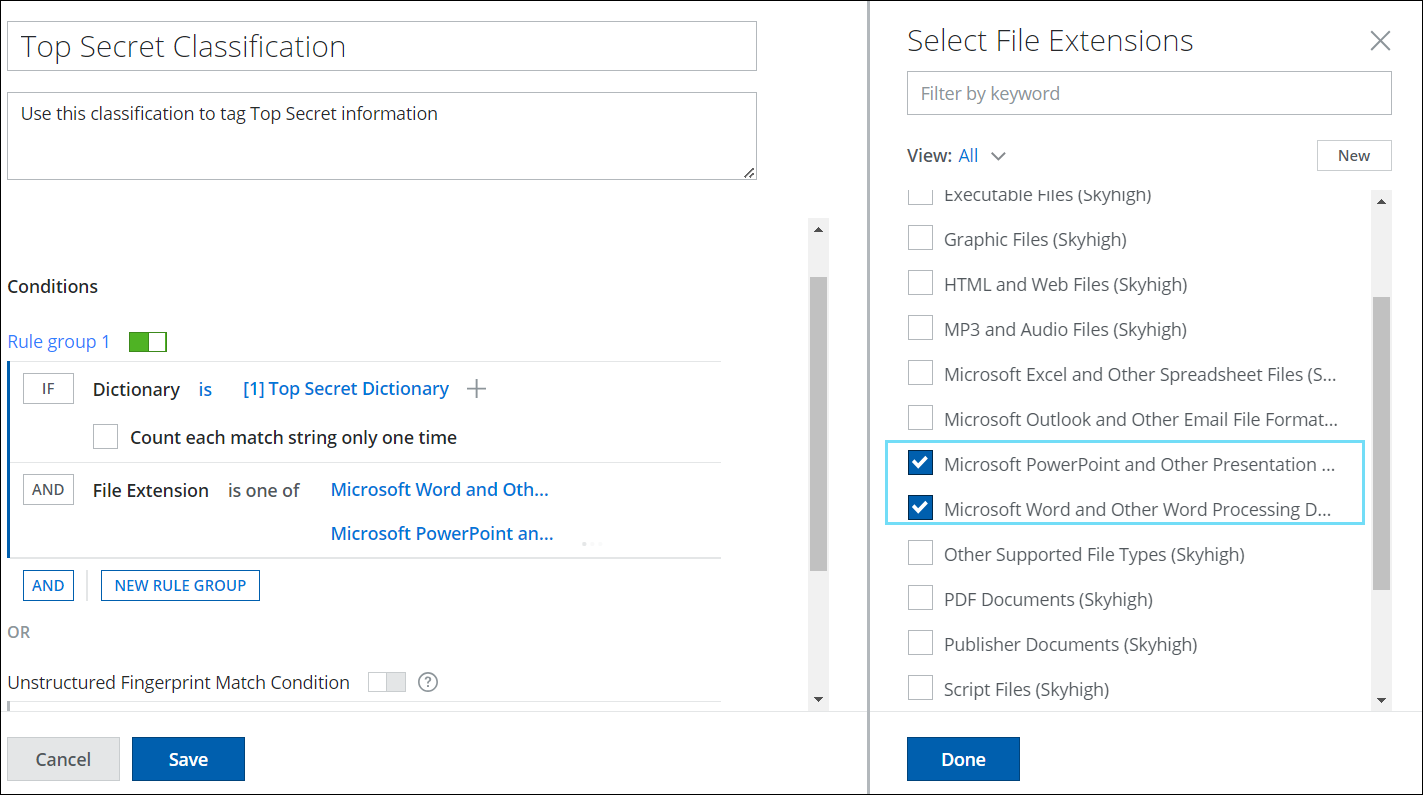
- On the Classification editor, click AND and select File Extensions.
- From the Select File Extensions list, select Microsoft Word and Microsoft PowerPoint. You can click a file extension name to view its details.
- Click AND and select Location in File. Choose Header and Footer.
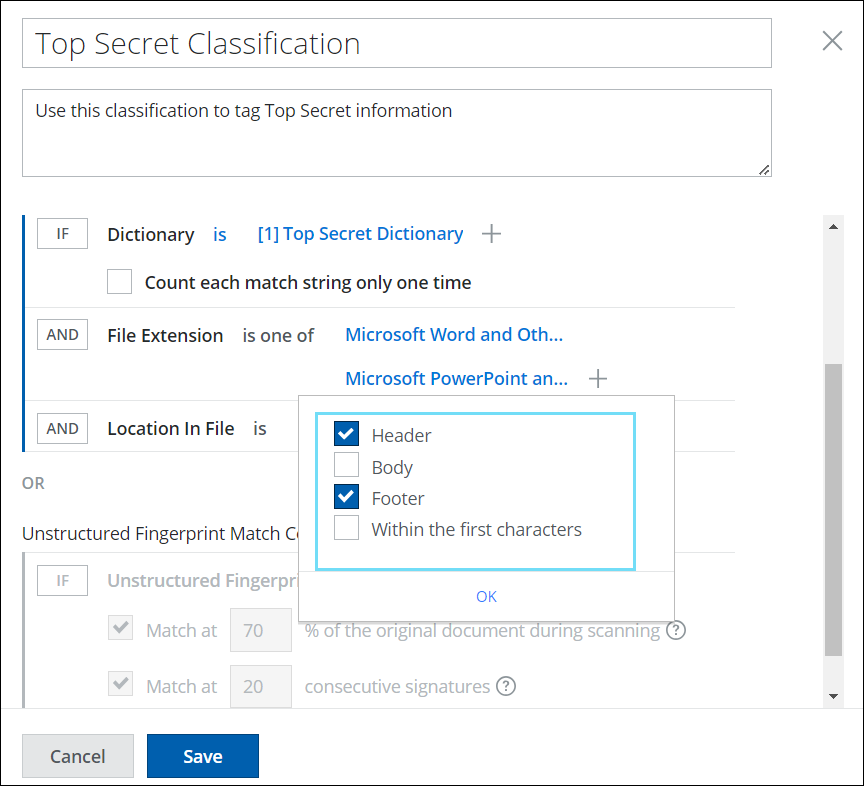
- Click OK.
- Click Save.
Your new Classification is saved to the selected category in the Classifications page. Add the classification to your data loss prevention policies as needed.