Configure a Per-App VPN for iOS
NOTE: The partner name formerly known as Airwatch is now VMware Workspace ONE UEM. So, this topic has been updated with relevant information. However, the screenshots still refer to Airwatch, which will be updated in future releases.
Log in to the VMware Workspace ONE UEM MDM Portal
- Login to the admin portal of VMware Workspace ONE UEM MDM to push the VPN profile to your iPhone profile.
You will be logged in to the admin portal of VMware Workspace ONE UEM .
**Before you proceed further, make sure to integrate your respective PKI infrastructure with VMware Workspace ONE UEM for managing your device certificate(s).
Adding a Device Certificate and server certificate in the device through MDM.
- Go to Devices → Profiles → Add → Add Profile → Apple iOS.
- Give a name to 'General' and complete respective fields.
- Select 'Deployment' type
- Managed: To automatically download those profiles in the device.
- Manual: To manually download this profile in the device. To download manually , user will get a notification in the 'Hub' app and clicking on this notification will redirect to messages screen of the app. From that screen user can select any of the messages and download the profiles which are available.
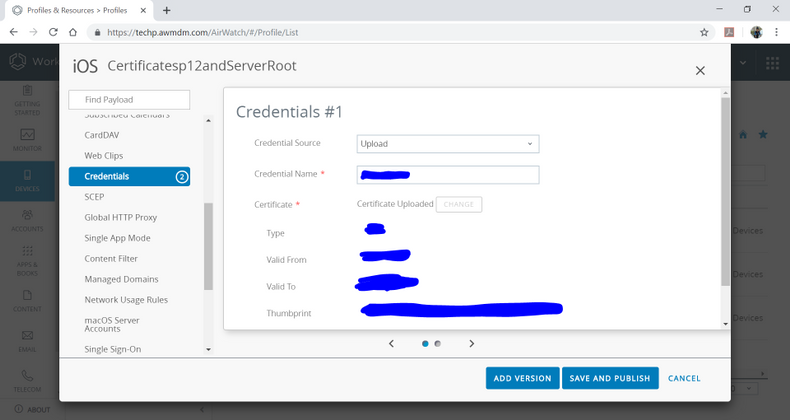
- Now select a profile, 'Credentials' to add device certificate and server certificate to your device.You can add multiple certificates in a single profile. Click on the (+) button to add or (-) to delete.
Add a VPN profile to the Device
- Go to Devices → Profiles → Add → Add Profile → Apple iOS.
- Give a name to 'General' and complete the respective fields.
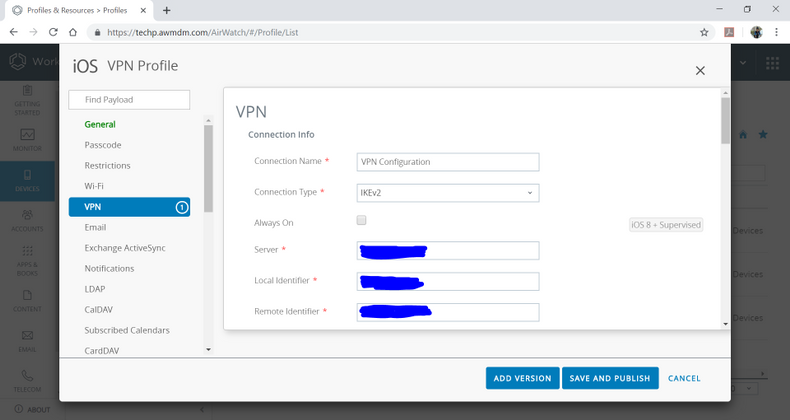
- Select a profile of ' VPN' and click on 'Configure '. These are the configurations need to setup for VPN profile.
Connection Information
| Fields | Values |
|---|---|
| Connection Name* | VPN Configuration |
| Connection Type* | IKEv2 |
| Always On | False (Make it false, otherwise device will be in supervised mode) |
| Server* |
c<customer ID>.smcs.skyhigh.cloud The following information is required to configure an SMCS app in the MDM of your choice. VPN gateway address: c<customer ID>.smcs.skyhigh.cloud |
| Local Identifier* |
Client_Key1 (This string is CN(Common Name) and SAN-(Subject Alternate Name) of client certificate |
| Remote Identifier* |
vpn.skyhigh.cloud (This string is CN(Common Name) and SAN-(Subject Alternate Name) of server certificate |
| Machine Authentication |
Certificate (select 'certificate' here) |
| Credential |
Certificate #1 (if there is no certificate, please follow #3.1 Step ) |
| Server Certificate Issuer Common Name |
VPN Server Root CA (This string is CN-Common Name of server root certificate) |
| Server Certificate Common Name |
vpn.skyhigh.cloud (This string is CN-Common Name of server root certificate) |
| Enable EAP | True |
| EAP Authentication |
Certificate (select 'certificate' here) |
| TLS Minimum Version iOS 11 | OS Default |
| TLS Maximum Version iOS 11 | OS Default |
| Credential |
Certificate #1 (Select the same 'Certificate' which added in 'Credentials') |
| Dead Peer Detection Interval | Every 10 minutes |
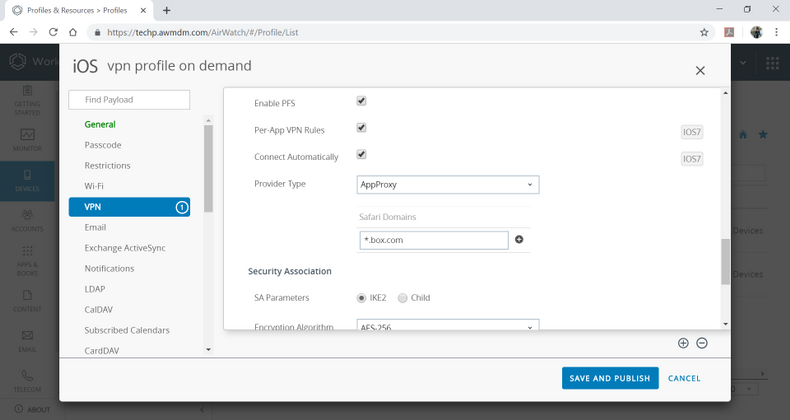
| SA Parameters IKE2 & Child |
Encryption Algorithm AES-256 Integrity Algorithm SHA2-256 Diffie Hellman Group 2 Lifetime in minutes 1440 |
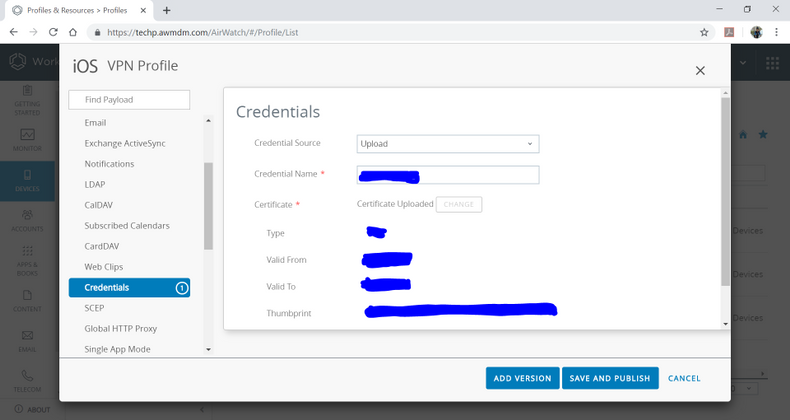
Add Your Credentials
- Select 'Credentials' from the same profile. (you may have to scroll down the menu on the right)
- Click on 'Configure' to add new credentials.
- Add your Device certificate file.
Save and Publish
- Click Save and Publish to save the profile.
- Click Publish to publish the profile.
- Respective devices will get updated with the published profile.
- To see this VPN Profile in your iOS device, go to Settings→VPN→PER-APP VPN. You can view your PER-APP and the VPN Profile.
Push an App to use the Profile
VPN Profile of Per-App VPN is created. You can push an application that will use this VPN configuration.
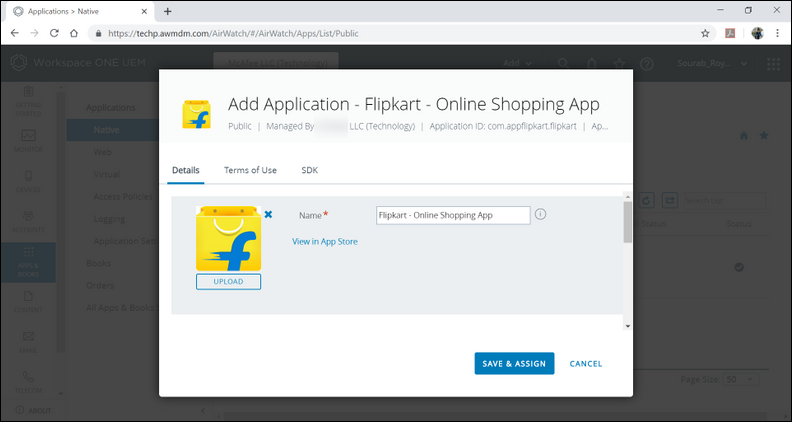
- Go to APPS & BOOKS → Applications → Native → Select Public tab → Add Application.
- Select following options:
- Platform Apple iOS
- Source SEARCH APP STORE
- Name (app will be searched in app store and would be installed in the iOS device) Flipkart.
- Click Next to search in App Store.
- Click Select to select an application.

- Click SAVE & ASSIGN.
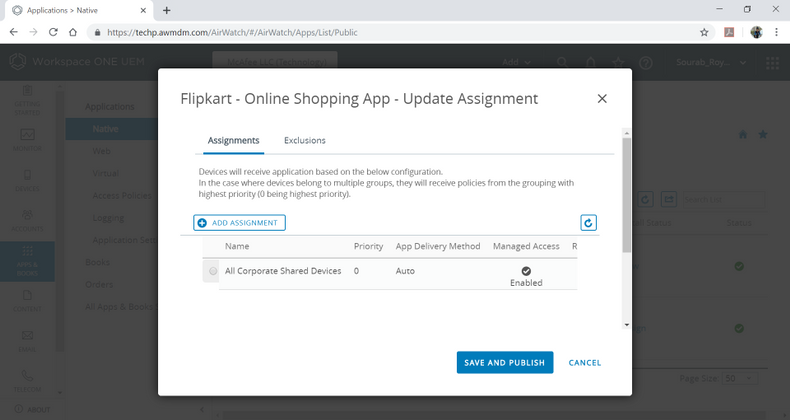
Add Assignments
- Select the Assignments tab.
- Click ADD ASSIGNMENT.
- Select respective settings to Add Assignments.
- Select Assignment Groups All Corporate Shared Devices.
Select Application Delivery Method
AUTO - App will be automatically installed in the device, no need to install the app from App store explicitly.
ON DEMAND- App needs to be installed manually from the notification of iOS 'HUB' application.
- Managed Access: ENABLED
- Remove On Unenroll: ENABLED
- Prevent Application Backup: ENABLED
- Make App MDM Managed if User Installed: ENABLED
- App Tunneling: ENABLED
- Per-App VPN Profile (Select the VPN Profile you have recently created in Resource section): VPN_APPLE
- Application Configuration: DISABLED
- Click Add to add the profile.

- Save and Publish to save and publish the profile.
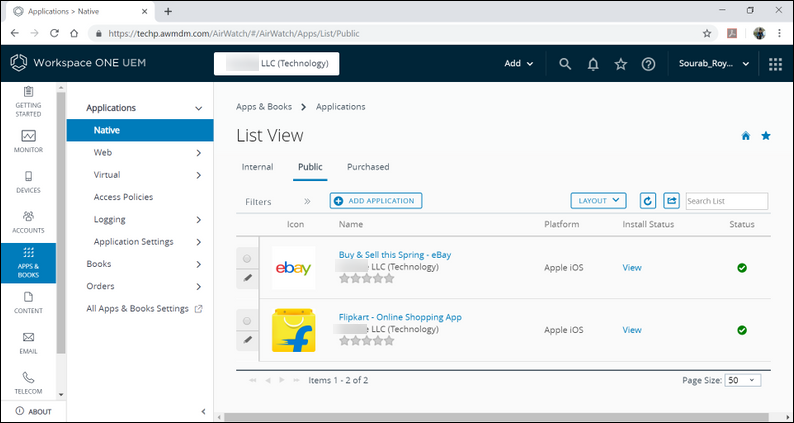
After publishing the changes, the list will look like this.
Now one notification will be fired in the iOS Device. Click Install in that notification to automatically install the application. Else, you can go to App Store and install the application on your iOS Device.