About the Skyhigh CASB Key Agent
The Skyhigh CASB Key Agent allows you to manage encryption through the Skyhigh CASB proxy while maintaining ownership of your own encryption keys. Managing your own keys gives you greater control and security over who can view your data.
Once installed, the Skyhigh CASB Key Agent requires no maintenance or configuration; just point it to your existing Hardware Security Module and the Key Agent will use your managed keys to protect your data in the cloud.
This procedure describes how to create encryption keys with attributes in the Vormetric Key Server.
Step 1: Create a Key Template
Create a key template to hold the attributes.
To create a Key Template:
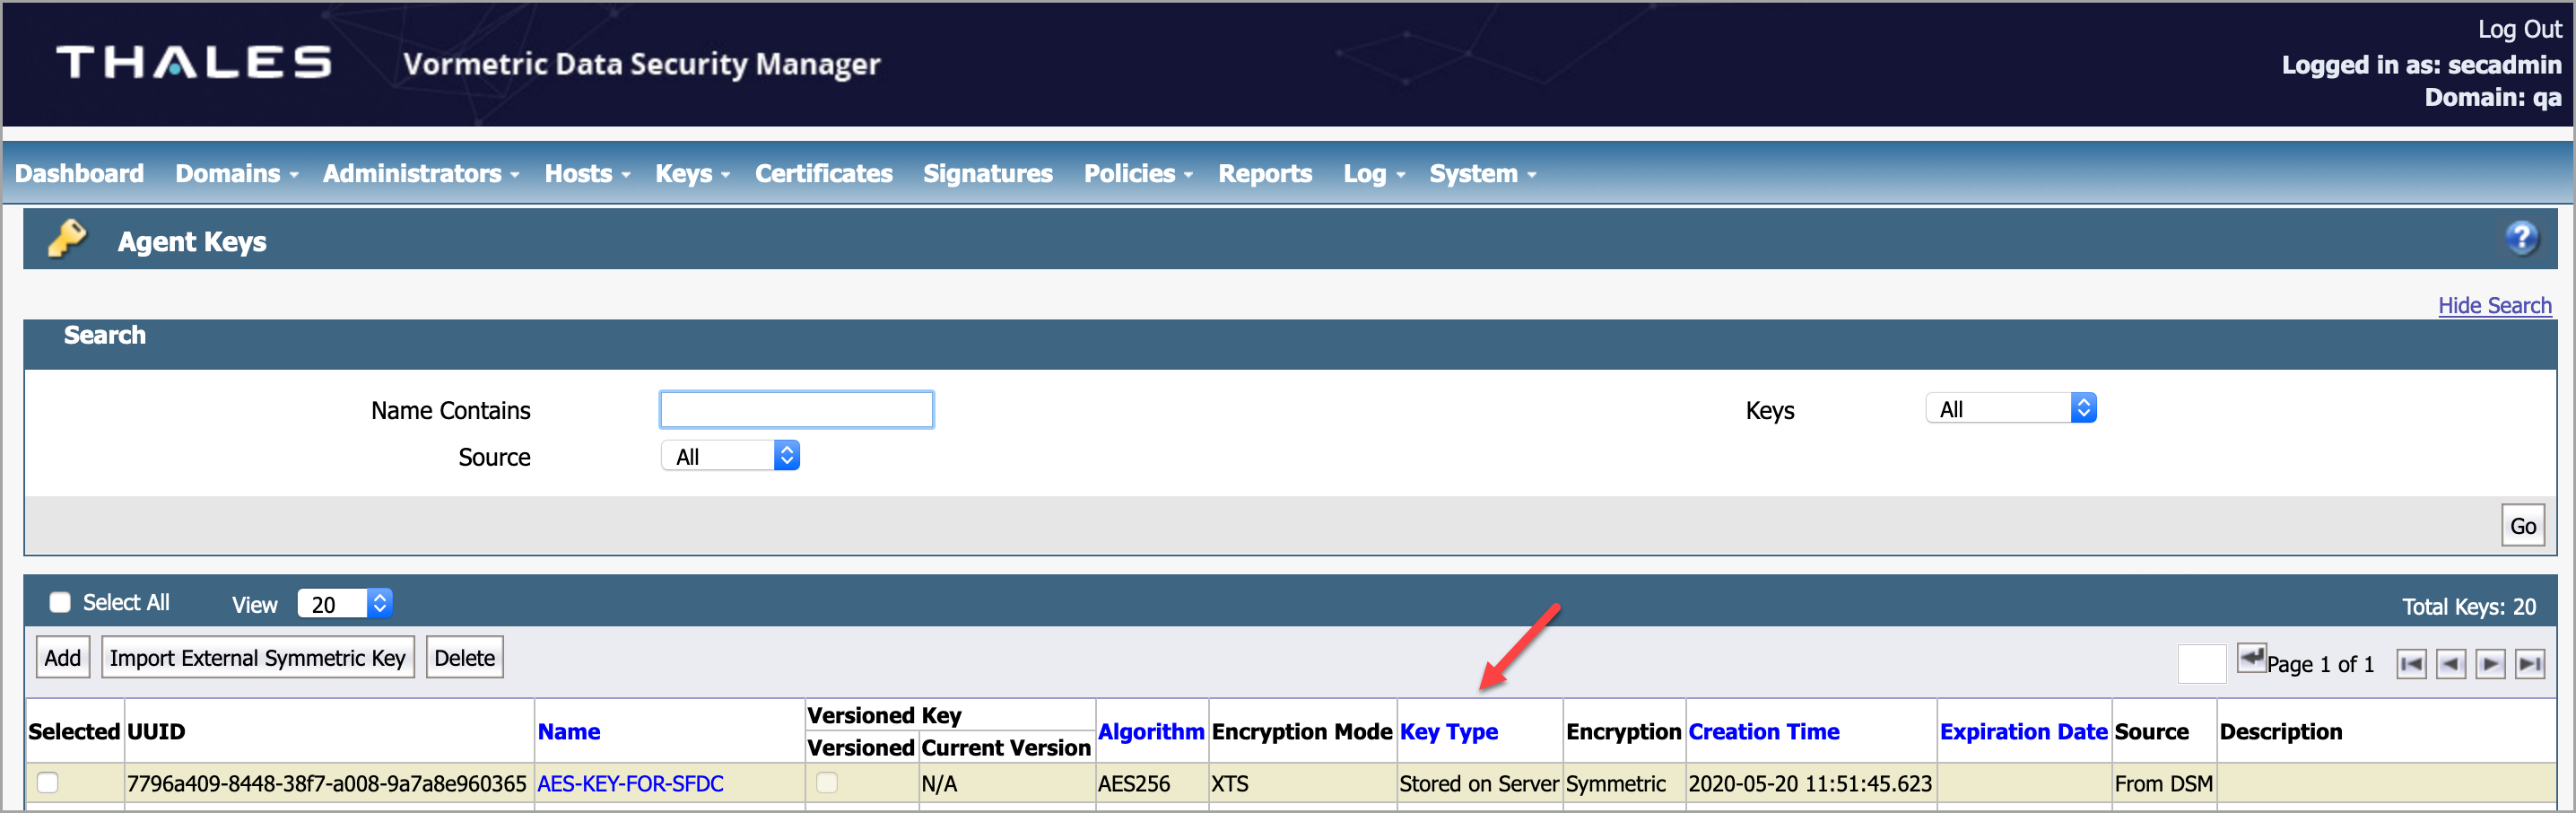
- Log in to the Vormetric Data Security Manager (DSM) application as an admin.
- Go to the desired domain and go to Keys > Key Templates.

- Click Add.
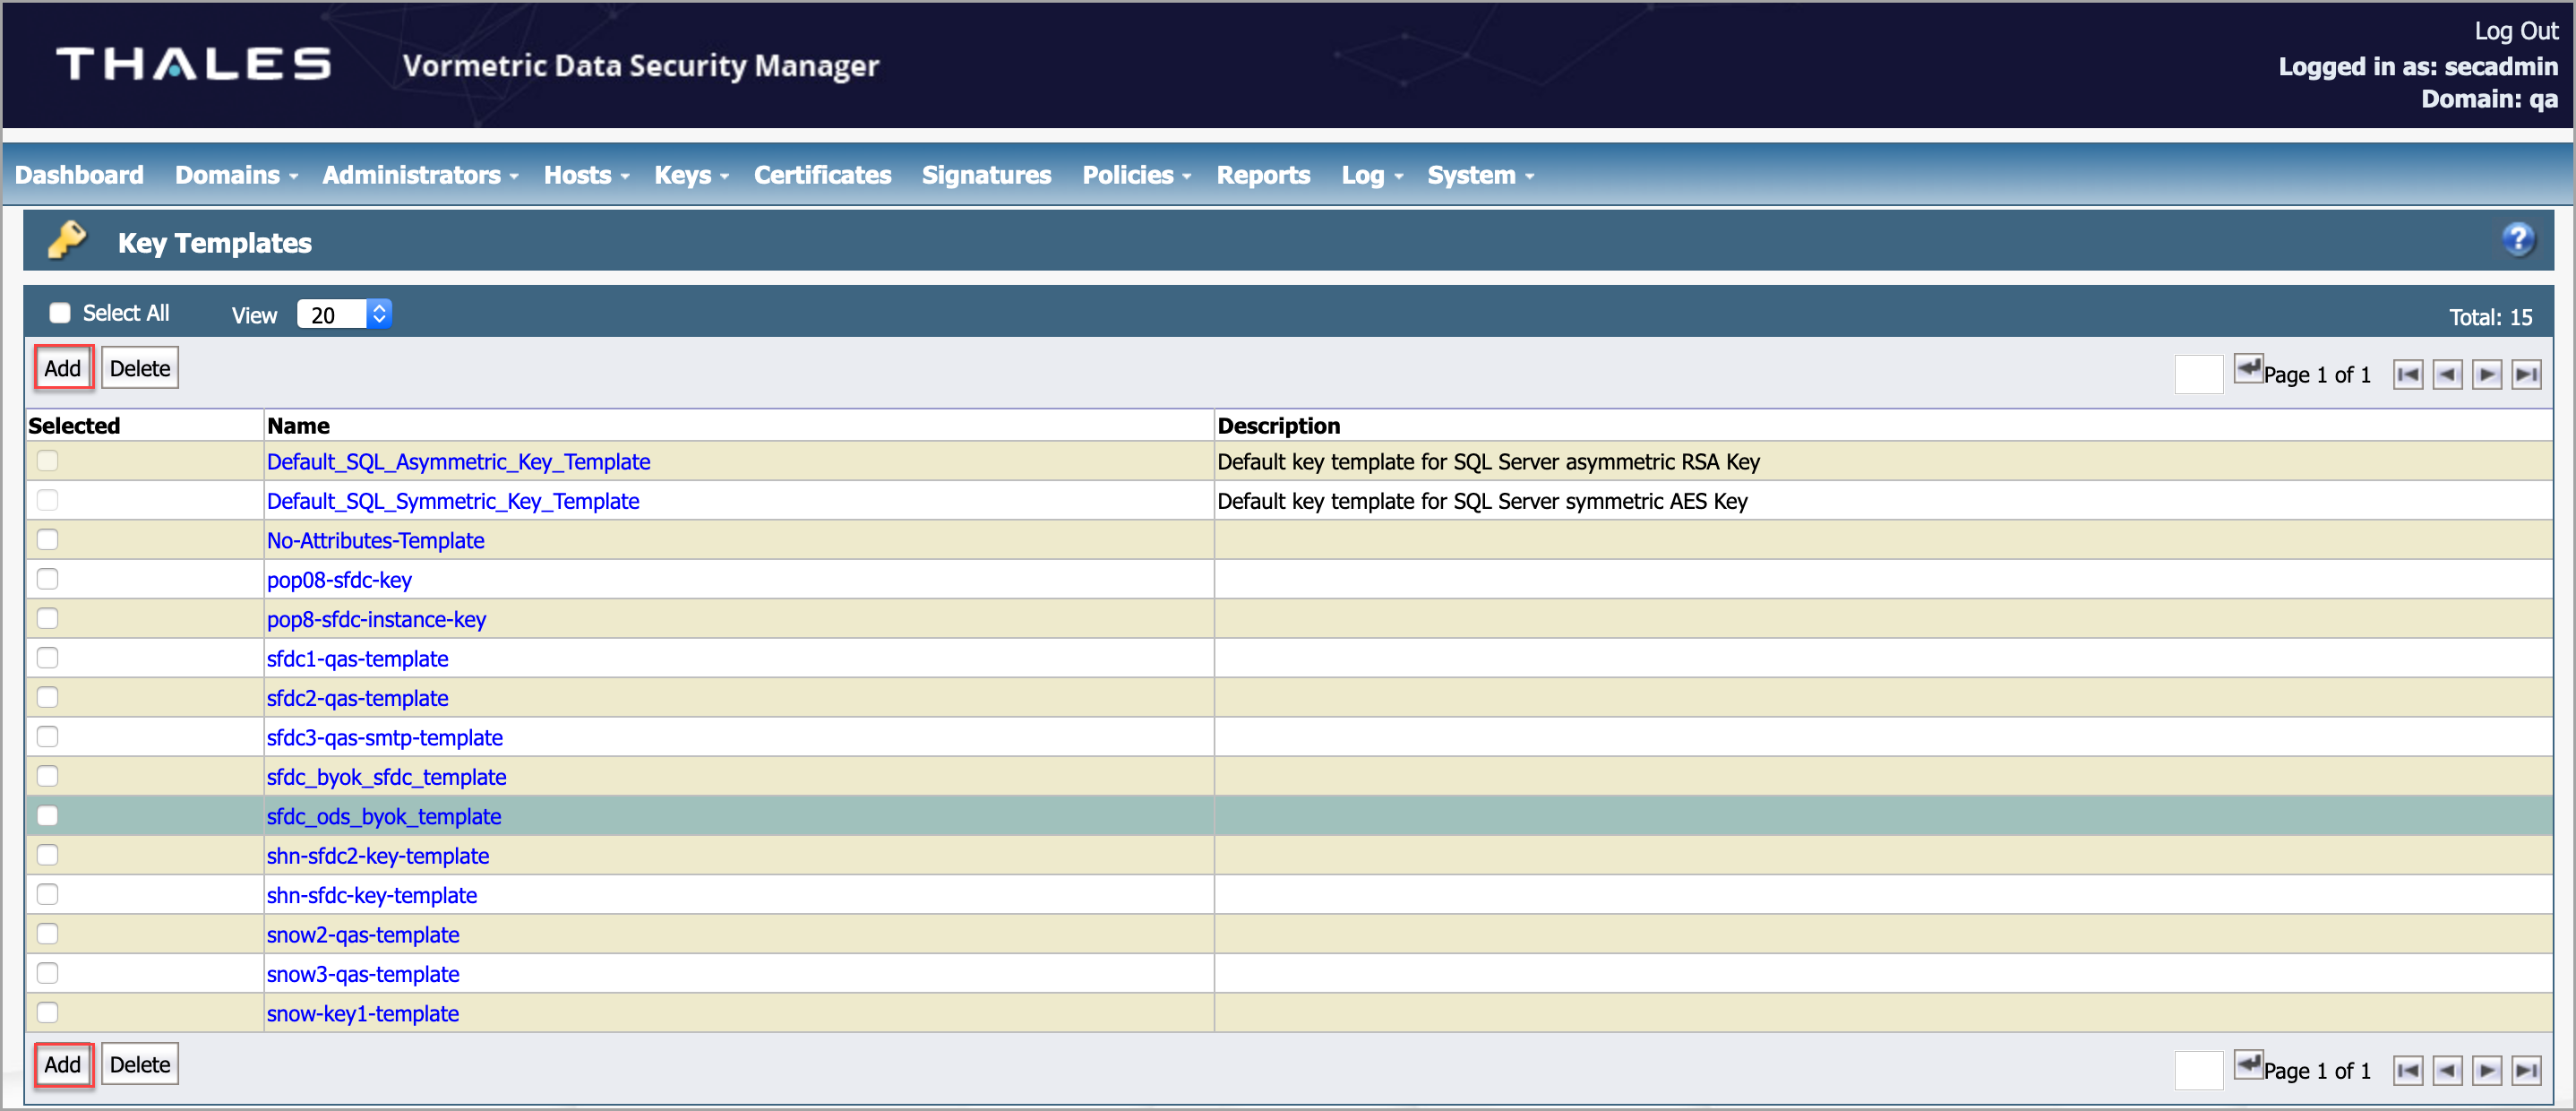
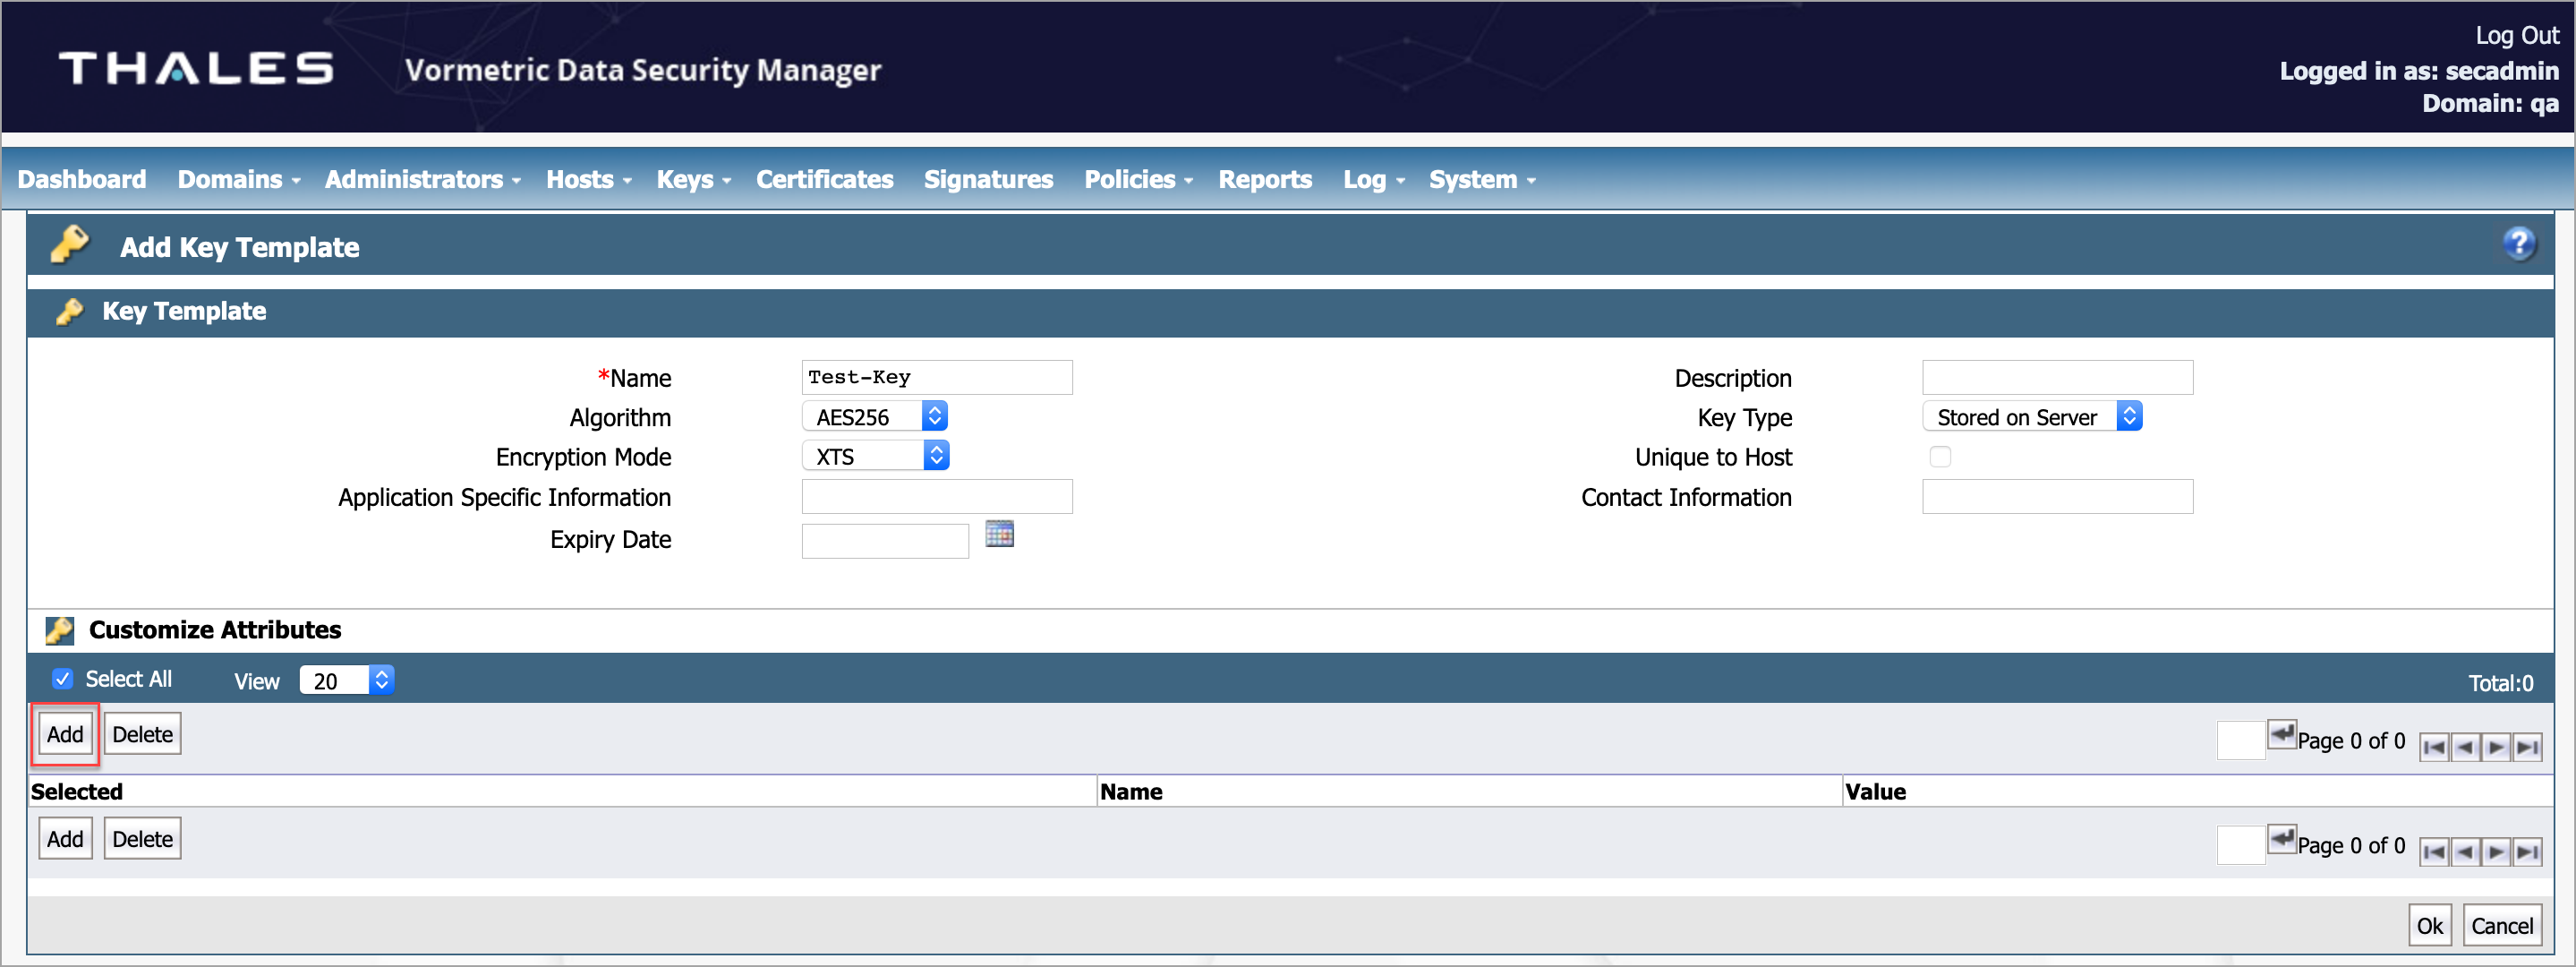
- To create a new key template, enter the following information:
- Name. Enter the name of the key template. For example, Test-Key-Template.
- Algorithm. Select the required option from the menu. For example, AES256.
- Encryption Mode. Select XTS from the menu.
- Key Type. Select the required option from the menu. For example, Stored on Server.
NOTE: The only Encryption mode that supports a KMIP-enabled key is XMS. If you select any other mode, then the keys generated are not fetched by KMIP clients.
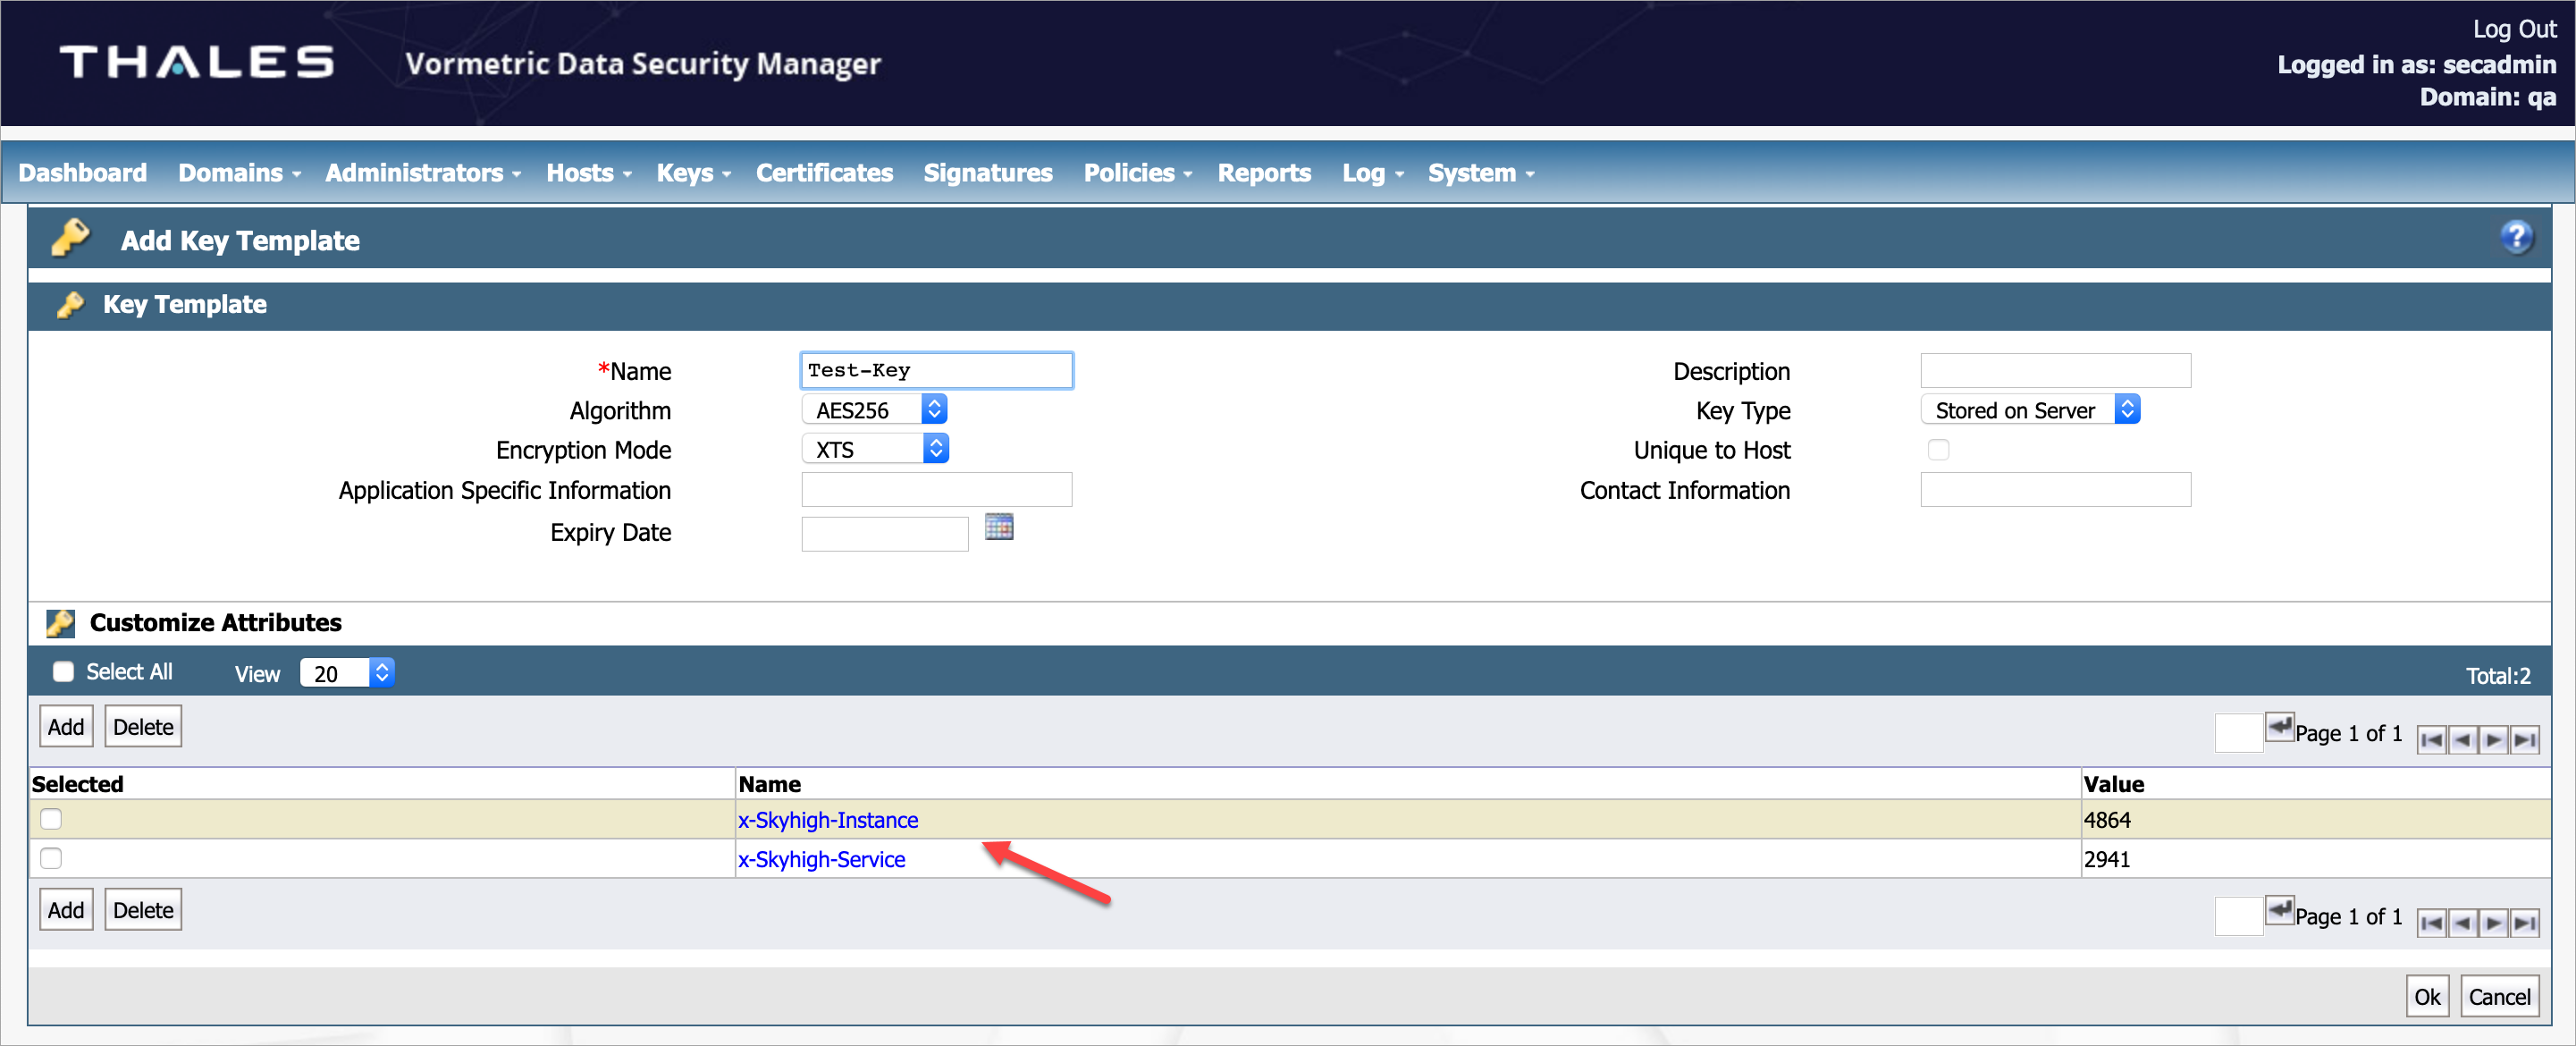
- Under Customize Attributes, click Add.

- Under Key Template Attribute, enter the following information:
- Attribute Name. Enter the name of the attribute. This attribute implies the CSP. For example, x-Skyhigh-Service.
- Attribute Value. The value of the attribute is based on the selected attribute name. Enter 2941 for the Salesforce CSP ID and 3487 for SNOW CSP ID.
- Add one more attribute to represent the Service Instance for a given tenant. To add the second attribute, repeat Step 5, and enter the following information:
- Attribute Name. Enter the name of the attribute. This attribute implies the Instance ID. For example, x-Skyhigh-Instance.
- Attribute Value. The value of the attribute is based on the selected attribute name. Enter 4864 for the Salesforce Instance ID. You can get the Instance ID from the admin dashboard.

- To save the Key Template, click OK.
- Under Customize Attributes, you can view the previously added key templates.
Step 2: Create a Key
Create a Key to inherit the attributes from the Key Templates.
To create a Key:
- To create a new key, in the Vormetric DSM application, go to Keys > Agent Keys > Keys and click Add.
- Configure the following fields:
- Name. Enter a name for the key.
- Description. Enter a description of the key.
- Template. Select the previously created Key Template from the menu.
- Expiration Date. Select the expiration date or leave blank.
- Algorithm. The default option AES256 populates automatically from the template.
- Encryption Mode - for VTE agents only. The default option XTS populates automatically.
- KMIP Accessible. Activate this checkbox.
- Key Type. The default option Stored on Server populates automatically from the template. In some cases, the default option may not be auto-populated. If so, select the default option manually, Stored on Server.
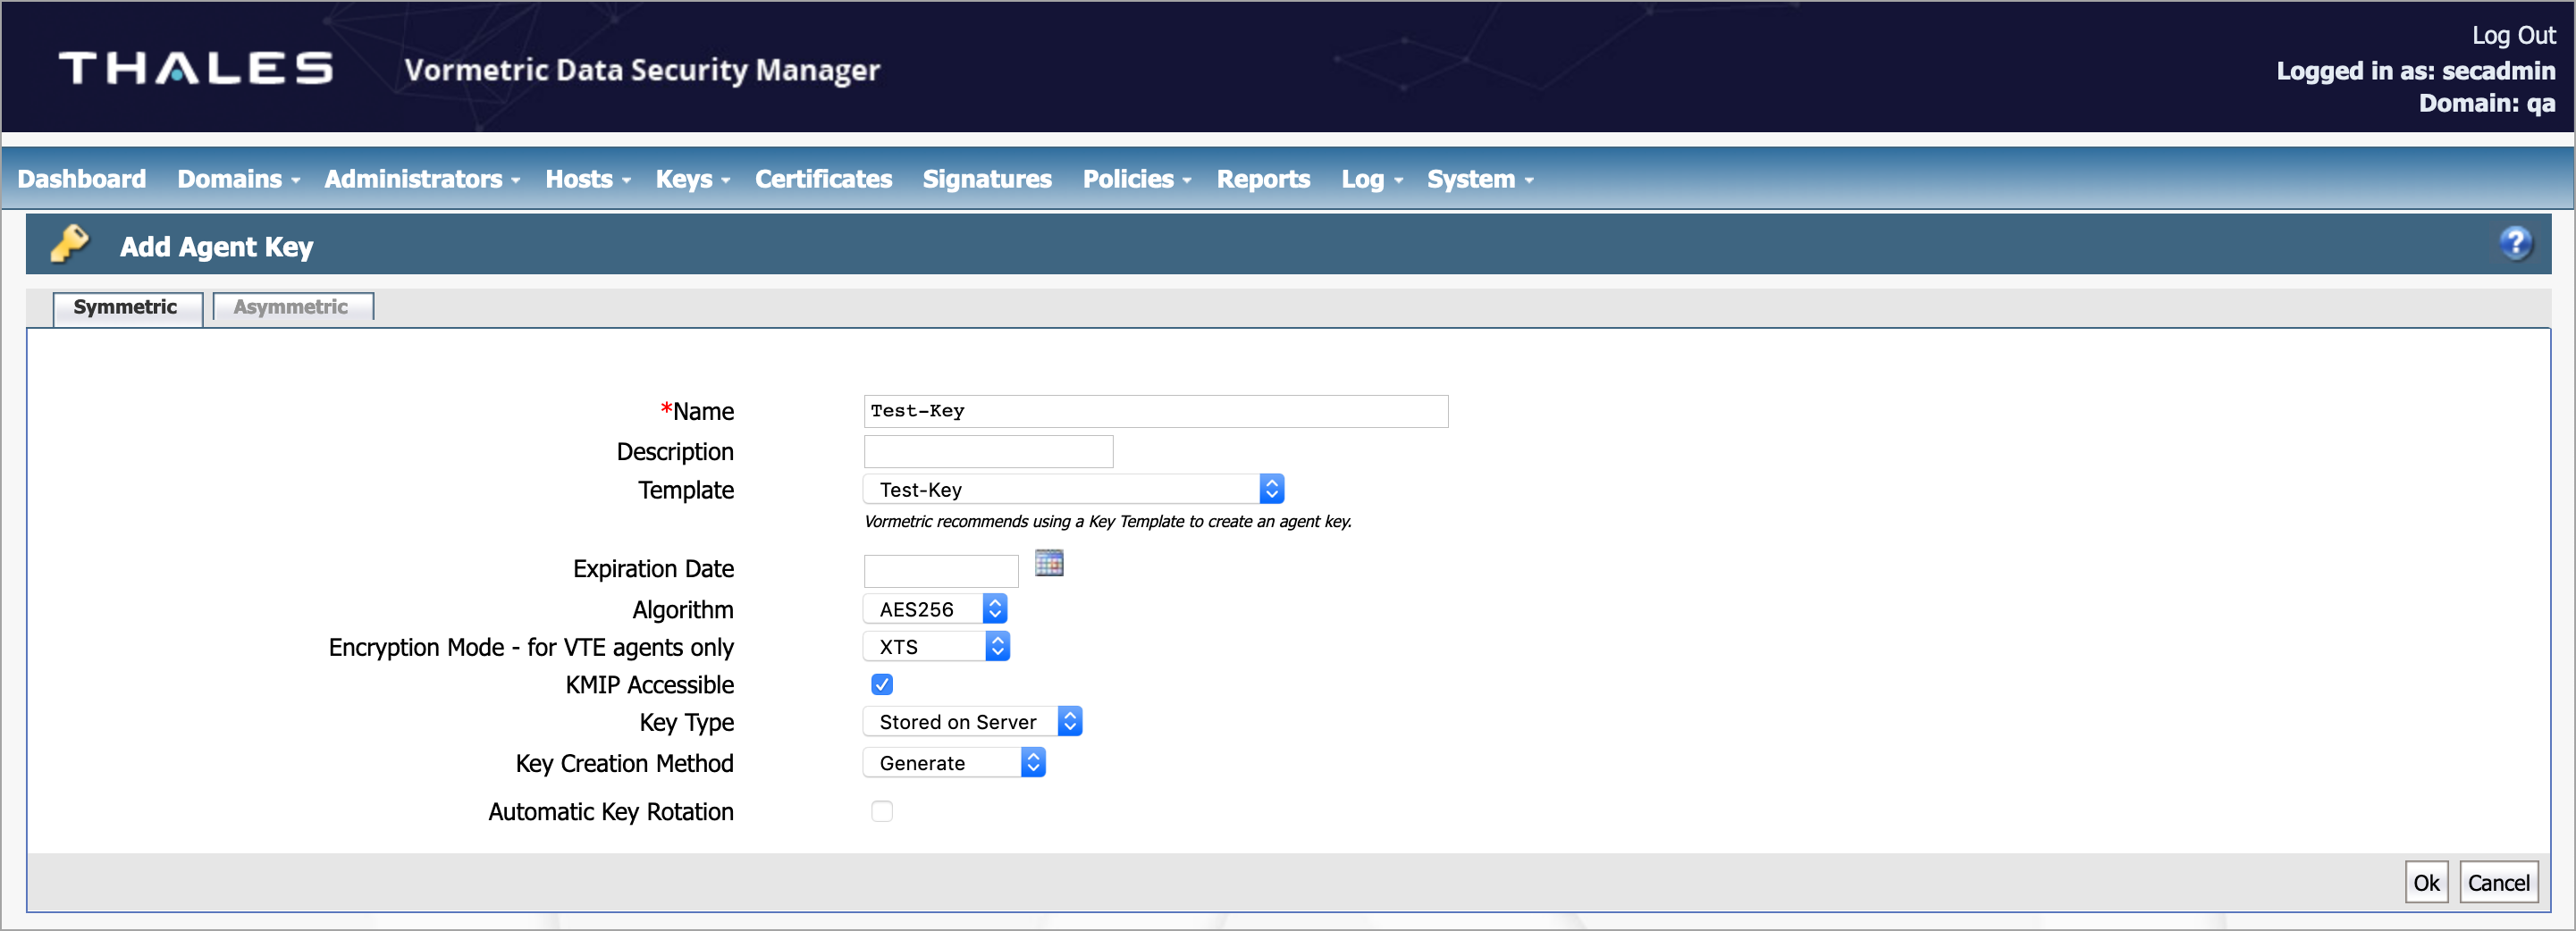
- Click OK.
Now, your new key with attributes is available.
Create a Vormetric Certificate
This procedure describes how to create a Vormetric Certificate.
Perform the following activities in the Linux /Mac system:
- Open the terminal and enter the commands:
openssl genrsa 2048 > client_private.pem
openssl req -new -x509 -key client_private.pem -out client.pem -days 365
- Import the above Certificate Authority (CA) in DSM.
Import the CA in DSM
- Log in to Vormetric DSM application as an admin.
- Go to System > KMIP Trusted CA Certificates page.
- Click Browse and select a certificate file.
- To import the file, click Import or Update Certificate.
- To update the certificate, enter the following command:
>keytool -keystore vksclient.jks -import -alias rootca -file client.pem
- Import the above client.pem in jks and enter the following commands:
>keytool -keystore vksclient.jks -genkey -alias dsmkeyagent -keyalg RSA -keysize 2048
>keytool -keystore vksclient.jks -certreq -alias dsmkeyagent -file myre.req
- To update the certificate, enter the following command:
NOTE: Here alias dsmkeyagent should be the same as mentioned in DSM.
- Enter the following command to update the signed certificate.
>openssl x509 -req -days 360 -in myre.req -CA client.pem -CAkey client_private.pem -CAcreateserial -out signed.crt -sha256
Import the Signed Certificate
- Go to Domains > Switch Domains and select the required KMIP domain.
- Click Switch Domains.
- Go to Hosts > Hosts and click the required KMIP client to register with the DSM. You are redirected to the Edit Hosts page.
- Click Import KMIP Certificate and browse to find the location of the signed CSR. Enter the following command:
>keytool -keystore vksclient.jks -import -alias dsmkeyagent -file signed.crt
- Import the above signed.crt in jks
- To get the list of certificates for root CA from DSM, enter the below command:
>openssl s_client -connect <dsmHostName>:5696 –showcerts
During the key agent installation, this list of certificates for root CA is used.