Add Applications
 Watch the interactive visual story about Adding Private Apps and Controlling their visibility
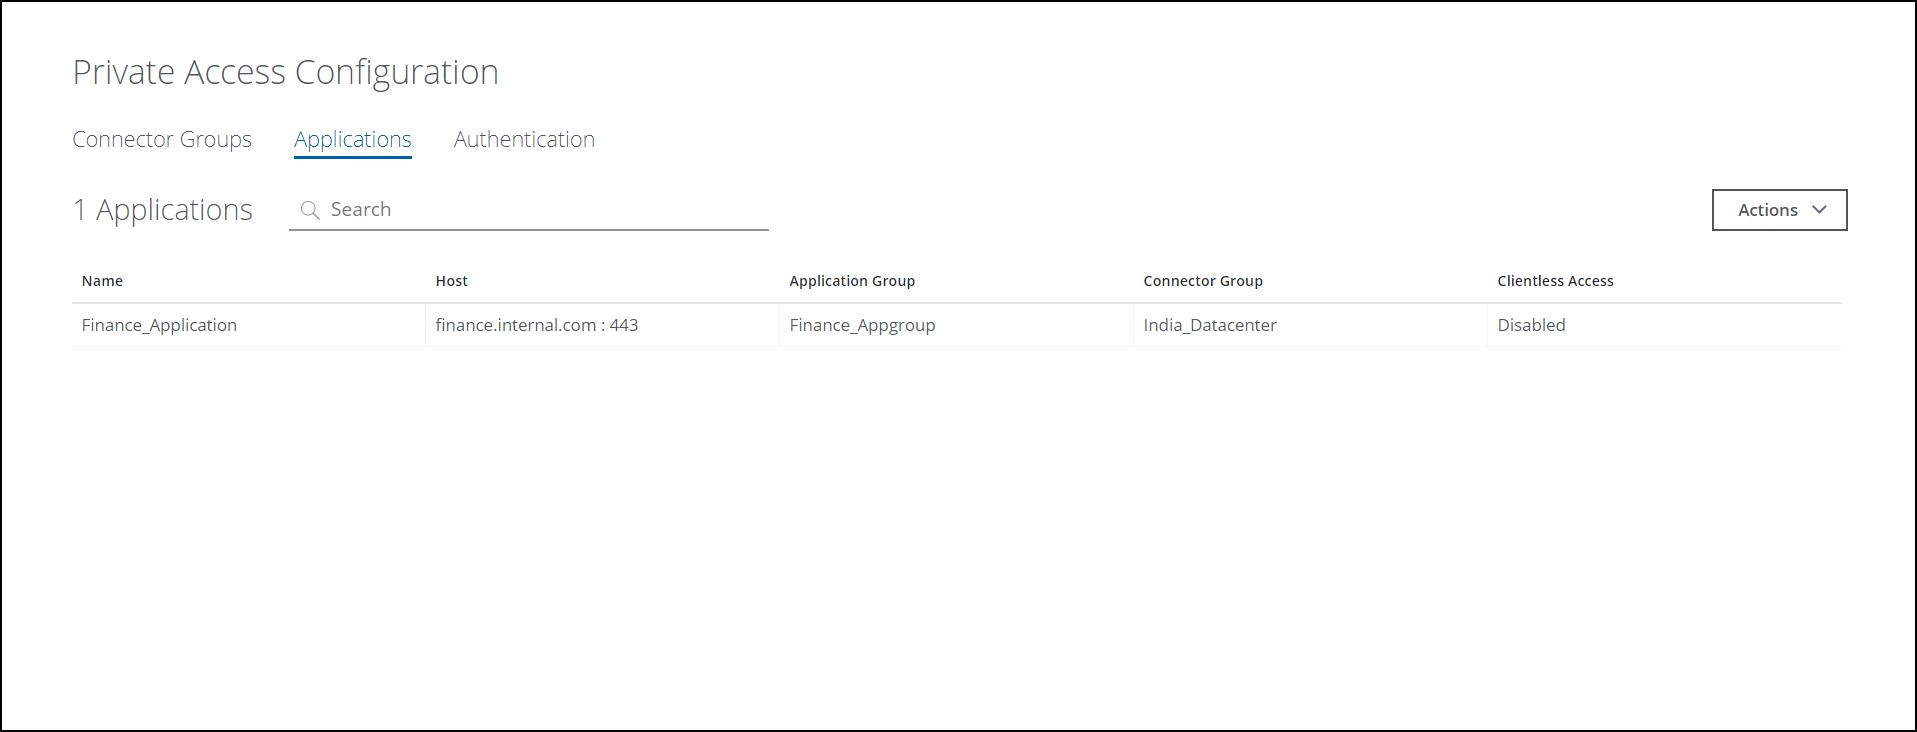
Add applications within an application group to logically manage different applications as one entity. Intended users can access these applications based on the rules applied in the private access policies.
Private Access supports relevant use cases fulfilled by traditional VPNs using Network Level Access, which securely opens the wide network like a VPN offering based on zero trust principles. Using Network Level Access, you can easily migrate from legacy VPN solutions.
You can control the visibility of the private applications per user or user groups on the Private Access user launchpad.
- Any PA app where the server initiates the connection is not supported. Eg: active FTP, where the client waits for the server to initiate the connection. This will not work as a PA app.
Add an Application
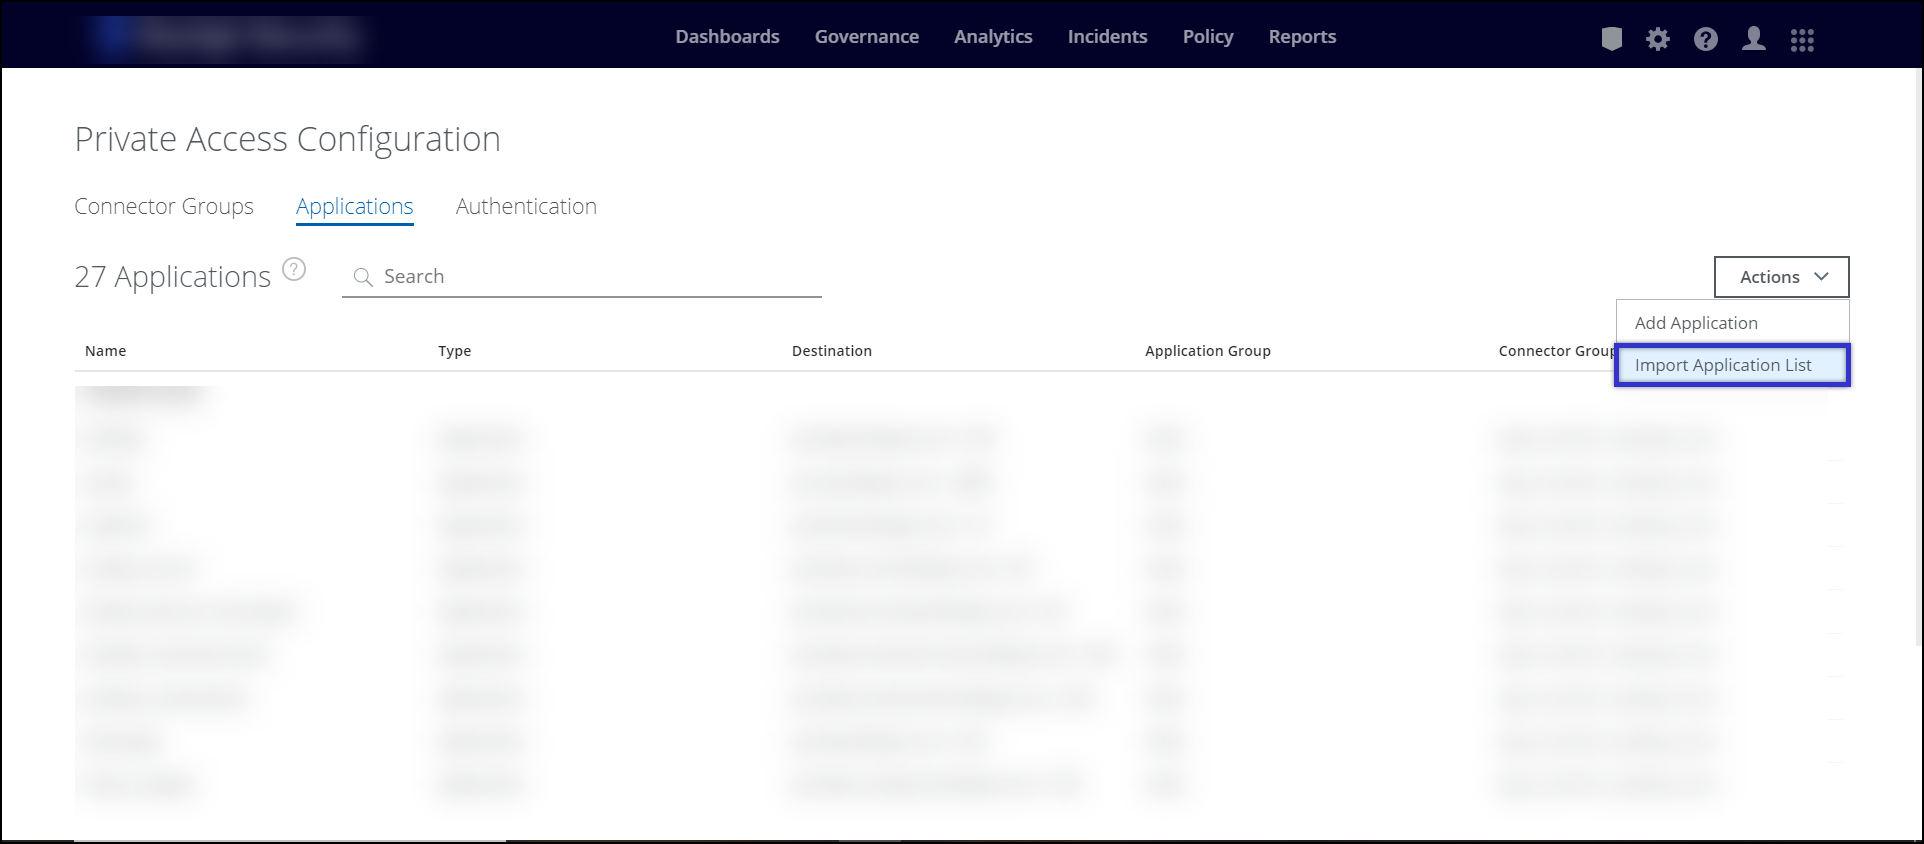
- Go to Settings > Infrastructure > Private Access Configuration.
.png?revision=1)
- Click Applications tab.
.png?revision=1)
- Under the Action menu, click Add Application.
.png?revision=1)
A new Add Application window appears.
- Complete the following fields:
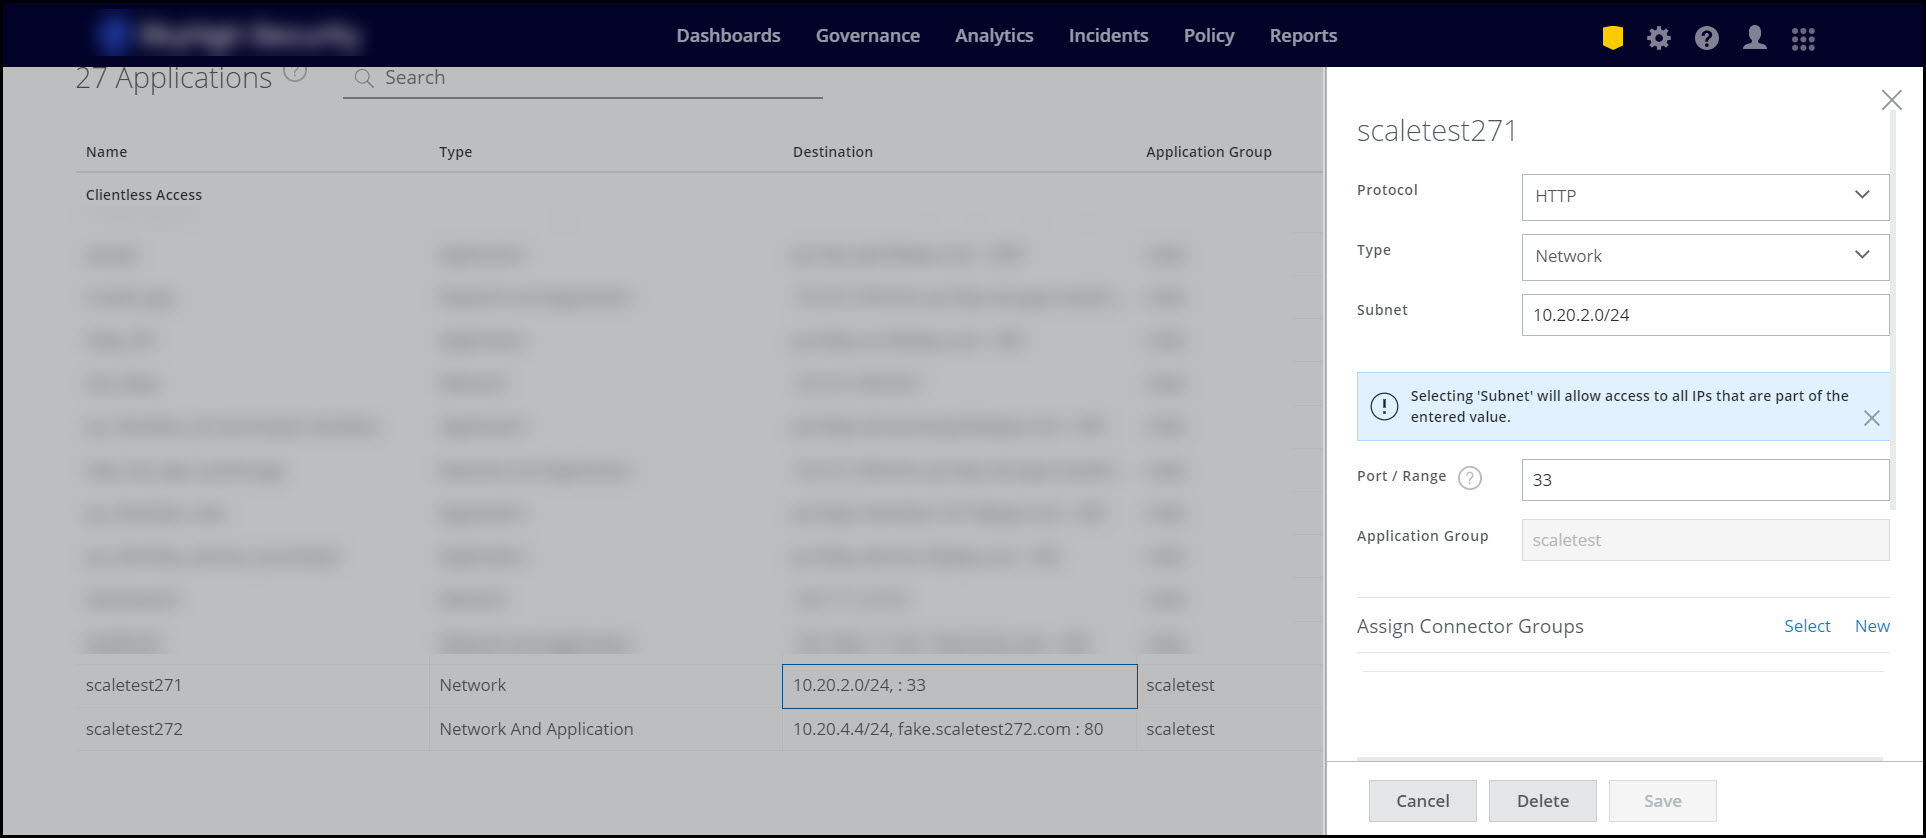
- Name. Enter the name of the application.
- Protocol. Select the protocol used to access an application. Supported protocols are HTTP, HTTPS, SSH, RDP, and Others (TCP).
NOTES:
- The Port field automatically populates the default port used by the selected protocol. If you do not want to use the default port numbers, you can change them. Make sure to specify the port when you select Others (TCP).
- If your private application uses SMB protocol (port 445), then make sure to enable the Include traffic originating from OS Core option in the SCP configuration policy (.opg) file before exporting it.
- Type. Select the type used to access an application. Supported types are Application or Network or Network and Application
| Application | Network | Network and Application |
|---|---|---|
| Allowed entries: Domain/Host/IP/Domain Wildcard | Allowed entries: Valid Subnet value | Allowed entries: Domain/Host/IP/Domain Wildcard |
|
|
|
Note: In Network type, if the user tries to access the private application using FQDN, it would be treated as Internet traffic. The user should be accessing the application via IP
Note: Data pertaining to any private application that has been accessed is visible on the Discovered Private Application page.
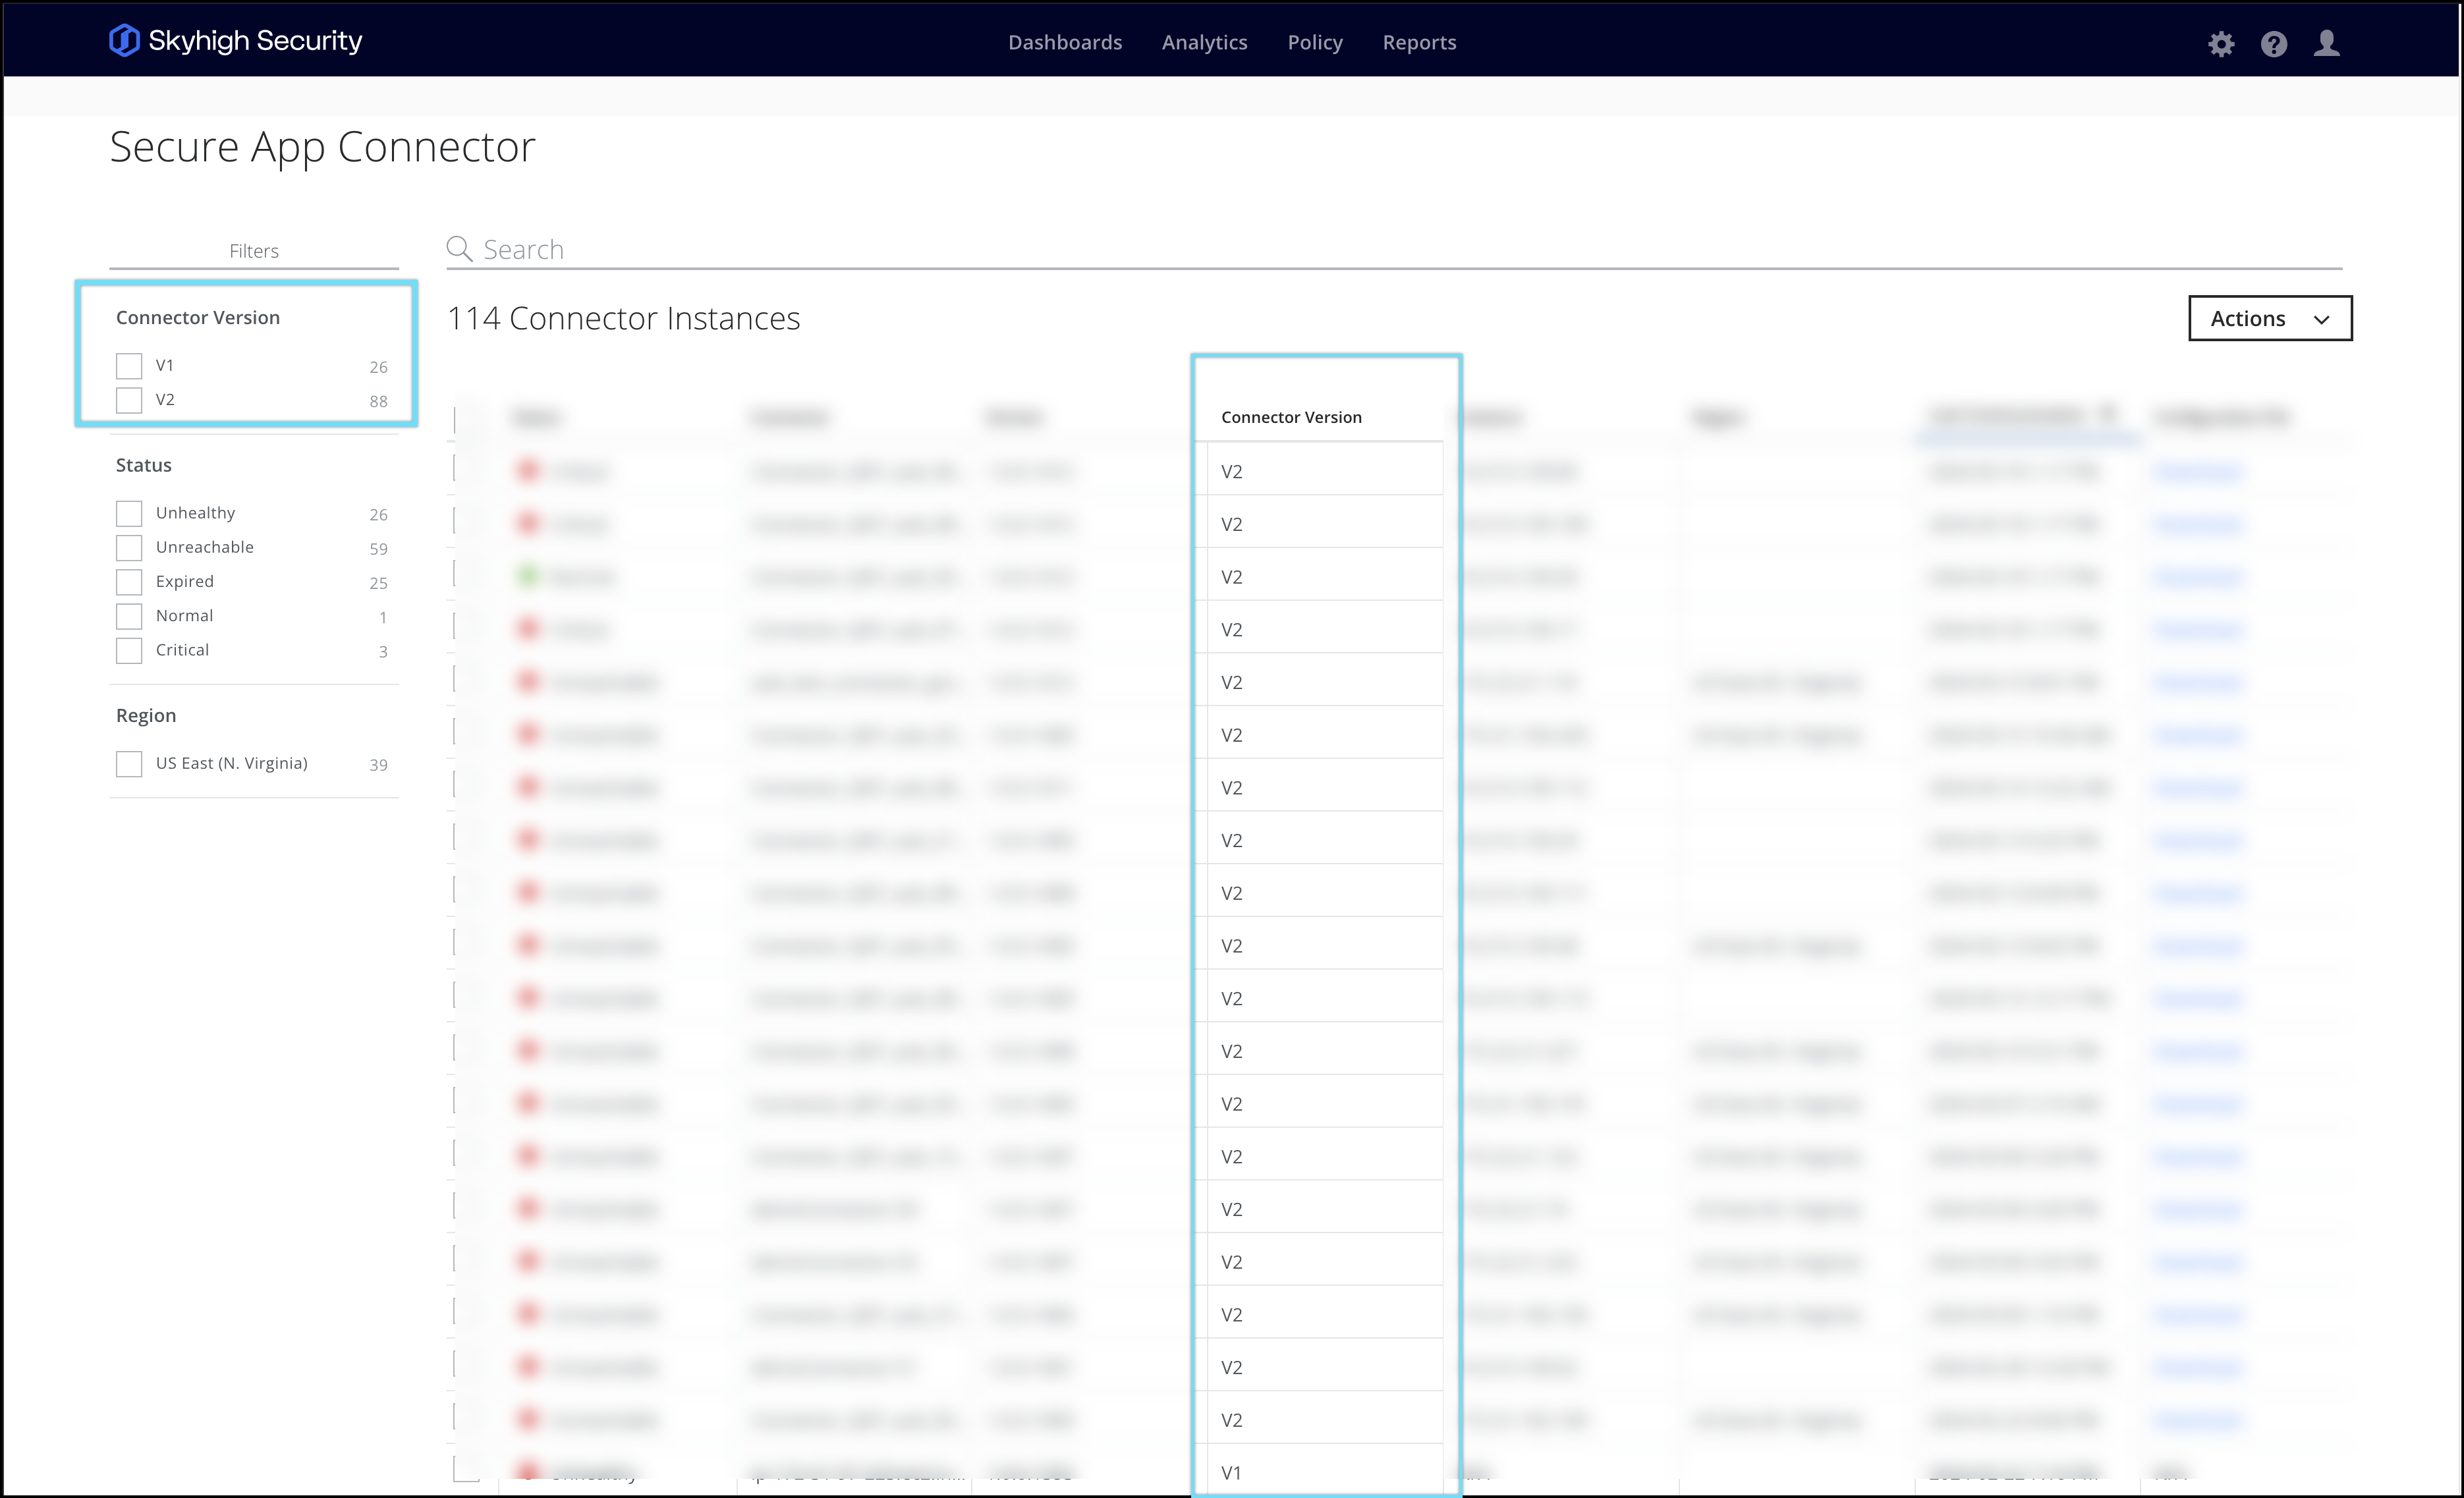
Note: The Network Level Access feature is exclusively accessible with the connector V2 version. To determine which connector is currently active, you can perform the following check: Go to Settings > Secure App Connector
Note: If a network subnet is added as a PA app, all the apps within that subnet must be reachable from all the connectors in the assigned connector group
- Port. Displays the port used to connect an application for the selected protocol. You can specify the ports in multiple different ways:
- Range (80-90)
- Individual (80, 90, 8080)
- Both (100-300, 80, 90)
Note: We support standard ports from 1 - 65535.
Note: You cannot add multiple applications with the same protocol, host, and port.
- Application Group. Select an application group from the drop-down list or enter an application group name to create a new application group.
- Assign Connector Groups. Assign an existing connector group or create a connector group and assign it to an application. Click Select to assign an existing group or select New to add a connector group.
NOTE: Any PA app that is public should be reachable directly from the connector, without any proxy in between the connector and the PA app
- Users with Visiblity in Launchpad - Select the user to access an application. The selected users and user groups can view this application in their Private Application launchpad.
NOTE: By default, all the applications will be visible to user lists and user groups.
- User Names/List -
- Manually enter users - Enter the user name manually. Multiple users should be separated by a comma.
.png?revision=1)
- Use a List - Select the User List from the available user lists.
.png?revision=1)
Click Show selected only to view the list of selected user lists.
_1.png?revision=1)
- Manually enter users - Enter the user name manually. Multiple users should be separated by a comma.
- User Groups - Select a User Group from the list of available user groups. To create a new list/group, see List Catalog.
.png?revision=1)
Click Show selected only to view the list of selected user groups.
.png?revision=1)
- Click Save.
.png?revision=1)
.png?revision=1)
Add Applications by Importing a List
You can import a list of private applications rather than adding them individually. Your list of applications must be in a CSV format. You can create the CSV file using any text editor. The imported items are added to the Applications page.
Before you begin
The .csv file must meet these requirements.
- The file contains one list item per row.
- The columns are separated by one of these characters: whitespace, tab, comma, semicolon, or a custom character.
- The characters in the file are encoded with UTF-8 encoding.
- Go to Settings > Infrastructure > Private Access Configuration.
- Click the Applications tab.
- Under the Action menu, click Import Application list.
.png?revision=1)
- In your file browser, select a .csv file to import, then click Open.
When you configure the import settings for the .csv file, you can:
- Specify whether there is a header row.
- Exclude rows from the import that start with the character you specify.
- Avoid duplicate entries.
- Specify whether leading and trailing whitespace is trimmed from the values in the columns.
- Use the backslash character to include special characters. For example, you can use this option when the list items include the column separator. In this example, the column separator is a comma.
Note: Make sure you have the following columns in the CSV or XLS file to avoid any errors while importing.
The following table shows the headers that are mandatory in the CSV file:

| Header name | Description |
|---|---|
| Application Name | Name of the private application. |
| Protocol | Protocol used to connect an application. Supported protocols are HTTP, HTTPS, SSH, RDP, and Others (TCP). Note: Only port 443 port and HTTPS protocol is supported for Clientless Access. |
| Type | Types used to access an application. Supported types are Application or Network or Network and Application |
| Host | Enter the fully qualified domain name (FQDN) of the application. Do not use smart match or IP address for the hostname. |
| Subnet | Subnet is a network or set of IPs. |
| Port | The port used to connect an application for the selected protocol. You can enter the port number you want to use. |
| Application Group | The application group name (mandatory) |
| Connector Group | The connector group name (optional). Displays Yet to be assigned on the Applications page when you import with this field empty. You can assign it to a connector group later. |
| Clientless Access | Enter True to enable Clientless Access and False to disable Clientless Access |
- In the Import CSV dialog box, select the column separator, then configure these options:
- Select First line contains column headers if the .csv file includes a header row.
- Select Ignore lines beginning with character to specify a character to exclude the specified rows from the import.
- Select Use "\" for escaping special characters when you want the import to interpret the character following the backslash as a character instead of as a column separator.
- Select Trim leading and trailing whitespace to trim leading and trailing whitespace from the values in the columns.
- Select Avoid duplicate enteries to exclude duplicate application enteries.
- Review all the import settings and click Import.
_1.png?revision=1)
- Applications will be added to the application dashboard.
.png?revision=1)
- Once the import of the applications are completed. To make any changes to the application settings, click on the application which you want to edit.
For more details on the following fields like protocol, type, and many more see Add an Application section
- Once the changes are made, click Save and Publish the changes.
.png?revision=1)
- Once access to resources based on applications and networks is granted to users, you can navigate to the discovered private application page to gain further insights and information on how applications are being utilized within your private network.
- These insights can be utilized to monitor the applications accessed by users, refine applications through updating application entries or importing lists, and control user access.