Customizing your Block Pages
Introduction
Any block page in the Secure Web Gateway can be modified to suit a customer's needs. The Secure Web Gateway's template editor will allow you to modify any element of the page from changing the company logo, color, or text to adding useful debugging data. This document will describe some of the recommended changes to help an Administrator troubleshoot issues as well as assist on some common modifications in order to help you get the most out of your block pages.
Template Editor
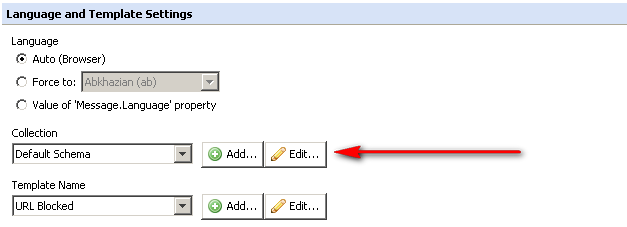
The Template Editor will be used to modify anything related to the Block Page templates. To get to the Template Editor, go to:
Policy > Settings > Actions > Block > (Default) > Language and Template Settings - Edit the"Default Schema" Collection.
The template editor consists of three different viewing panes Templates > HTML Editor >File System:

Templates
This view provides all the templates belonging to a collection. Each template contains the following:
- en - Language versions of the template. A fresh installation of Secure Web Gateway ships with English templates. If you'd like templates in a different language, you can download various language packs from https://contentsecurity.skyhigh.cloud/software_mwg7_download and import them into the template editor.
- html - Version in HTML format. This version of the block message will be served to an application that understands HTML. (ex: Web Browsers)
- txt - Version in TEXT format. This version of the block message will be served to an application that doesn't understand HTML. (ex: FTP applications, IM, etc)
This is the pane that you'll be using most of the time to navigate the Template Editor.
HTML Editor
Displays the content of the template that is currently selected on the Templates or File System pane. You'll use this pane any time you want to edit the contents of a particular file.
File System
Provides a tree structure for completing general tasks, such as adding, renaming, deleting template fi les and images. You'll see examples of how to upload an image in some of our Common Modification examples below.
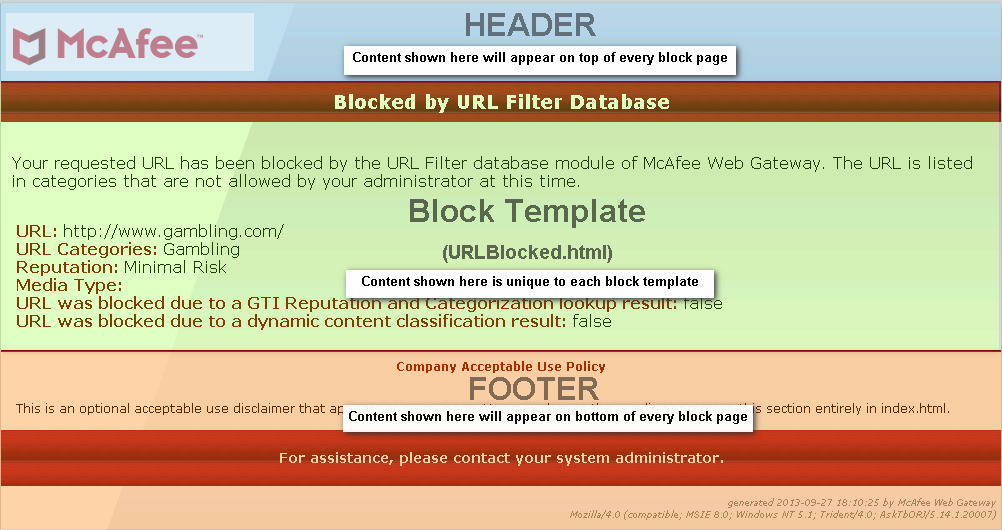
Components of a Block Page
Every Secure Web Gateway block page can be broken into three different components. (Header,Footer, and the Block Template)
| Name | Location (in editor) | Description |
|---|---|---|
| Header/Footer | Default Schema > [Language] > HTML |
-Items that will appear at the top and bottom of every Block page. -Great if you want something to appear on every block page. (see Common Modification Example 'Header/Footer' and 'Add Logo') |
| Individual Block Templates | Default Schema > [Language] > [TemplateName].HTML |
-Sits between the Header/Footer on the Block Page. This is the .html file that displays the description or reason for your block. -An example would be the 'VirusFound.html' or 'URLBlocked.html' file. -Modify this if you want to change something specific about this individual template. (see Common Modification Example 'Adding Properties to individual block template') |
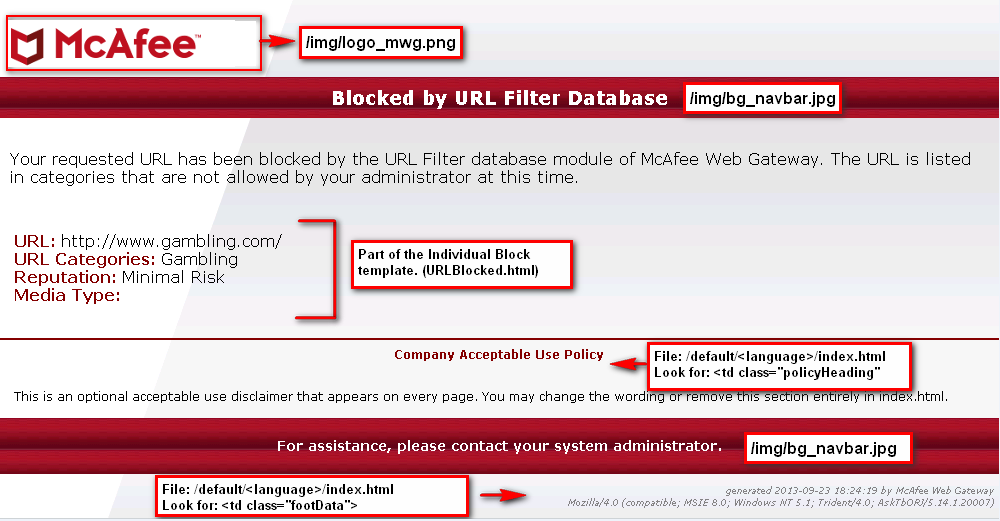
| CSS | File System Pane: /default/stylesheet.css |
-This is what formats the look and feel of the block page. -You can modify the style sheet to change colors, etc on the block page. -See Common Example 'Changing Text Color' below. |
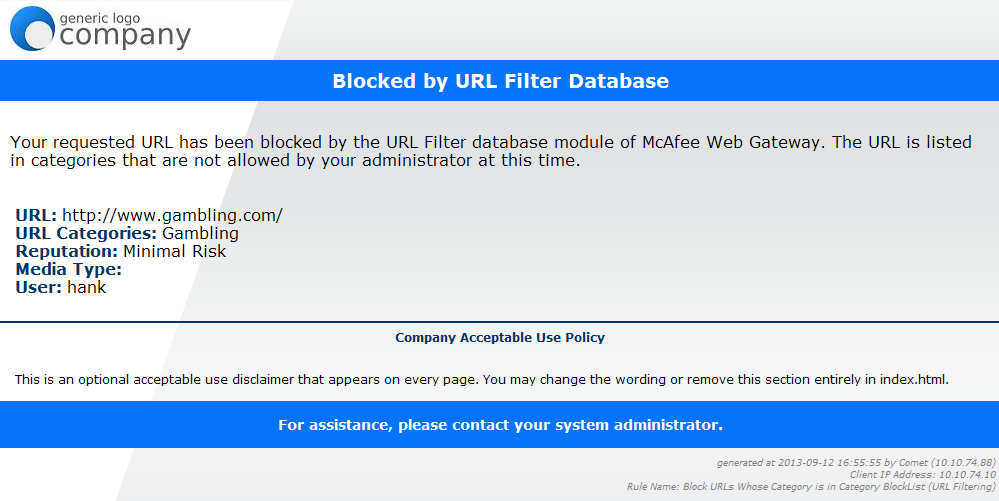
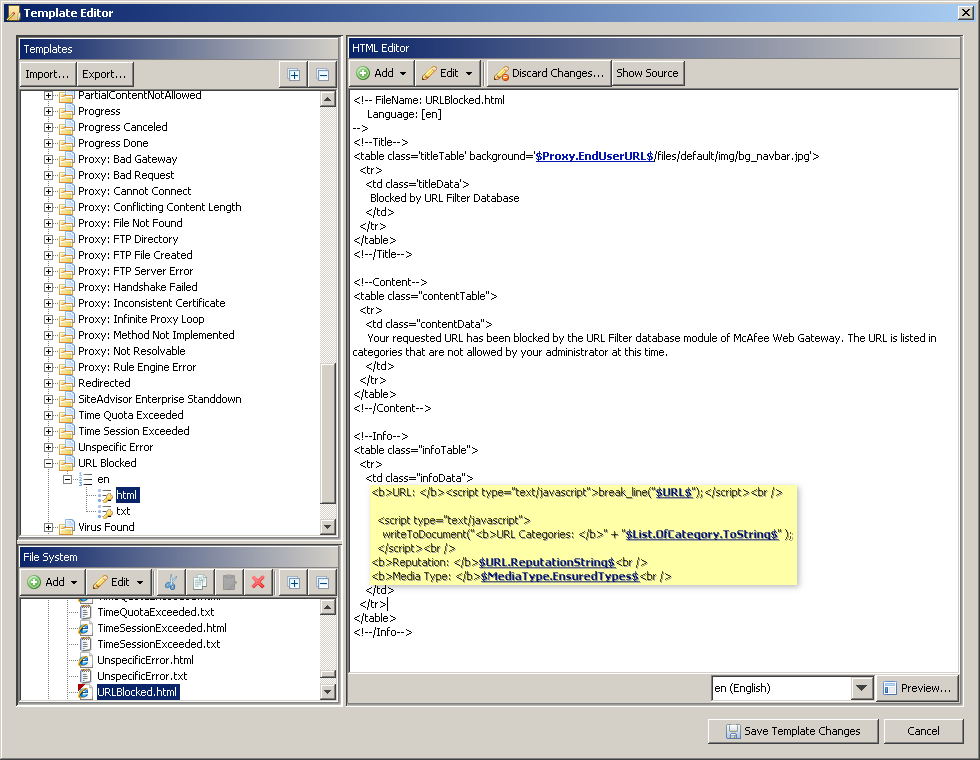
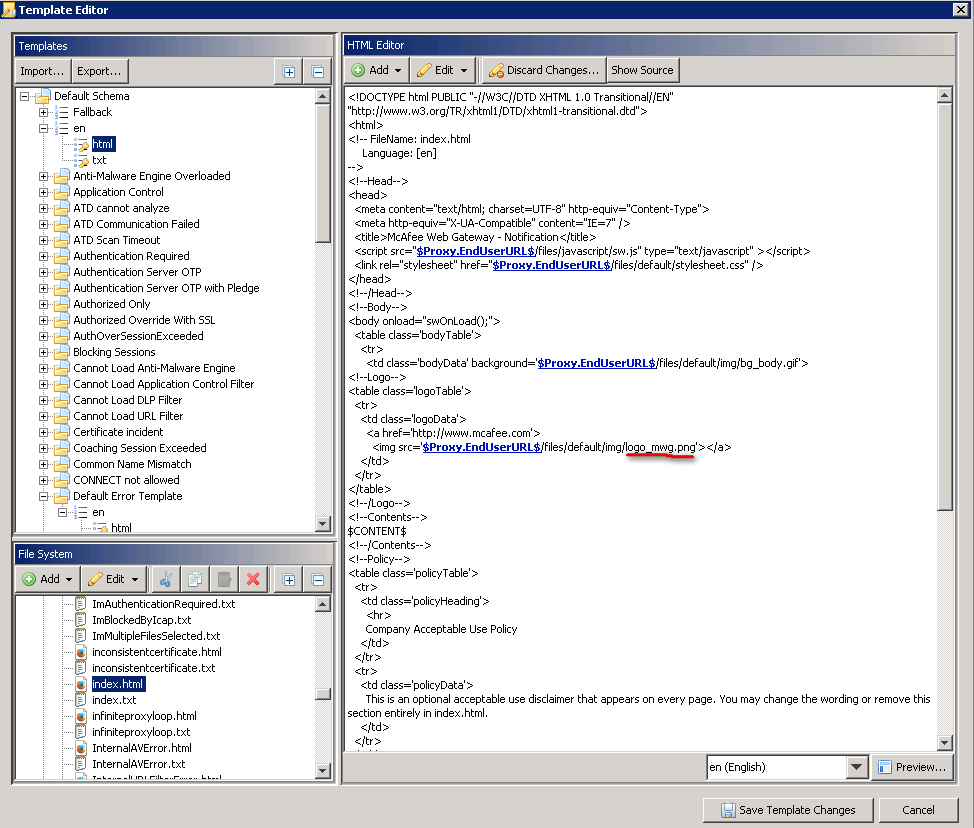
Below is the default version of the URLBlocked.html template. We've highlighted some of the items that we will be helping you modify in this article. This should also help familiarize you with the different components of the block page.
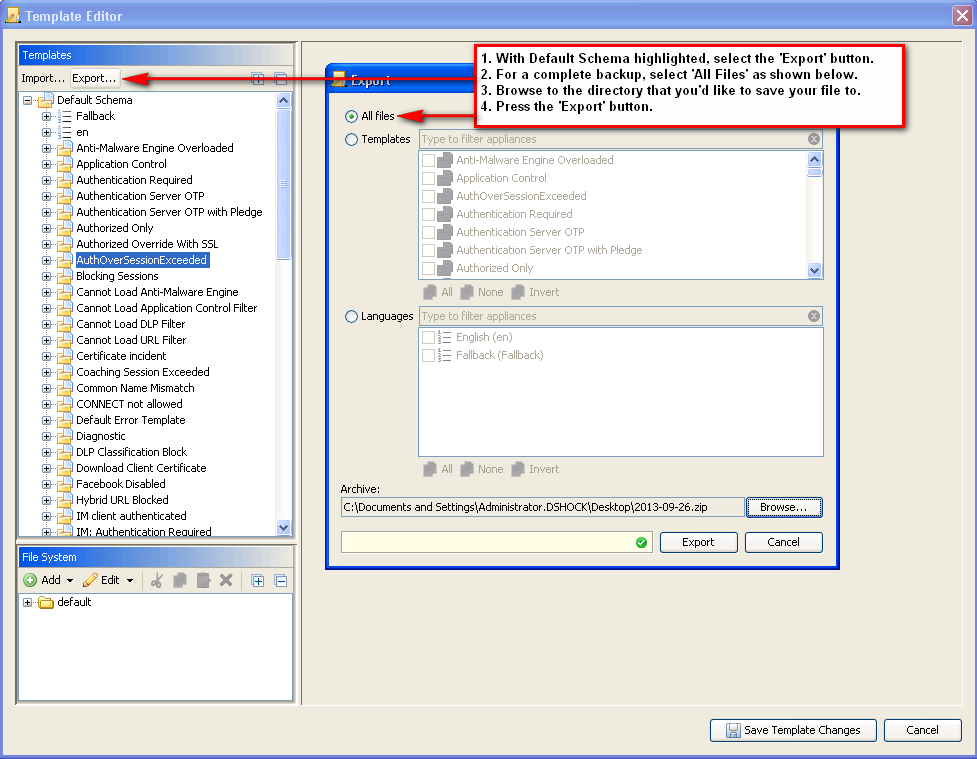
Backup
Whether you plan on making one or several changes to your block pages, the very first thing you should do is make a backup of the default templates. You can back-up your templates in the SWG UI:
Common Modifications to Block Pages
Header/Footer
As mentioned earlier, the Header/Footer will appear at the top and bottom of every block page. You'll want to modify this when there is something to add that you'd like to appear on every block page. A best practice we recommend is to add additional debugging properties to your block page's footer. Adding these additional properties to your block pages can save an Administrator a lot of time when troubleshooting. The properties were commend adding to the footer are:
- System.Hostname - the Secure Web Gateway hostname of the appliance that handled the web request.
- Proxy.IP - the Secure Web Gateway's IP of the appliance that handled the web request,
- Client.IP - the Client IP address that made the request.
- Rules.CurrentRule.Name - the name of last evaluated Rule in your policy.
- Rules.CurrentRuleSet.Name - the name of last evaluated Rule Set in your policy.
The advantage of adding these debugging properties to the footer is that they are placed in a discrete place and more importantly are added to every block page. Therefore one does not have to edit each and every block template individually.
***It is recommended that only basic information be displayed here. If you want you display username, user group, or destination IP address, then it is recommended you add those properties to specific block pages only as the Secure Web Gateway must perform lookups to fill those properties. If these properties are on every block page then far too many lookups are being conducted, consuming resources on the Secure Web Gateway. To add a property to just an individual block template, please see the example "Adding Properties to Individual Block Templates" below.
Steps
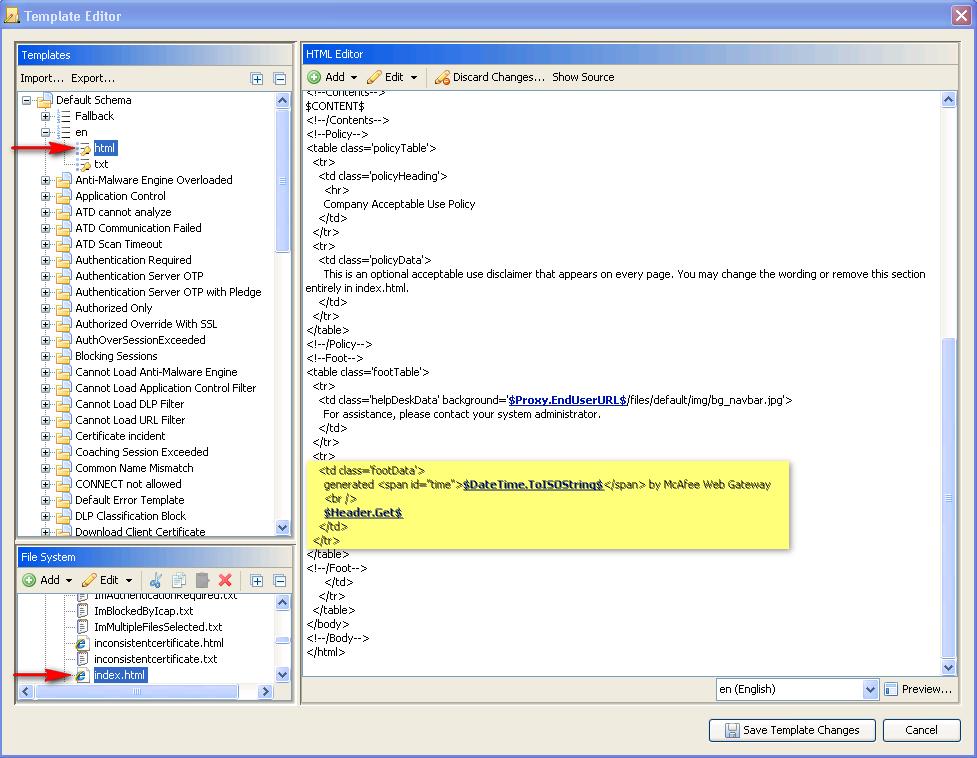
Open the template editor
to edit the index.html fi le. Under the Templates section, expand the language you are using (en in this example) and click on html. Notice that in the File System section (lower left corner) index.html is automatically highlighted. This is the fi le we are now editing. The highlighted section below shows the default footer section that we are looking to modify.
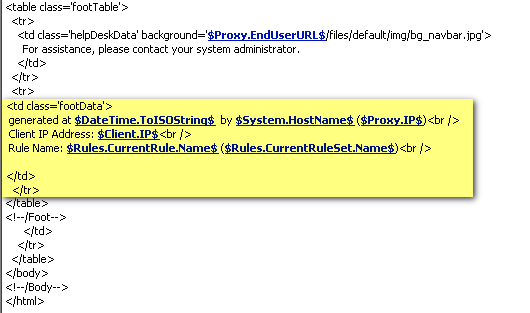
To modify your block pages to contain the recommended properties, simply copy/pastethe following into the highlighted area above:
<td class='footData'>
generated at $<propertyInstanceuseMostRecentConfiguration="false"propertyId="com.scur.engine.datetimefilter.datetime.toisostring"/>$ by $<propertyInstance useMostRecentConfiguration="false"propertyId="com.scur.engine.system.hostname"/>$ ($<propertyInstanceuseMostRecentConfiguration="false"propertyId="com.scur.engine.system.proxy.ip"/>$)<br />
Client IP Address: $<propertyInstanceuseMostRecentConfiguration="false"propertyId="com.scur.engine.system.client.ip"/>$<br />
Rule Name: $<propertyInstance useMostRecentConfiguration="false"propertyId="com.scur.engine.system.rules.currentrulename"/>$($<propertyInstance useMostRecentConfiguration="false"propertyId="com.scur.engine.system.rules.currentrulesetname"/>$)
</td>
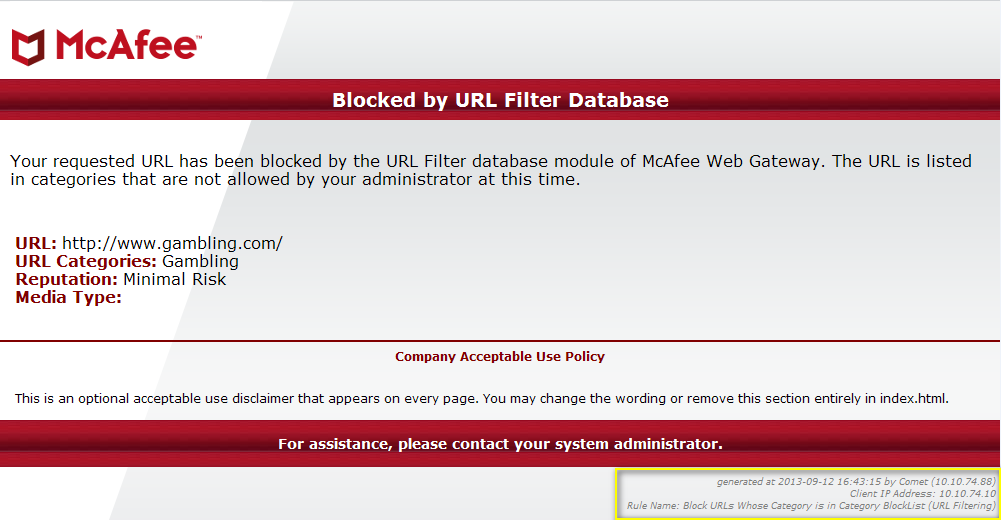
After pasting the text in, your updated page should look like this:
Updated block page (with new footer):
Modifying individual block templates
As mentioned above, it's a best practice to limit the amount of properties you add into the header/footer of the index.html page--especially those properties that require lookups(username, user group names, or destination IP address) which will consume resources.These properties should be added to individual block pages as needed.
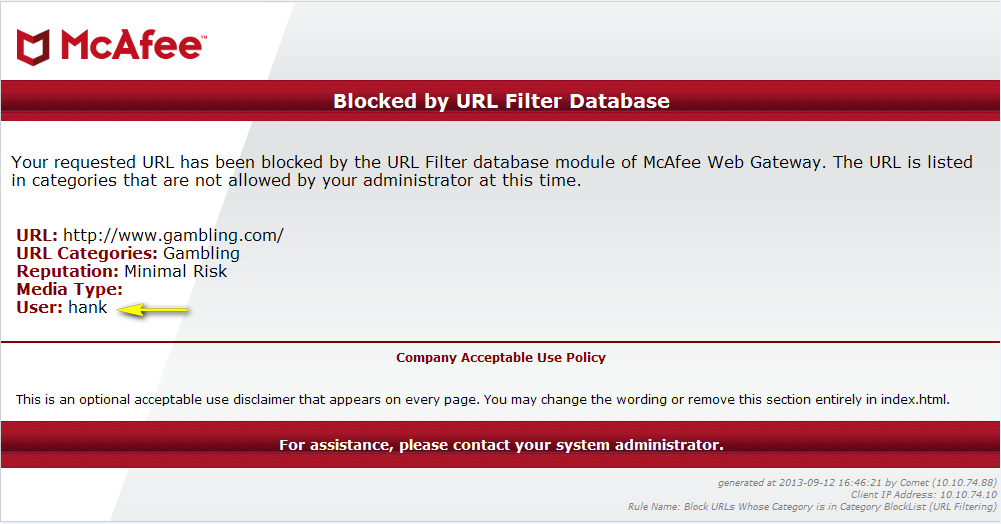
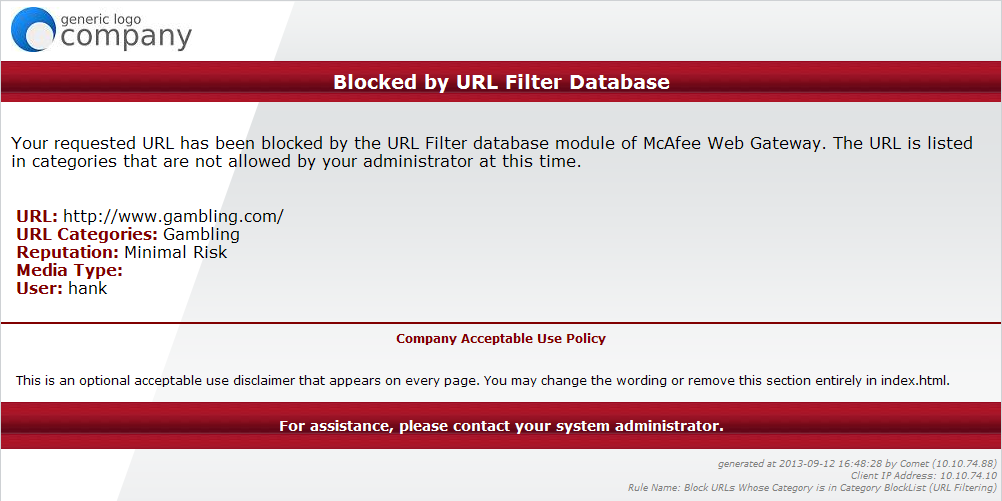
The screenshot above is an example of putting debugging info on the "URL Blocked"page. Here we have URL, URL Category, Reputation & Media Type displayed on this block page. Lets say you wanted this page to also show the current username. Here are the steps to take:
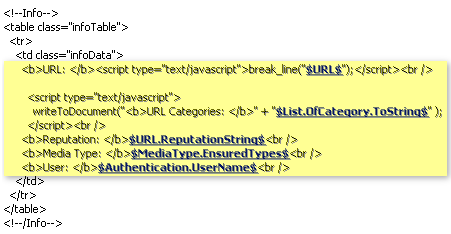
- Duplicate the following line: <b>Media Type:</b> $MediaType.EnsuredTypes$ <br /> beneath the existing one.
- Rename <b>Media Type:</b> to <b>User:</b>
- Place the cursor at the end of "$MediaType.EnsuredTypes$" and hit the backspace button, deleting that property.
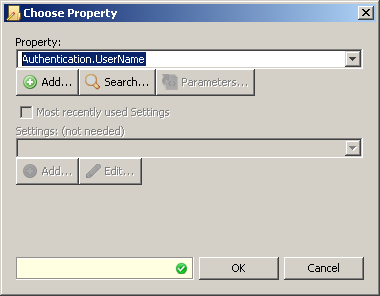
- Without moving the cursor, click on the Add button at the top of the page. From the drop-down select Property - the 'Choose Property' window appears
- From the Property drop-down select Authentication.UserName and click OK
- Now you should see this property in the HTML version of your block page:
Before saving changes, use the Preview button in the lower right corner to seewhat the block page will actually look like.
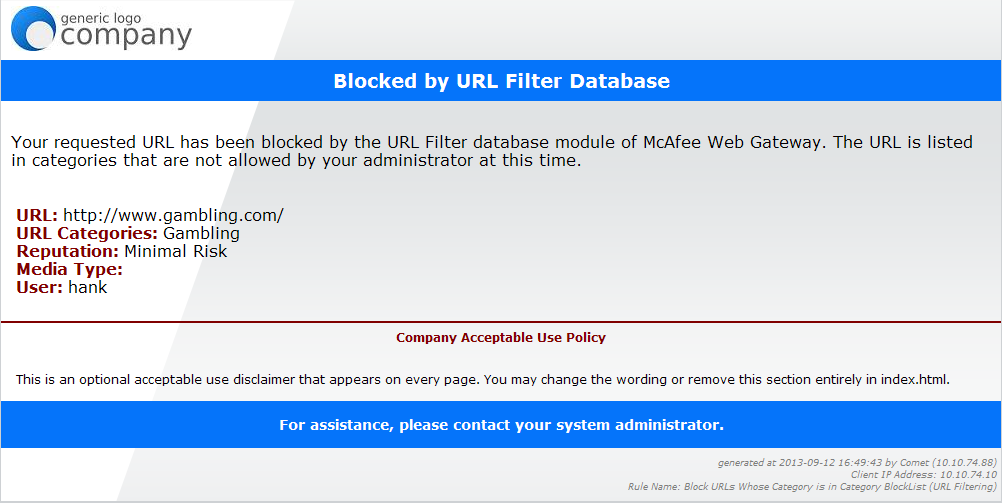
Updated block page (with added property):
Customizing the Block Page Logo
Another common modification to block pages is removing the default Skyhigh logo in the upper left corner and replacing it with your company's logo. All images are stored in the img folder of the File System View.
Note: If you'd like to use a logo the same size as the default, the dimensions of the default logo is 252x75.
- Open the Template Editor. In the File System section, make a copy of the default logo_mwg.png and rename it to logo_mwg.png-bak
- Highlight the img folder, then click Add and from the drop-down. Select Existing file or Directory and select your image file.
- Re-name your uploaded fi le to logo_mwg.png
- Note : The Default Schema > en > html (index.html) references the logo_mwg.png.If for some reason you did not change the file name of your logo, you would need to update this file to reference the correct fi le name. See the screenshot below for reference.
- 'Use the preview button and then Save Changes.
Updated block page (with new Logo):
Changing the color of the background navigation bar
The background navigation bars are the red strips at the top and bottom of your default block page
Note : If you'd like the navigation bars to be the same size as the default, the dimensions are 20x32.
The most straight forward way for changing the colors of the navigation bars(/img/bg_navbar.jpg) is to:
- Open the Template Editor. In the File System section, make a copy of the file bg_navbar.jpg and rename it to bg_navbar.jpg-bak
- Create a custom image (20x32) with the color of your choosing.
- Highlight the img folder, then click Add and from the drop-down. Select Existing file or Directory and select your image file.
- Re-name your uploaded file to bg_navbar.jpg
- Use the preview button and then Save Changes.
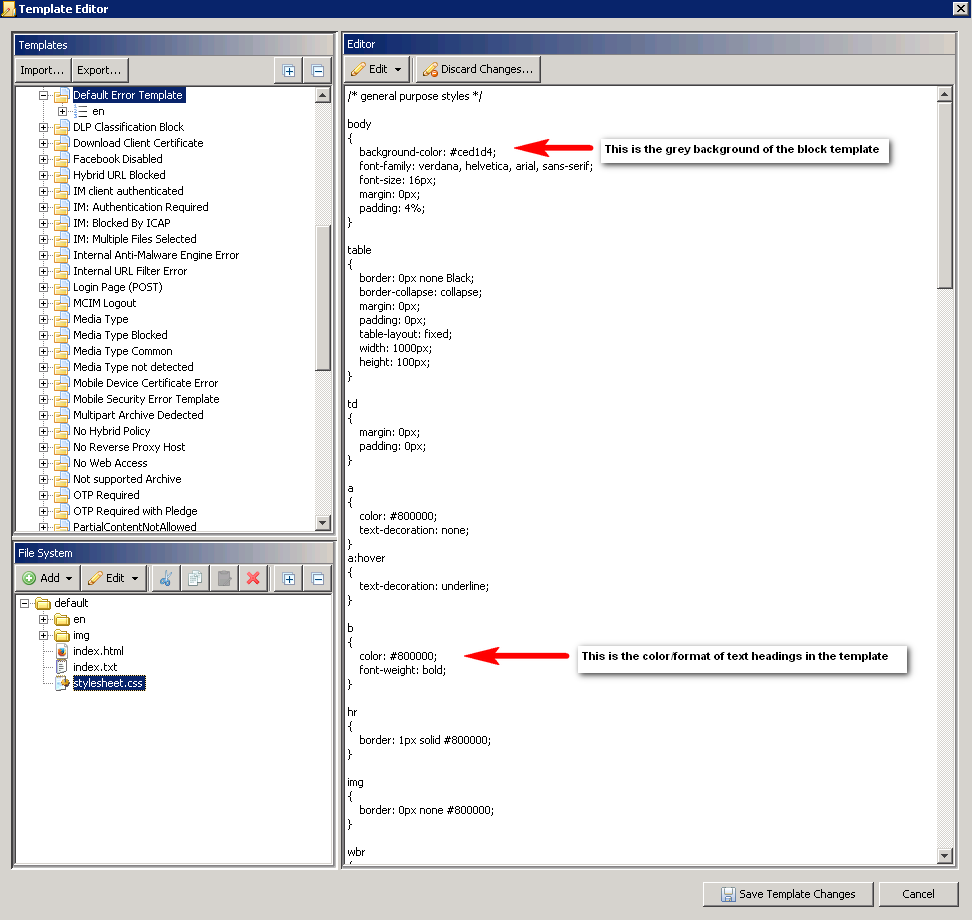
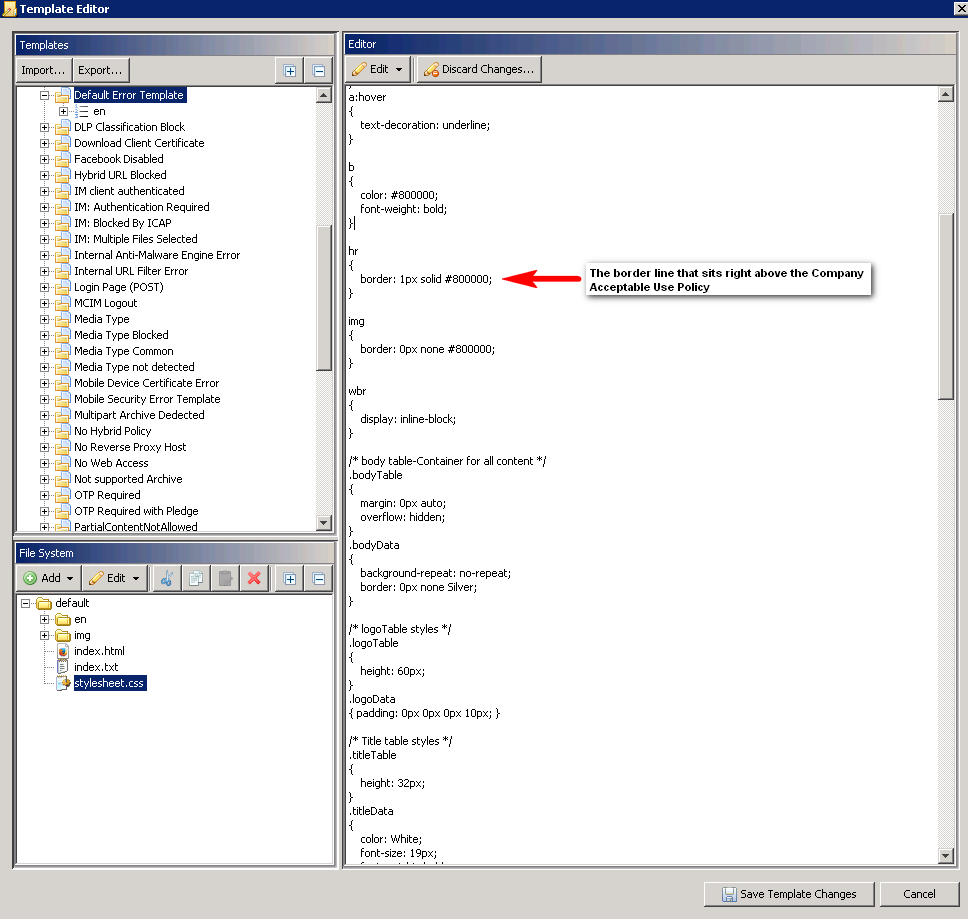
Changing text color
The stylesheet.css is the fi le that formats the block page and this fi le is found in the file system area of the template editor. Below we've highlighted certain areas of the stylesheet that you may be interested in modifying. In this example, we've decided to change the colors of the text-headings, divider bar, and text for the Company Acceptable Use Policy.
Updated block page (text heading and border color changes):