Configure your Remote Access Card (RMM)
Introduction
Do you have a newer model appliance? If you do, and you haven’t configured your remote access card, you are missing out on some very useful functionality -- and you’d be well served to get it configured today.
What are Remote Access Cards?
Let’s assume for a moment that you are reading this document and you have never heard of RMM. Remote Access Cards give you basically all the functionality of sitting directly in front of your appliance in your server room, but without all the noise/heat/leaving your desk.
You can reboot -- power on from a true power off -- you can even re-image your appliance if needed. Beyond that, you are able to look at hardware health information and the System Event Log.
Your remote access card operates completely independently from the host system/OS. That means you can reboot your machine, or even power it off entirely, and you can still get access to your appliance. With the remote console, you can even get into your BIOS/RAID controller BIOS if needed, all from the comfort of your workstation outside of the server room and potentially hundreds of miles away from it.
Which SWG appliances have remote access cards?
The following models have remote access cards available:
- 5000A & 5500A - EOL - Configuration for the DRAC was removed from this guide
- 5000B & 5500B
- 4500C, 5000C, & 5500C
- 4500D, 5000C, & 5500D
How do I set up my remote access card?
The steps are different depending on whether you are using RMM. Both require a unique IP and a separate ethernet connection.
RMM
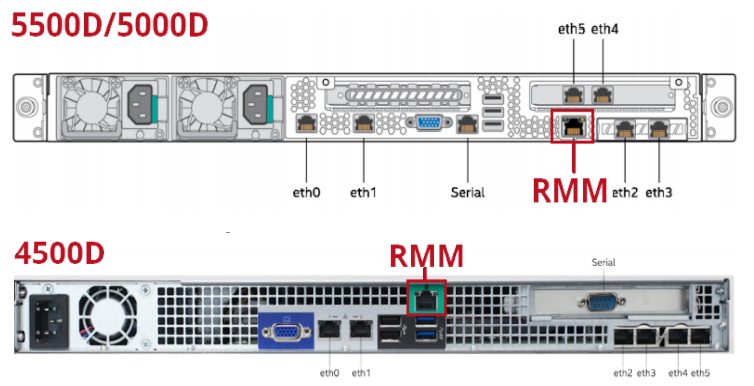
First, connect your RMM to your network, you can find the RMM port on the back of your appliance:

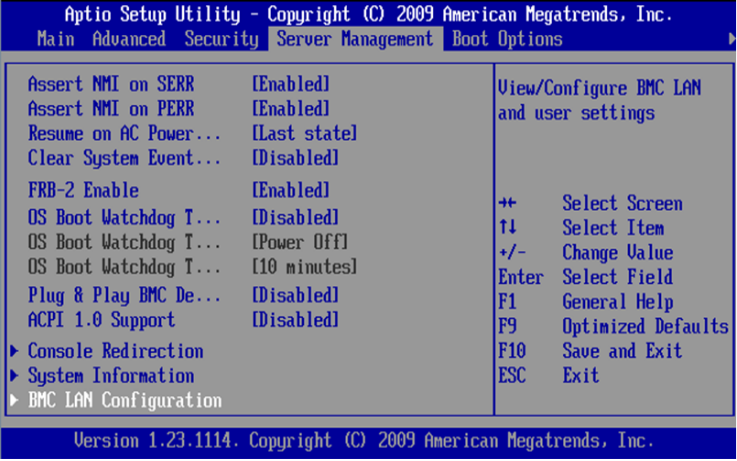
Boot your system into the BIOS (F2 at startup). Navigate to Server Management -> BMC LAN Configuration.
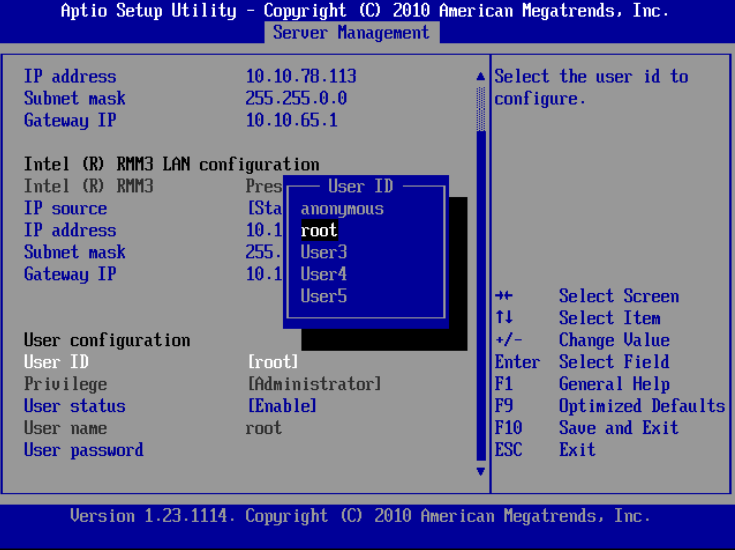
Configure your IP address, subnet mask and Gateway IP for your Intel RMM LAN configuration, as shown here.
NOTE: Do not configure your Baseboard LAN. Enabling both BMC and RMM can cause interface conflicts and lead to problems accessing your RMM.

Finally, scroll down to the ‘User configuration’ section. You can define accounts and set passwords here. For now, just select the ‘root’ user, and change the password to something you will remember.
Save the changes in the BIOS and exit, then you can allow your box to boot as normal. You should now be able to access your RMM GUI via HTTPS in the browser
Remote Access Card Usability
If you don’t have any pressing needs, you’re good to go. Simply having the remote access card configured and available if need be puts you a step ahead if and when you need to troubleshoot an issue or re-image an appliance. I’ll touch on a few main functionalities in RMM below.
RMM
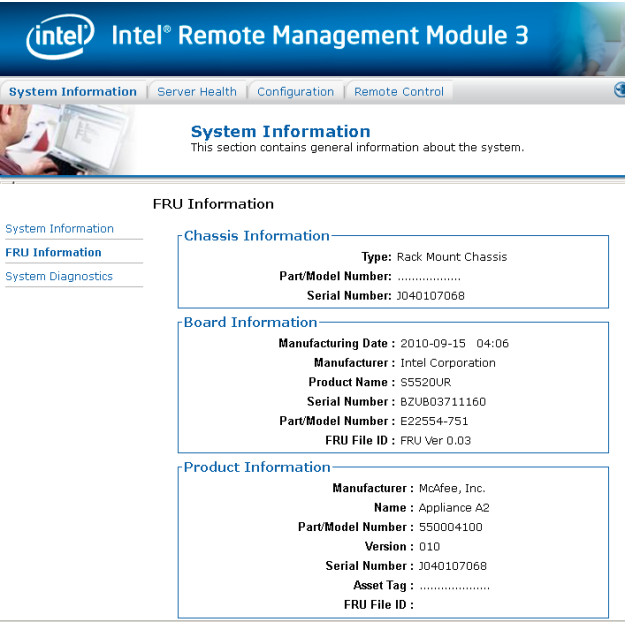
After logging into your RMM - you will be brought to the System Information screen. Unfortunately, there’s not a lot of useful information or links on this tab. To locate your appliance’s serial number, click on the ‘FRU Information’ on the left-hand side.
It’s also worth noting here that the ‘System Diagnostics’ section, while it sounds useful, actually isn’t. It outputs a password protected ZIP file which cannot be viewed by you or even SWG Support Engineers.
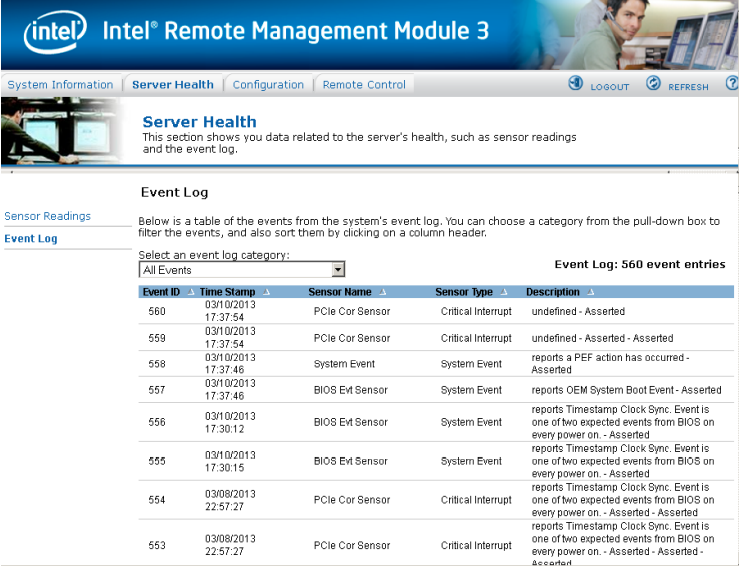
A useful troubleshooting tool is the System Event Log, which can be found under Server Health -> Event Log. If you suspect you are having a hardware issue, you can often find evidence of that here.
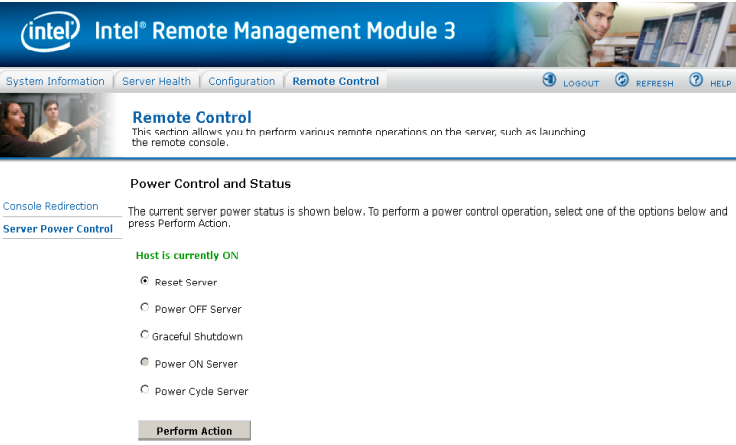
To power on/off or reboot the appliance from your RMM, you can do so under the Remote Control -> Server Power Control section.
Lastly, and perhaps most important, you can gain access to the remote console under the Remote Control -> Console Redirection section of your GUI.

From the JViewer console - you can interact with your appliance as though you were at the physical console - including modifying BIOS/RAID configuration as well as regular console interaction with your SWG and re-imaging.
On the point of re-imaging, if you needed to do so, you can mount an ISO file to the virtual drive under the Device -> Redirect ISO option.
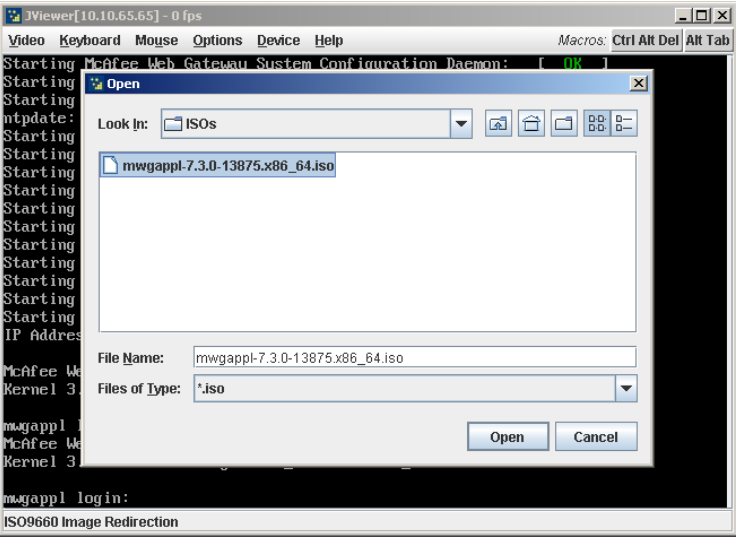
Then, once mounted, you can reboot your machine, and then enter the boot menu by pressing F6 and proceed to re-image your appliance as normal.
Conclusion
I hope that this document has opened your eyes to the value of configuring your RMM -- and the time savings it has the potential to bring to you. In my opinion, being able to handle the power states of your box, directly control the console/BIOS/RAID Controller and even reimaging from the comfort of your workstation instead of standing in a server room seems to be well worth the 5 minutes it took to configure it initially.