Configure Incident Notifications and Alerts
Introduction
This article will explain how to use and implement "Incident Notification" ruleset. Using the ruleset along with the Alerts you find in the dashboard you can begin to receive proactive notifications which include actionable next steps (Support Recommendations).
Understanding Incidents/Alerts
An Incident (good or bad) is an action or event that was triggered by the Web Gateway process. An Alert is a record of this Incident. A good example of this is when the Web Gateway tries to update the URL Filter engine, push a log file, or connect to the domain. The Incident would be the action taken, and the Alert would be the outcome of that action. Everything that shows up in the Dashboard Alerts can be referenced by an Incident ID. Throughout this article, we will be referencing Incident IDs in order to generate notifications.
Locating Incident IDs
Starting in Web Gateway 7.4.0 Incident IDs can be found dashboard alert messages themselves. This helps in identifying Incident IDs you might be interested in to quickly add to your notification rules. For a full Incident ID listing you still have the option of searching the help file in the UI.
Simplified View
This ruleset uses the Simplified View. You will see less of the inner workings of the ruleset, if you have any reason to unlock it, please post your use case here, and we can try and address it. If you unlock it, and quickly regret it, please reimport the ruleset and refer to existing objects on import.
Incident Notification Ruleset
The Web Gateway support team has come up with a ruleset that is intended to simplify incident notifications. We have incorporated a feature that allows for actionable information to be included IN the notification. This actionable information is called Support Recommendations.
Concept
The concept of this ruleset is simple, identify an alert you want to know about, add it to a list to receive a notification in whatever form you want (email/snmp/syslog/incident.log).
Example
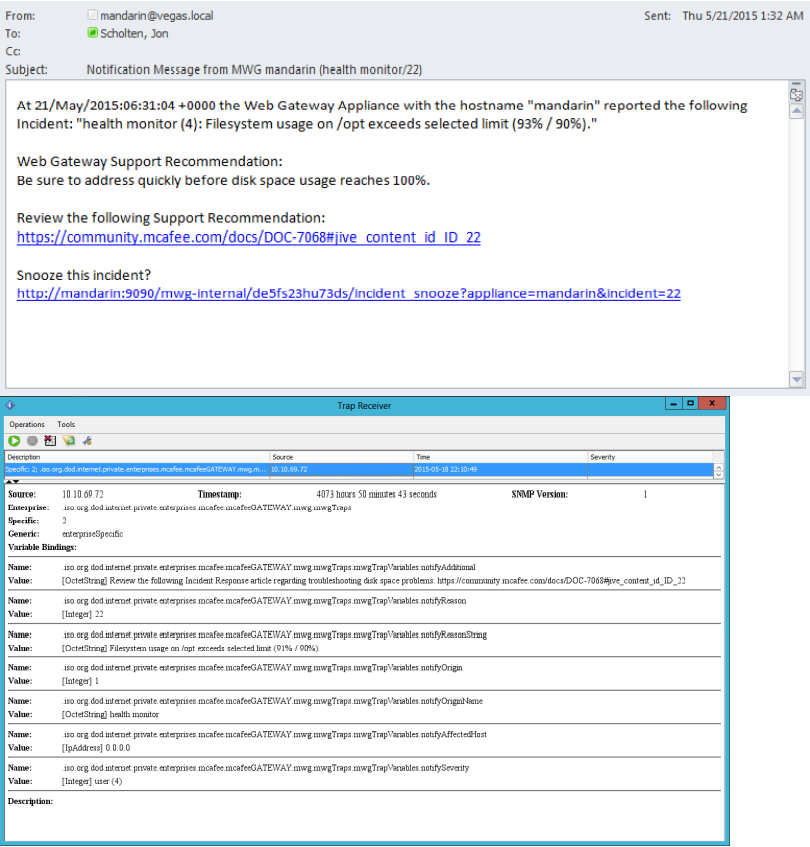
Install
Download the "Incident Notifications v2.0.zip" To install the ruleset, navigate to Policy > Rule Sets > Error Handler, select the Default Error Handler, then import from the library, choosing the "Import from File" option. Refer to existing objects if there are any conflicts.

Configuration
Incident Specific Settings

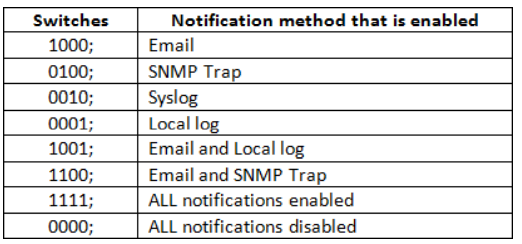
With each incident you can configure incident specific settings. The incident specific settings involve three things:
- Notification "switches" (1's and 0's)
- User defined message (optional)
- Incident specific email recipient (optional)
- Example 1 - Send an email to the default recipient and write to a the incident.log 1001;
- Example 2 - Send an email to john_doe@company.com, write to syslog, and write to the incident.log. 1011;john_doe@company.com
- Example 3 - Send an email with the custom message "Custom message: Call the data center." to john_doe@company.com and jane_doe@company.com, also send an SNMP trap.
1100;Custom message: Call the data center.;john_doe@company.com;jane_doe@company.com
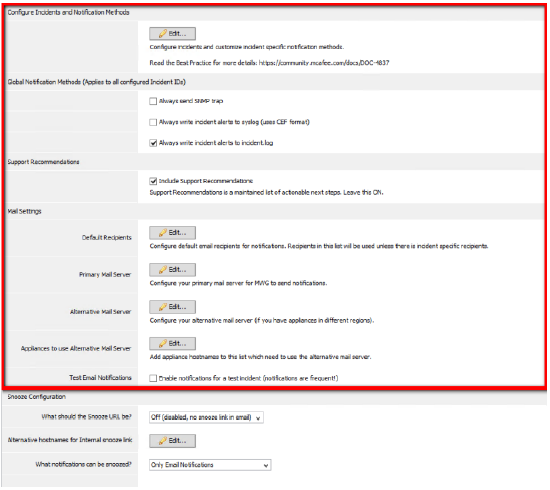
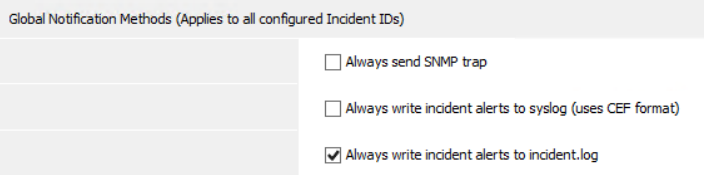
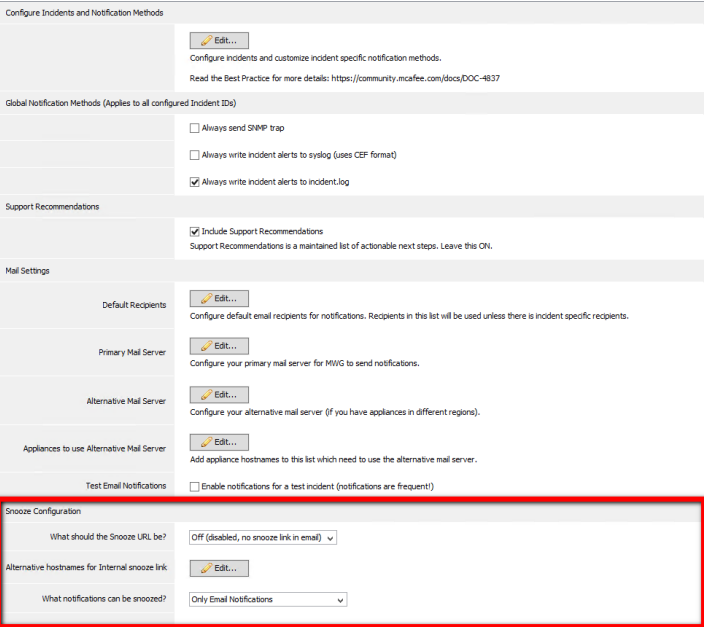
Global override options
If you wish to always send an SNMP trap, send to syslog, or write to the incident.log, incident specific settings can be overridden.
Support Recommendations
Support recommendations are included in the notifications sent by Web Gateway. Recommendations are updated by the Web Gateway support team using the subscribed lists feature. LEAVE THIS ON.
The list of Support Recommendations can be found here:

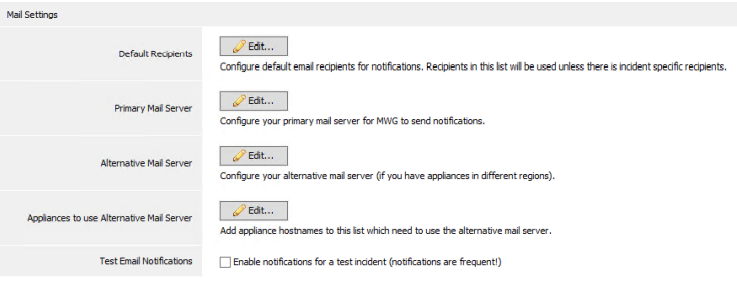
Mail Settings
In order for Web Gateway to send email notifications, you must define default recipients (for which emails will be sent to), and also your mail servers. If you have appliances in different regions or subsidiary's, you can specify alternate mail server settings.
Snooze Feature (Optional)
Much like an alarm clock's "snooze" feature, there may be notifications you want to "snooze" as well. If you have a failing harddrive and the new drive is on its way, you can acknowledge the notification, and snooze notifications for a configurable amount of time.
The snooze feature is off by default.
Installation
To install the Snooze feature, you must first import the blockpages, then install the ruleset.
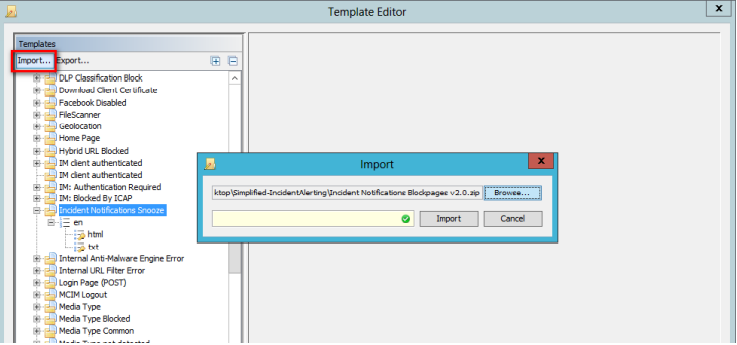
Install Block Pages
Download "Incident Snooze Blockpages v2.0.zip" and install the block pages in the Template Editor by navigating to Policy > Settings, select a Blockpage template, and click edit.
Install the Snooze Policy Ruleset
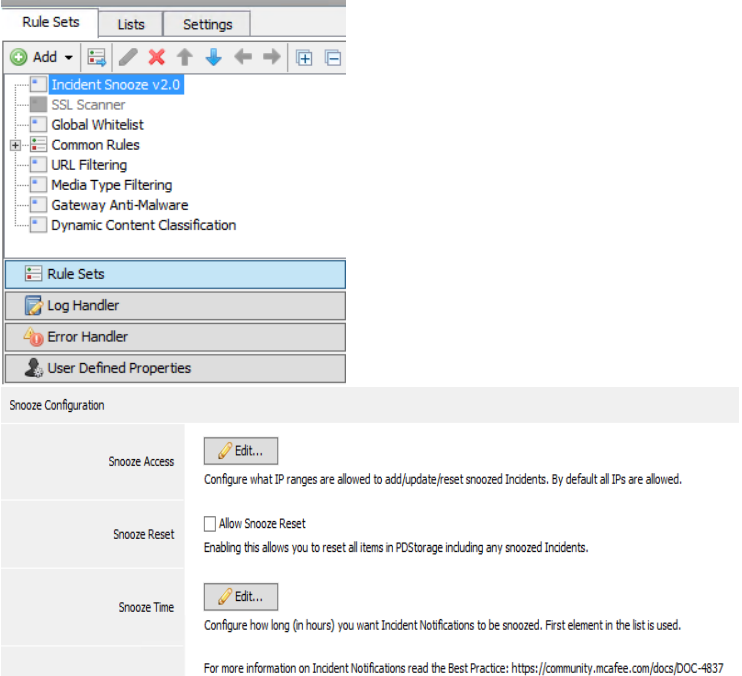
To install the Policy ruleset, navigate to Policy > Rule Sets, and stay on the "Rule sets" section. Click "Add" and select "Import Ruleset from Library", on the next screen "Choose from file..." and browse for the "Incident Snooze v2.0.xml" file.
In the Snooze Policy Ruleset, you can restrict access, disallow resets of Snoozed alerts, and configure the Snooze Time.
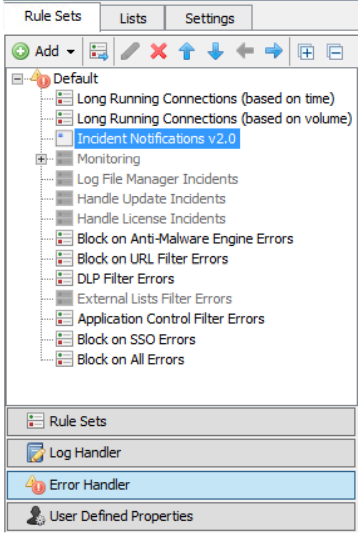
Configure the Snooze options in the Error Handler
In the Error Handler options are configurable for what the Snooze URL should be (external --swginternal.com, internal -- the appliance hostname, or off). You can also define what items will be snoozed.
Delivery Methods
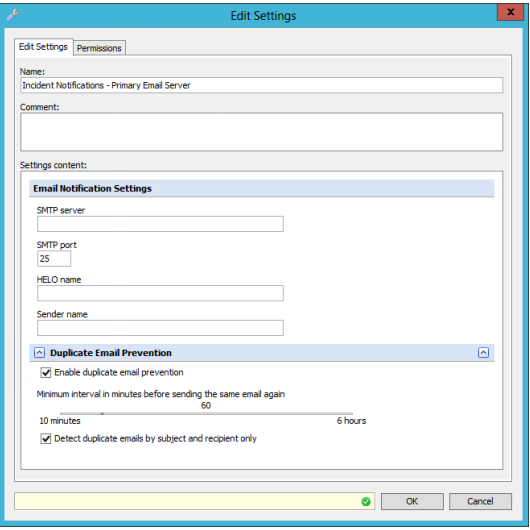
To be able to receive notifications via Email, it is required to first configure the Email notification settings under Policy > Settings > Email Notification. If you have multiple appliances in Central management, this only needs to be applied once, as it is part of the policy and shared between appliances.
The required settings include:
- SMTP server. Enter the active/functioning SMTP server name
- SMTP port. Enter the port that is used for SMTP
- HELO name. Enter the HELO name of the SMTP server
- Sender name. Enter the value configured to be the sender name
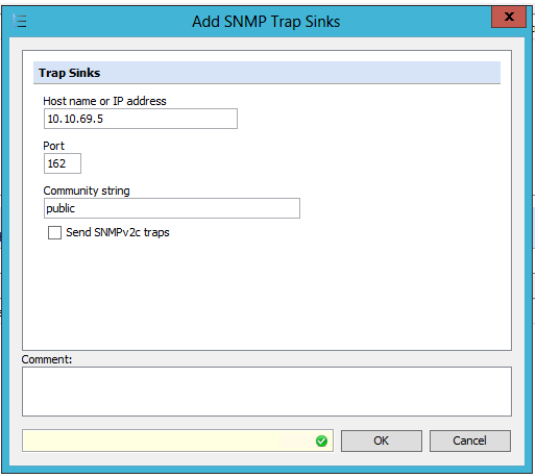
SNMP Traps
To be able to receive notifications via SNMP Traps, it is required to first configure the SNMP Trap Sink under Configuration > SNMP. The SNMP settings are unique per appliance and need to be configured for each member of a central management cluster.
These required settings include:
- SNMP Trap Sinks. these settings specify the management systems that will receive traps from the agent
- Host name or IP address. Enter the host name or IP of the server that is to be used as the Trap Receiver
- Port. The listener port that is configured to listen for SNMP messages
- Community string. Enter the string message that is expected by the Trap Receiver
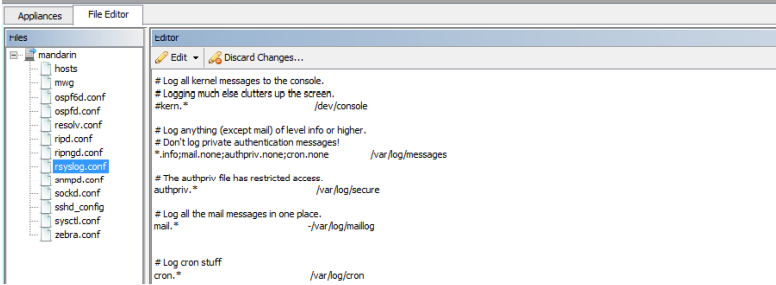
Syslog
To be able to receive notifications via syslog, it is required to first configure the rsyslog.conf file under Configuration > File Editor > rsyslog.conf. The syslog settings are unique per appliance and need to be configured for each member of a central management cluster.
Incident.log (a local log)
It is highly recommended to use a local file in addition to any of the delivery methods above. This log file will give you a record of all the notifications that have been triggered and helps to troubleshoot in case other delivery methods are not working correctly.
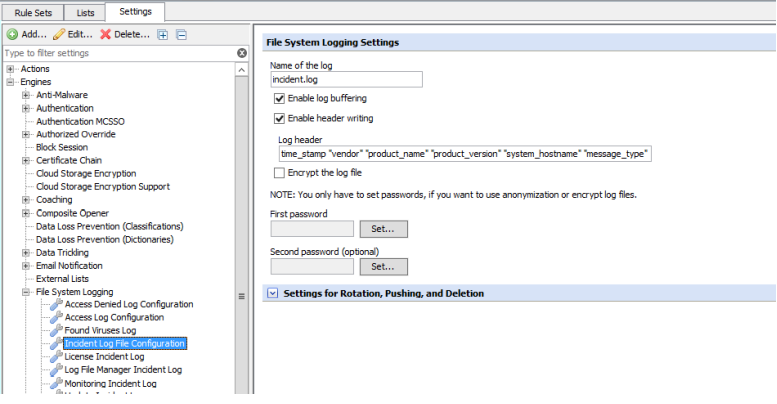
To be able to write notifications into a local log file, it is required to first configure a new log file under Policy > Settings > File System Logging . If you have multiple appliances in Central management, this only needs to be applied once, as it is part of the policy and shared between appliances.
The required settings include:
- Name of the log. Enter the name of the log file that will be used in the event the Incident criteria is matched
- Settings for Rotation, Pushing, and Deletion. These settings are required
Changelog
If any changes are made to the ruleset, the version number of the ruleset will be incremented and documented here. To update, simply delete the old ruleset and import the new ruleset in place of the old one. Your lists and settings should all be preserved on the Web Gateway.
- Version 2.0 - Rewrite of Incident Notifications, incorporation of Support Recommendations