Configure Web Hybrid Policy Synchrnonization
Introduction
The idea behind "Web Hybrid" is that you can manage your web security policy from your Secure Web Gateway (On-Prem), and it will sync to the Secure Web Gateway Cloud. This ensures a consistent web security policy wherever your users are (inside or outside the corporate boundaries). Users on-premise will be protected by your Secure Web Gateway (On-Prem), and users outside the network will be protected by the Secure Web Gateway Cloud.
Using Web Hybrid allows you to enforce the same security policy on the web usage of both kinds of users; this includes:
- Your block pages will look the same on-premises as well as in the cloud
- You can select the rule sets that you want to synchronize to the Secure Web Gateway Cloud
- The policy is synchronized in configured intervals to ensure that rule sets remain the same on both products, including changes that you have incorporated on Secure Web Gateway
- You can also perform synchronization manually, regardless of the configured interval
You can check the status of the Secure Web Gateway Cloud at https://status.skyhighsecurity.com/
Secure Web Gateway Cloud Account
To sync your Secure Web Gateway (On-Prem) policy to the Secure Web Gateway Cloud, you need an Secure Web Gateway Cloud account. https://auth.ui.trellix.com/
Configuring Policy Synchronization
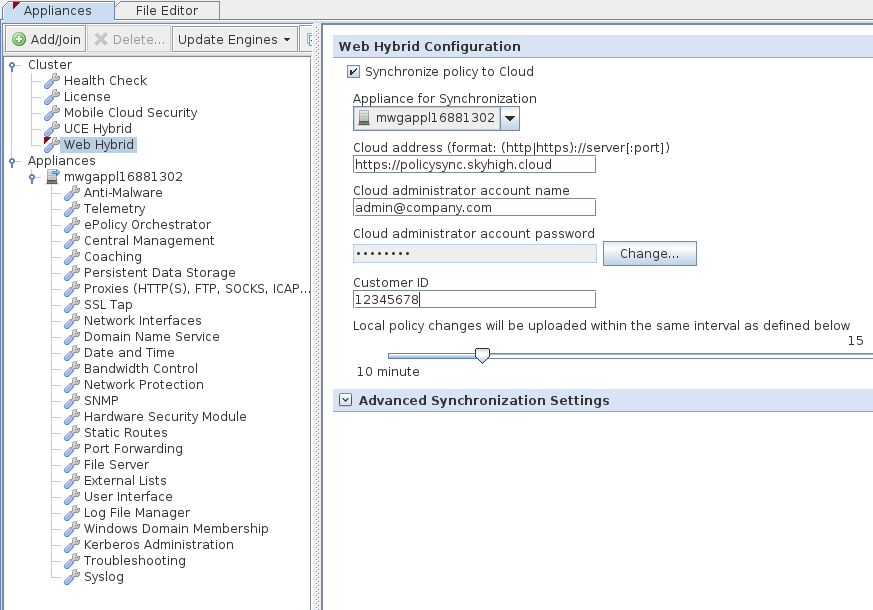
In the Secure Web Gateway UI we need to enable the policy synchronization as a first step to creating your hybrid policy. Navigate to Configuration > Web Hybrid and configure the following:
- Check the box for "Synchronize policy to Cloud"
- Select the appliance that should do the synchronization from the drop-down (only one appliance can do the synchronization in a cluster)
- Unless instructed otherwise in your account setup email, leave the Cloud address field at its default: policysync.skyhigh.cloud
- Enter your administrator account, password, and customer ID from your account setup email
- Select the synchronization interval desired (15 minutes seems to be a common value here).
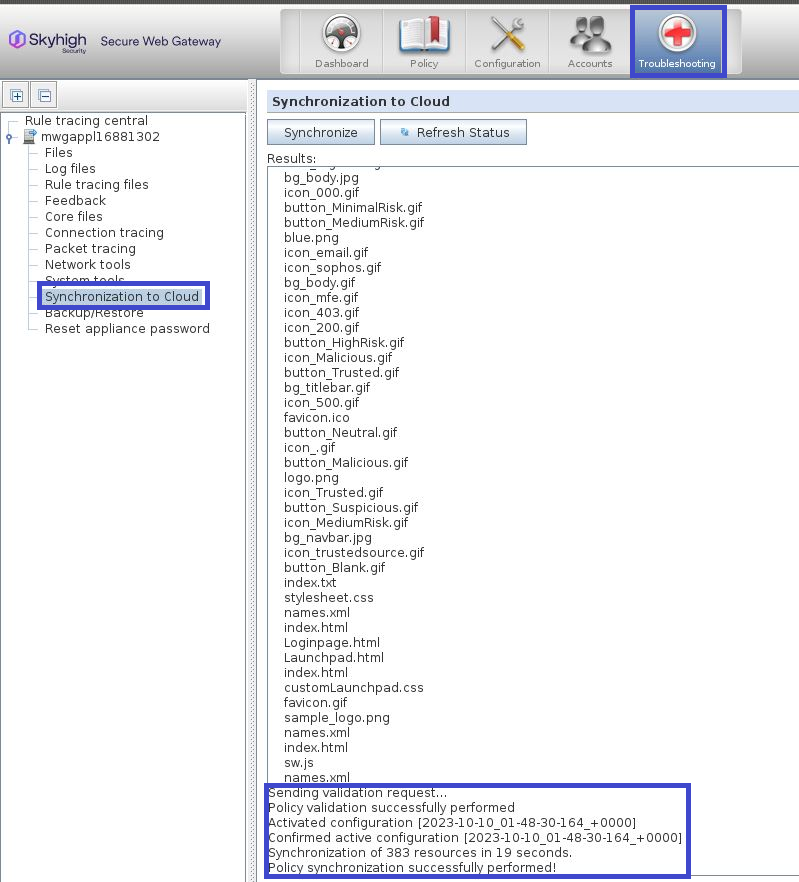
Now click "Save changes" and verify that the communication with the Cloud Service is working by going to Troubleshooting > Synchronization to Cloud > Synchronize.
A successful synchronization should end with a similar message as shown below.
Enabling Rules for Use in the Cloud
You can now pick and choose which parts of your policy should be synchronized with the cloud. A good starting point might be a global block list or a URL filtering rule set (but virtually any rule set should work with the restrictions below in mind)
To enable a rule set for use in the cloud, select the Enable in Cloud checkbox and click Save. The rule set will be enabled in the next synchronization.

You can also enable multiple rule sets at the same time by selecting the desired rule sets and then right-clicking on them and selecting "Cloud".
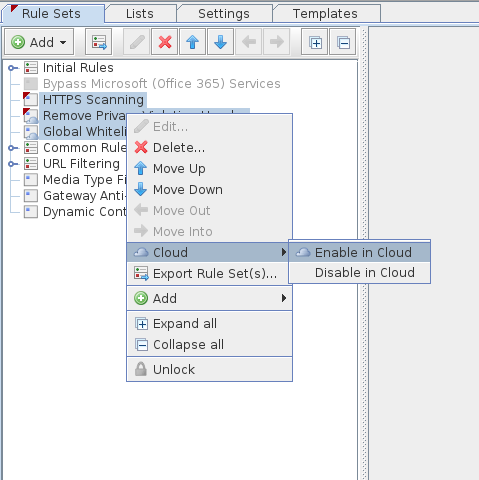
Whether a particular rule set is enabled in the cloud or not is indicated by the little blue cloud symbol on the rule set.
Verify your configuration
Once everything is syncing between Secure Web Gateway (On-Prem) and the Secure Web Gateway Cloud, you'll want to verify and test your configuration. To do this, we need to redirect our web traffic to the Secure Web Gateway Cloud. This can be done using SCP, or changing the browser settings. SCP is the most common deployment method, if you use IP Range or SAML, we'll need to change the browser settings.
Using SCP
Using IP Range authentication
After your policy has been synced, you should be able to verify your setup by pointing your browser to the Secure Web Gateway Cloud instead of your local Secure Web Gateway (On-Prem).
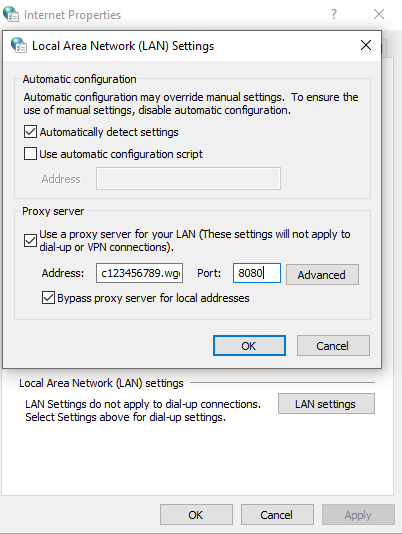
Your account setup email should have provided you with the proxy address needed. Alternatively, check Cloud UI > Configuration > Infrastructure > Client Proxy Management > Gateway List > Default Proxy Server > List of Gateways, this already has a prefilled Proxy address.
As an example, you can change your proxy settings in Internet Explorer under Tools > Internet Options > Connections > LAN Settings.
If the setup is working correctly, you should see that you're on-premise policy (and block pages) are applied while going through the Cloud Service for filtering. If you have access to Web Policy in Cloud UI > Policy > Web Policy > Policy, for details, see Review the Web Hybrid Policy Sync Status.
Restrictions
Synchronization Times
The synchronization of your policy from your on-premises appliance to the cloud only takes a few seconds. For efficiency purposes, the active policy in the cloud that is deployed to the proxies is being cached for a few minutes though. Do not be alarmed if a change you made takes a few minutes before it actually starts to work through the Cloud Service proxy. Unless there was an error message during the synchronization, you can be sure that your policy will get applied and will become active within a few minutes.
Hard-coded default values in some properties
Some properties that might be used in your on-premises policy might not make sense to be used in the cloud proxy. As an example, the property proxy.ip has a hard-coded value of 0.0.0.0 when a request is processed through the cloud.
If you need to verify whether a property has a real or a hard-coded value in the cloud, the easiest and quickest way is to add it to a block page and then examine that block page while going through the cloud proxy.
Example rule: if URL. Host equals property-check.mwginternal.com then block (property-check block page)
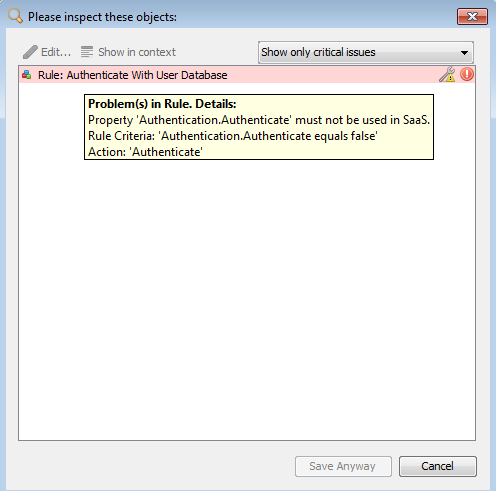
UI warnings
Several properties and events will not work in a cloud setup and might therefore cause warnings in your local UI when you try to save your changes. Some examples are authentication properties, log file writing, or sending email/snmp/syslog messages. If these properties or events are in use in your policy that you enable to sync to the cloud, you will see a UI warning popup when you save changes. Red warnings need to be addressed before you can proceed to save your changes!
Authentication related rules
As mentioned earlier, authentication for the cloud-based requests still happens as part of the Secure Web Gateway Cloud and not as part of your Secure Web Gateway rules being synced.
It is very important that your rules and rule sets are configured to work for users that are authenticated on-premise (for example with NTLM/AD) as well as in the cloud (for example with a static username like we are using in these instructions).
Consider that the actual username and even more importantly the group names can look different between the cloud and the on-premise environment.
Adding usernames and group names to a test block page is a quick and easy way for you to see what exactly is available to you.
Tips and Tricks
Identify a request executed in the cloud
For policy-building purposes, it may be important to be able to identify whether a particular request is being filtered in the cloud or on-premise. As an example, you can add text to your block pages to show where the request was blocked.
There is an official property called "InTheCloud" which will return "true" only if a request was filtered through the Secure Web Gateway (On-Prem) proxy.

Using a User-defined Property to set custom text and then embedding that text into the block pages would allow you to show which proxy was being used.
This kind of detection can also be helpful in situations where you would want to set a default user group for cloud users.