Configure Event Monitoring with SNMP
You can configure SNMP to monitor system events on an appliance, configure an SNMP protocol version, configure a user or community that is allowed to view monitored information, and other settings.
To configure event monitoring with SNMP:
- Select Configuration> Appliances.
- On the appliances tree, select the appliance where you want to configure SNMP event monitoring, then click SNMP.
- Under SNMP Port Settings and SNMP System information, add and modify information about listener ports and management stations as needed.
- To work with SNMPv1 or SNMPv2c, complete these options. Otherwise, continue with step 5.
- Under SNMP Protocol Options, make sure the correct version is selected.
- Above the list of communities that are allowed to view monitored information, click Add. Then create an entry for a community in the window that opens.
- Under Community string, enter the name of a community. For example, public.
- Under Allowed root OID, enter a root Object ID to identify the item on the MIB (Management Information Base) tree where the information begins that is allowed for viewing.
For example, enter this root Object ID to allow all information that is related to Skyhigh Security for viewing:
.1.3.6.1.4.1.59732
Information related to Web Gateway is a part of this information. So, enter the following to allow only this information for viewing:
.1.3.6.1.4.1.59732.2.7.1.1
If you enter an * (asterisk) here, all information is allowed for viewing. - Under Allowed from, specify the host system where viewing the information is allowed.
If you specify no host system here, viewing is allowed from any system.
- Under SNMP Trap Sinks,.click the Add icon above the list and configure trap sinks as needed.
- To work with SNMPv3, complete these options:
- Under SNMP Protocol Options, make sure this version is selected.
- Above the list of users who are allowed to view monitored information, click Add. Then create an entry for a user in the window that opens.
- Under User name, enter the name of a user.
- Next to Authentication Password, click Set, then enter a password.
- Next to Encryption Password, click Set, then enter a password.
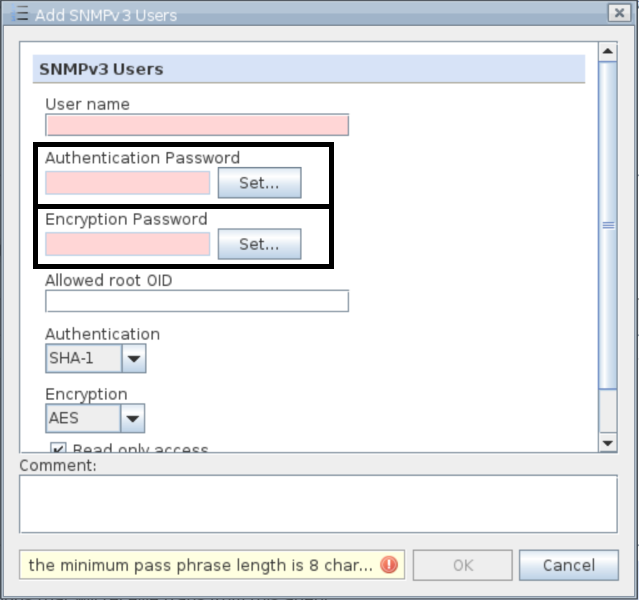
NOTE: If no Encryption password is configured, the Authentication password is used for both authentication and encryption.
- Under Allowed root OID, enter a root Object ID to identify the item on the MIB (Management Information Base) tree where the information that is allowed for viewing begins.
If you enter an * (asterisk) here, all information is allowed for viewing. - Under Authentication, select a method for calculating a hash value that is used to verify and control authentication data.
Available methods: MD5, SHA-1, SHA-224, SHA-256, SHA-384, SHA-512
Some authentication methods cannot be used together with some encryption methods that are used with regard to SNMP traffic. You cannot configure the following:- MD5 or SHA-1 with encryption method AES-192 or AES-256
- SHA-224 with encryption method AES-256
- If you want to have the SNMP traffic encrypted, select a method for this encryption under Encryption.
Available methods: DES, AES, AES-128, AES-192, AES-256, or None (no encryption).
Some encryption methods cannot be used together with some authentication methods that are also used for creating SNMP user information. See above for combinations that will not work.- Under SNMP Trap Sinks, click Add above the list for SNMPv3 and configure trap sinks as needed.
- Click Save Changes.