Integrate the ServiceNow API
Use the following procedure to register the ServiceNow application, and integrate the ServiceNow API in Skyhigh CASB.
Prerequisite
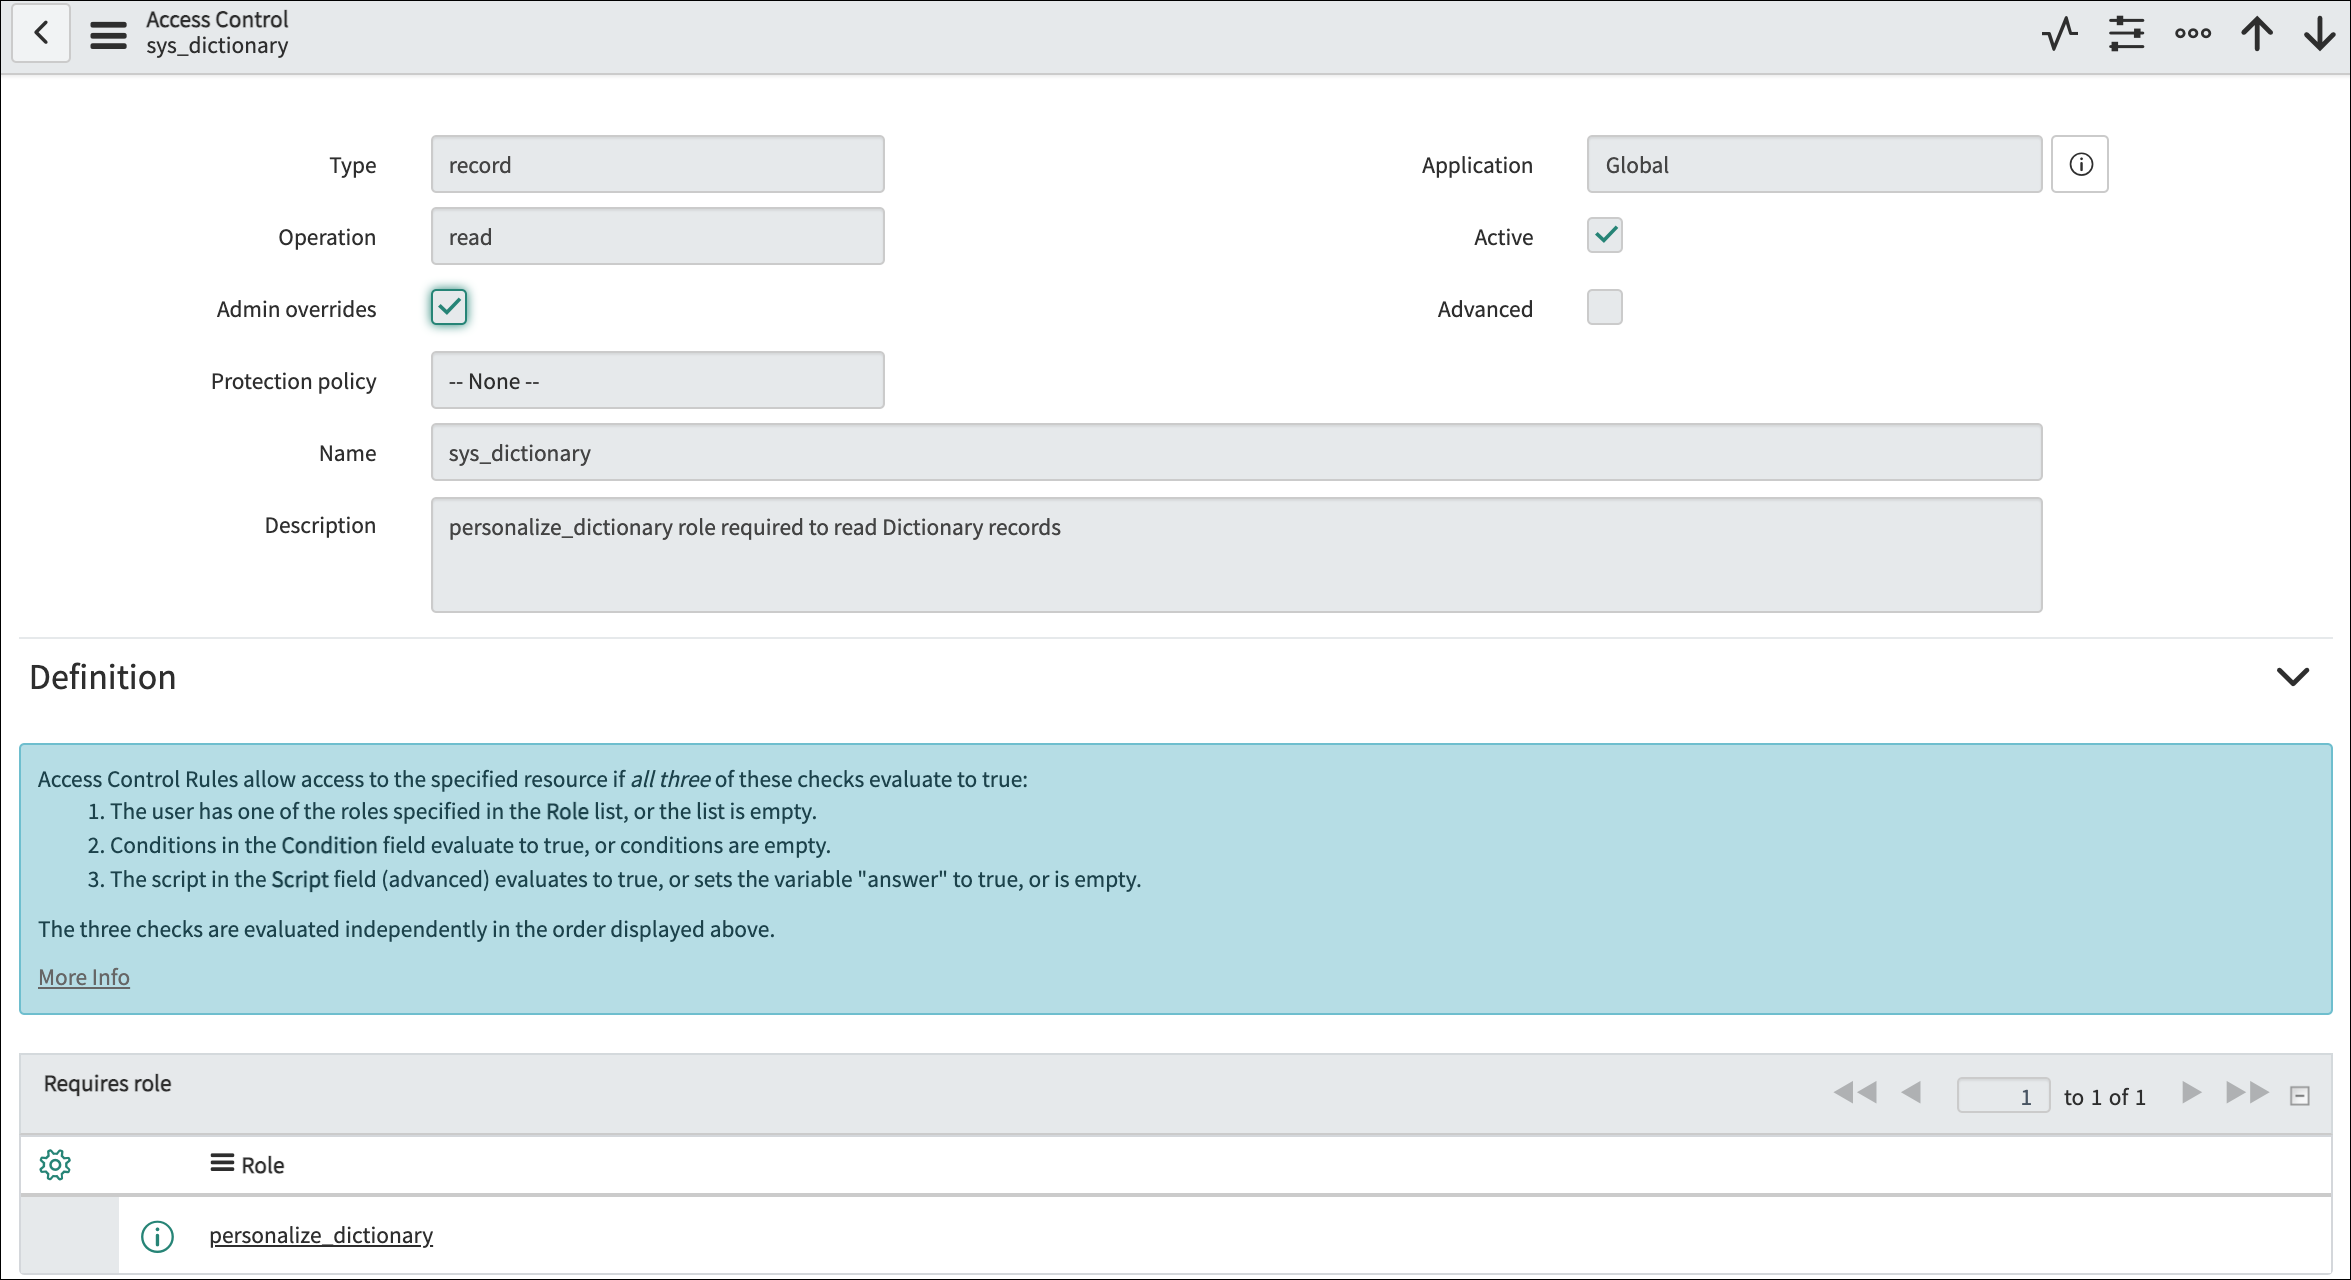
For ServiceNow ODS, the ServiceNow admin should have access to ServiceNow's sys_dictionary and sys_db_object tables. The ODS configuration page fetches the ServiceNow objects for scanning from ServiceNow's sys_dictionary and sys_db_object tables. If the ServiceNow admin does not have access to ServiceNow's sys_dictionary and sys_db_object tables, assign the personalize_dictionary role to the ServiceNow admin and ensure that the assigned personalize_dictionary role has Access to (Access Control List) the sys_dictionary with read access and sys_db_object with read access ACL's.
Register the ServiceNow Application
- Log in to ServiceNow with an Admin account.
- Create a new application in ServiceNow as described here and configure the following:
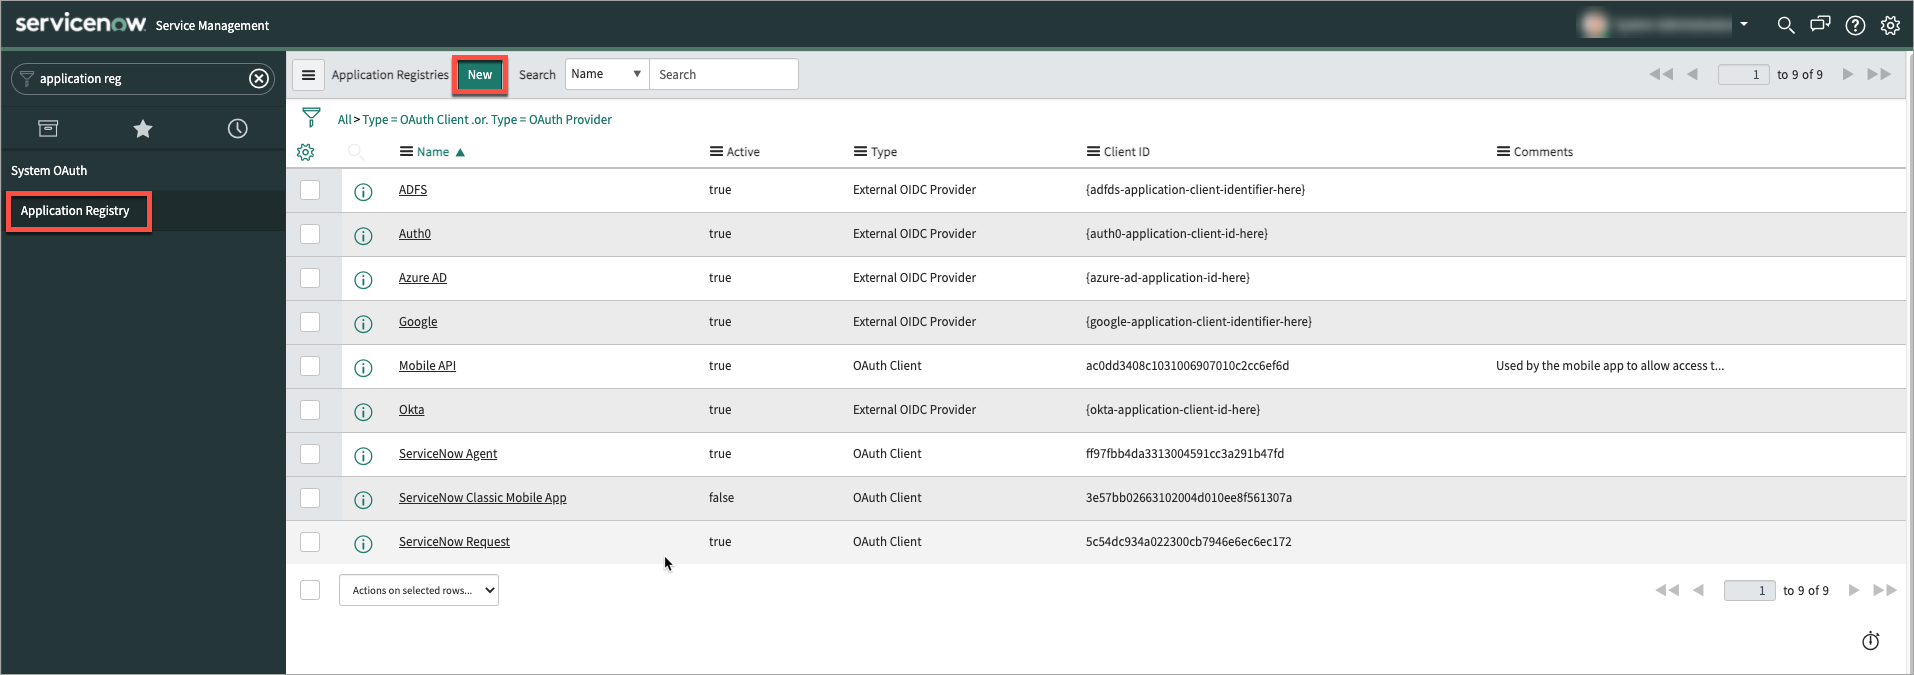
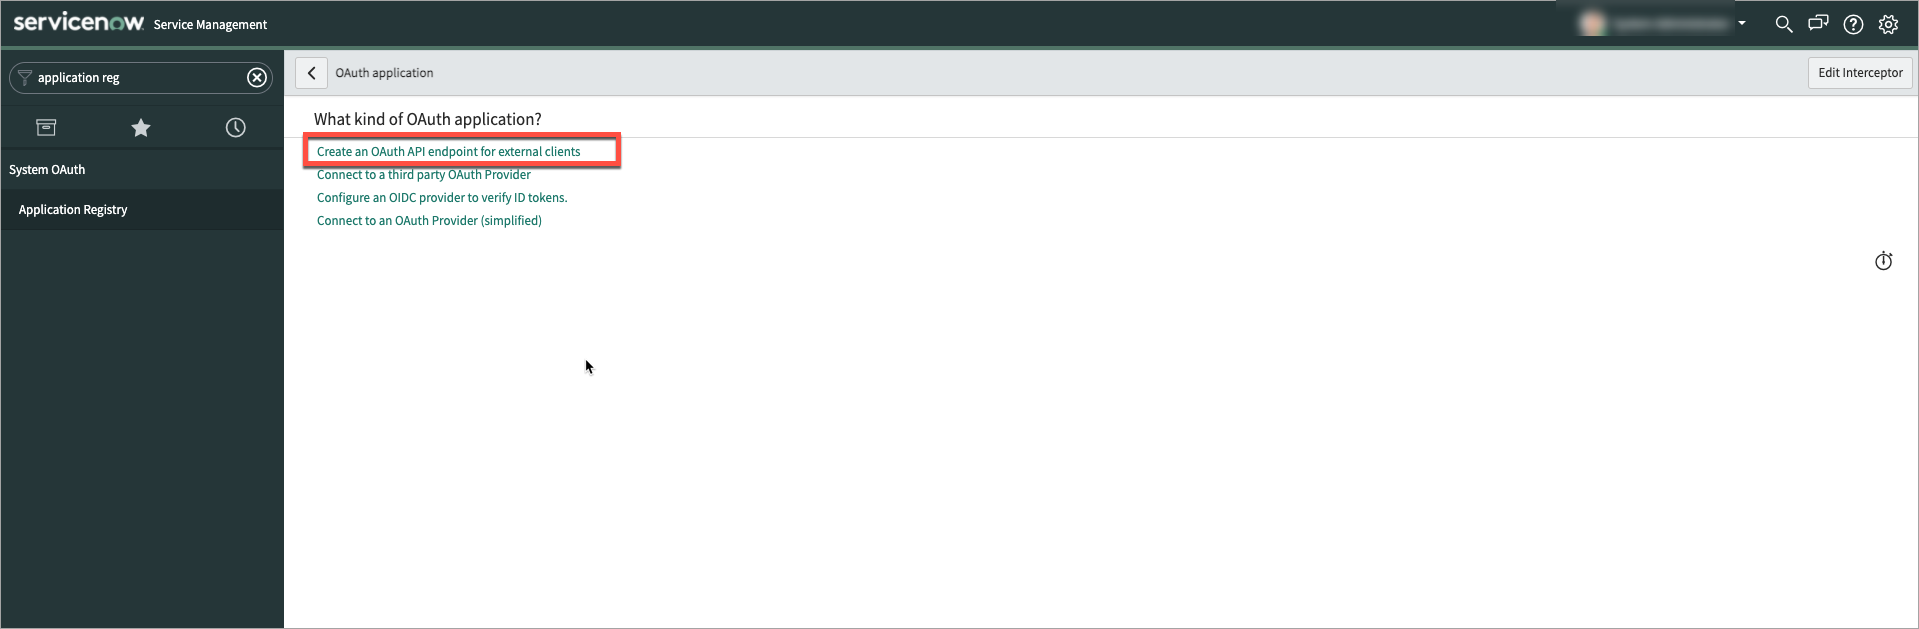
- OAuth Application Type. Click Create an OAuth API endpoint for external clients.
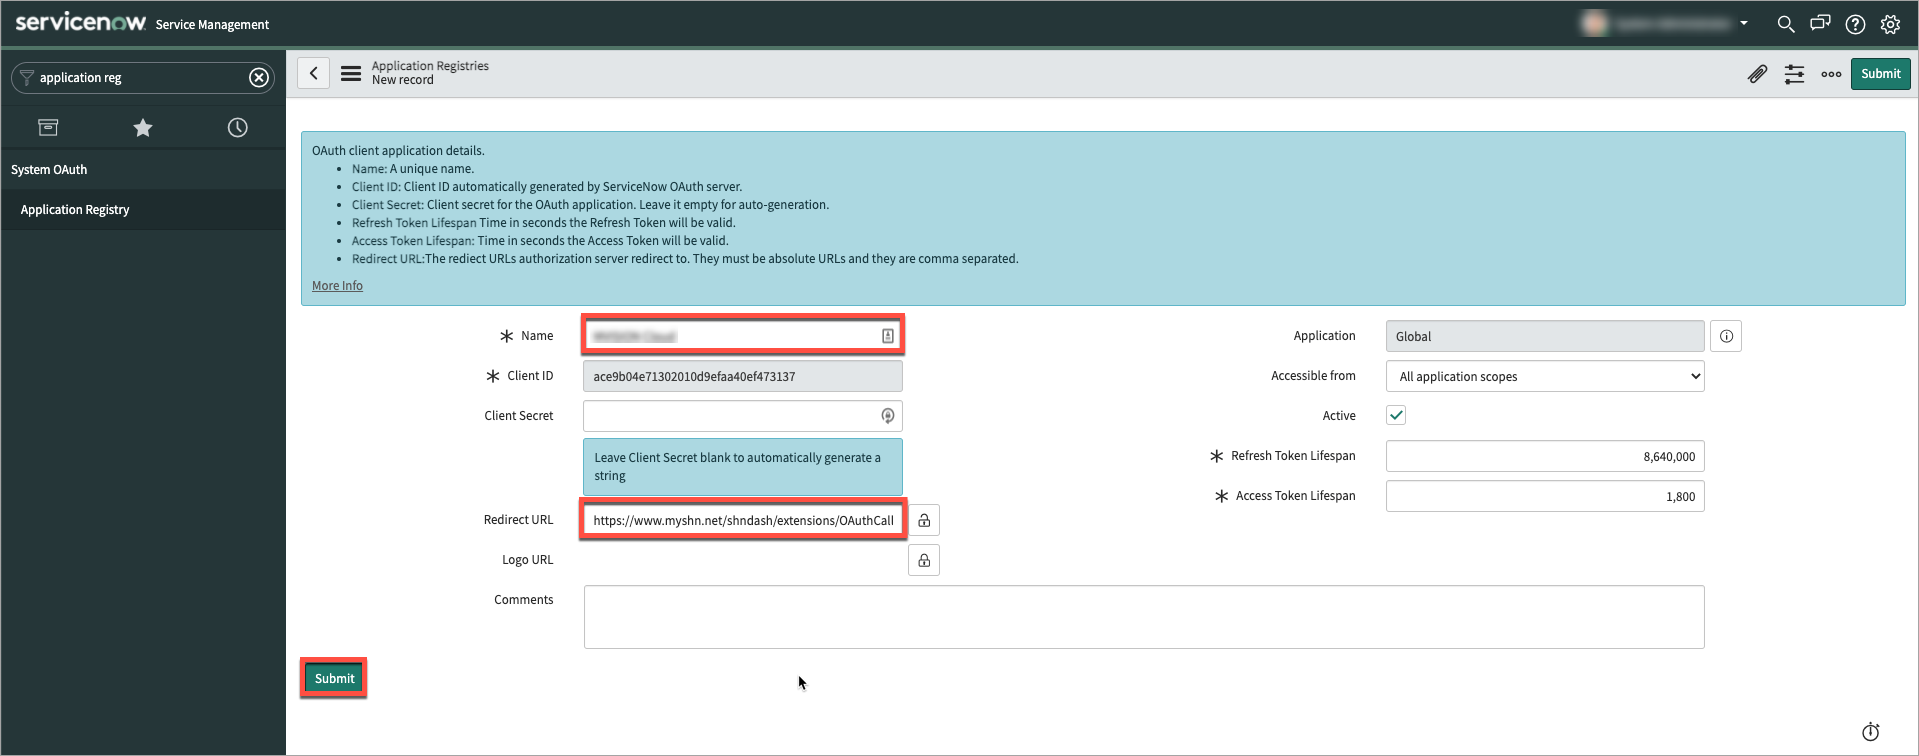
- Name. Enter the application name as Skyhigh CASB.
- Client ID. This ID is auto-populated in ServiceNow. Copy the Client ID to use later in ServiceNow API Integration Setup in Skyhigh CASB.
- Client Secret. Enter a strong password. This can be used later in ServiceNow API Integration Setup in Skyhigh CASB.
- Redirect URL. Enter the redirect URI depending on Skyhigh CASB backend:
- OAuth Application Type. Click Create an OAuth API endpoint for external clients.
US Production: https://www.myshn.net/shndash/extensions/OAuthCallbackController
Integrate the ServiceNow API in Skyhigh CASB
- Log in to Skyhigh CASB with your tenant and go to Settings > Service Management.
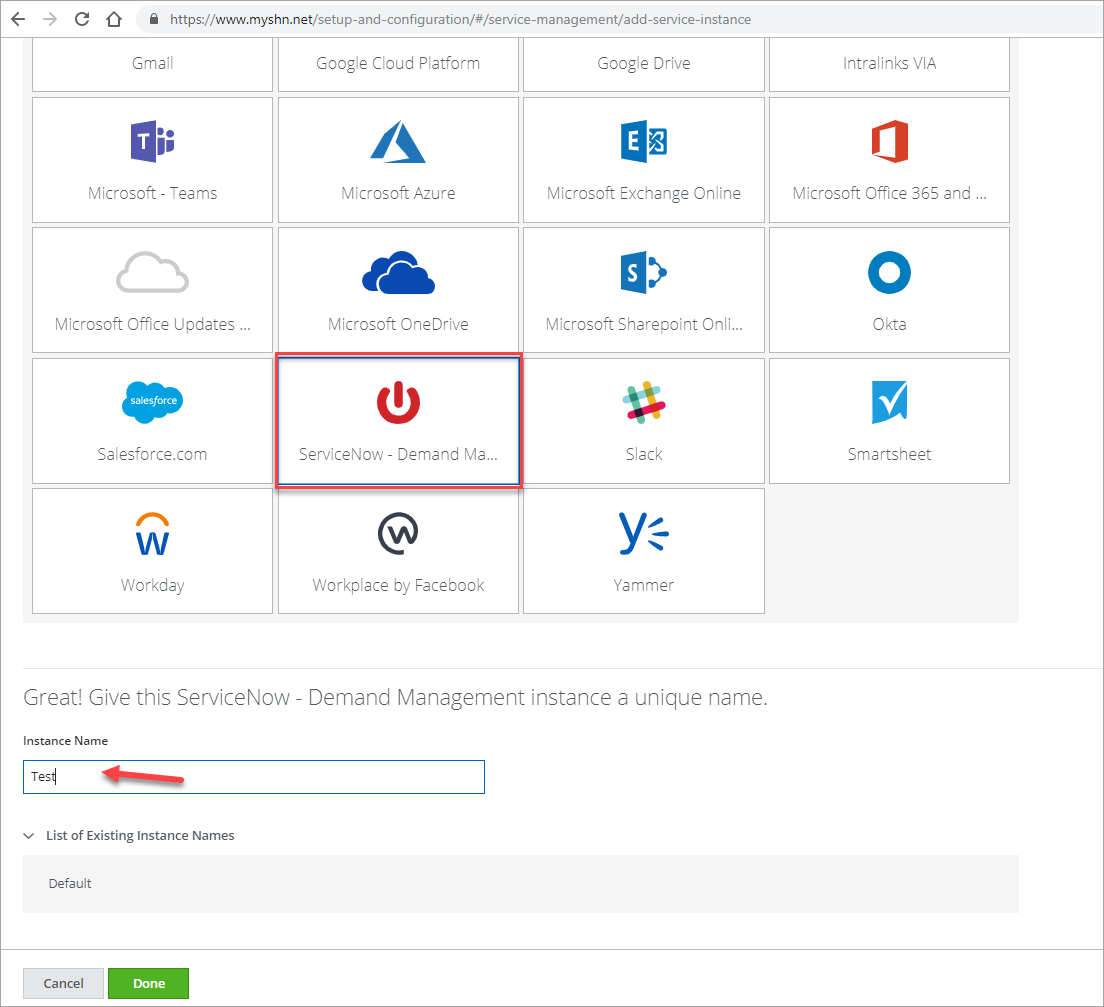
- Click Add Service Instance, select ServiceNow.
- Enter a name for the instance and click Done.
- Select the ServiceNow instance you created.
- Go to the Setup tab and under API, click Enable.
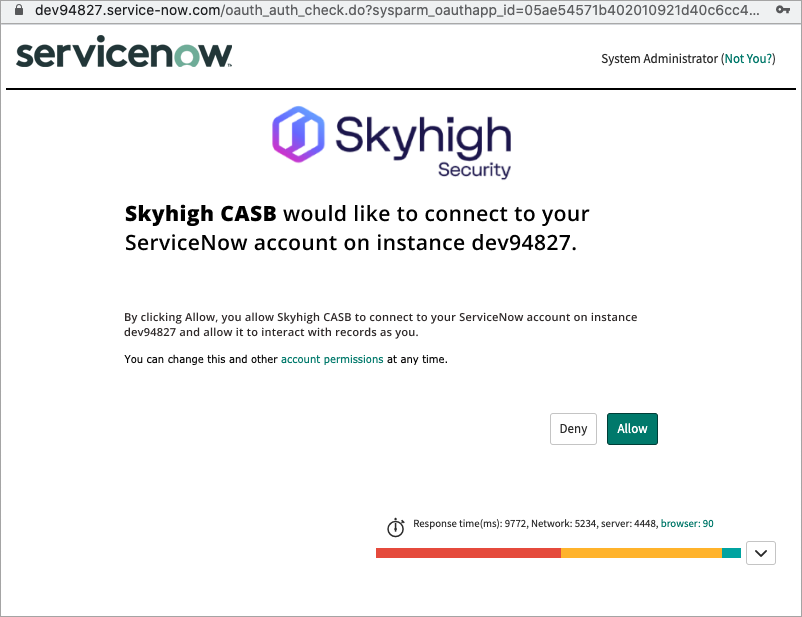
- On the Enable API page, click Provide API Credentials.

- Enter the details of the Custom OAuth Application created in ServiceNow and click Submit.
- For the ServiceNow URL, in this example, you would replace ven01114 with your own ServiceNow instance.
- For the Admin Email, enter the ServiceNow Admin email.

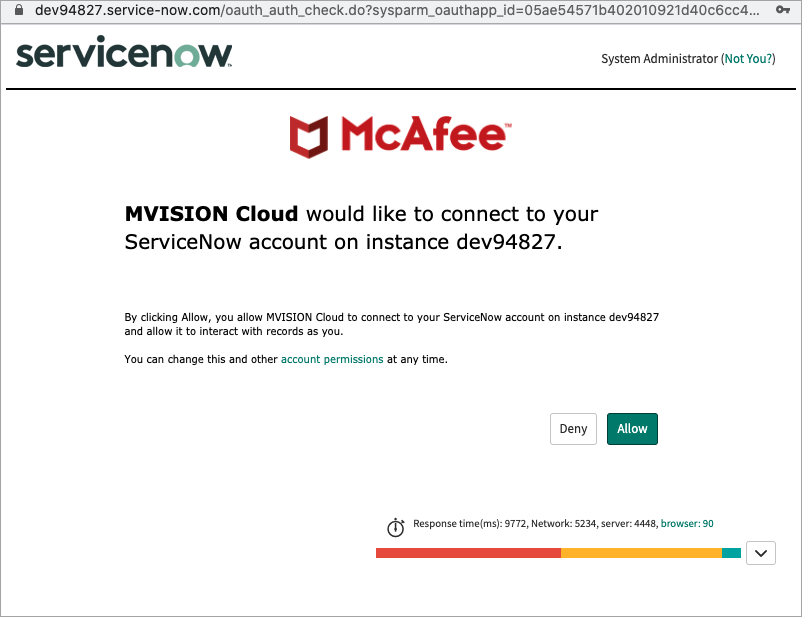
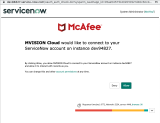
- Click Allow.
After ServiceNow API Integration Setup, wait for an hour to configure ODS Scan because the files, connect chats, and table in ODS Scan UI will be visible after an hour.
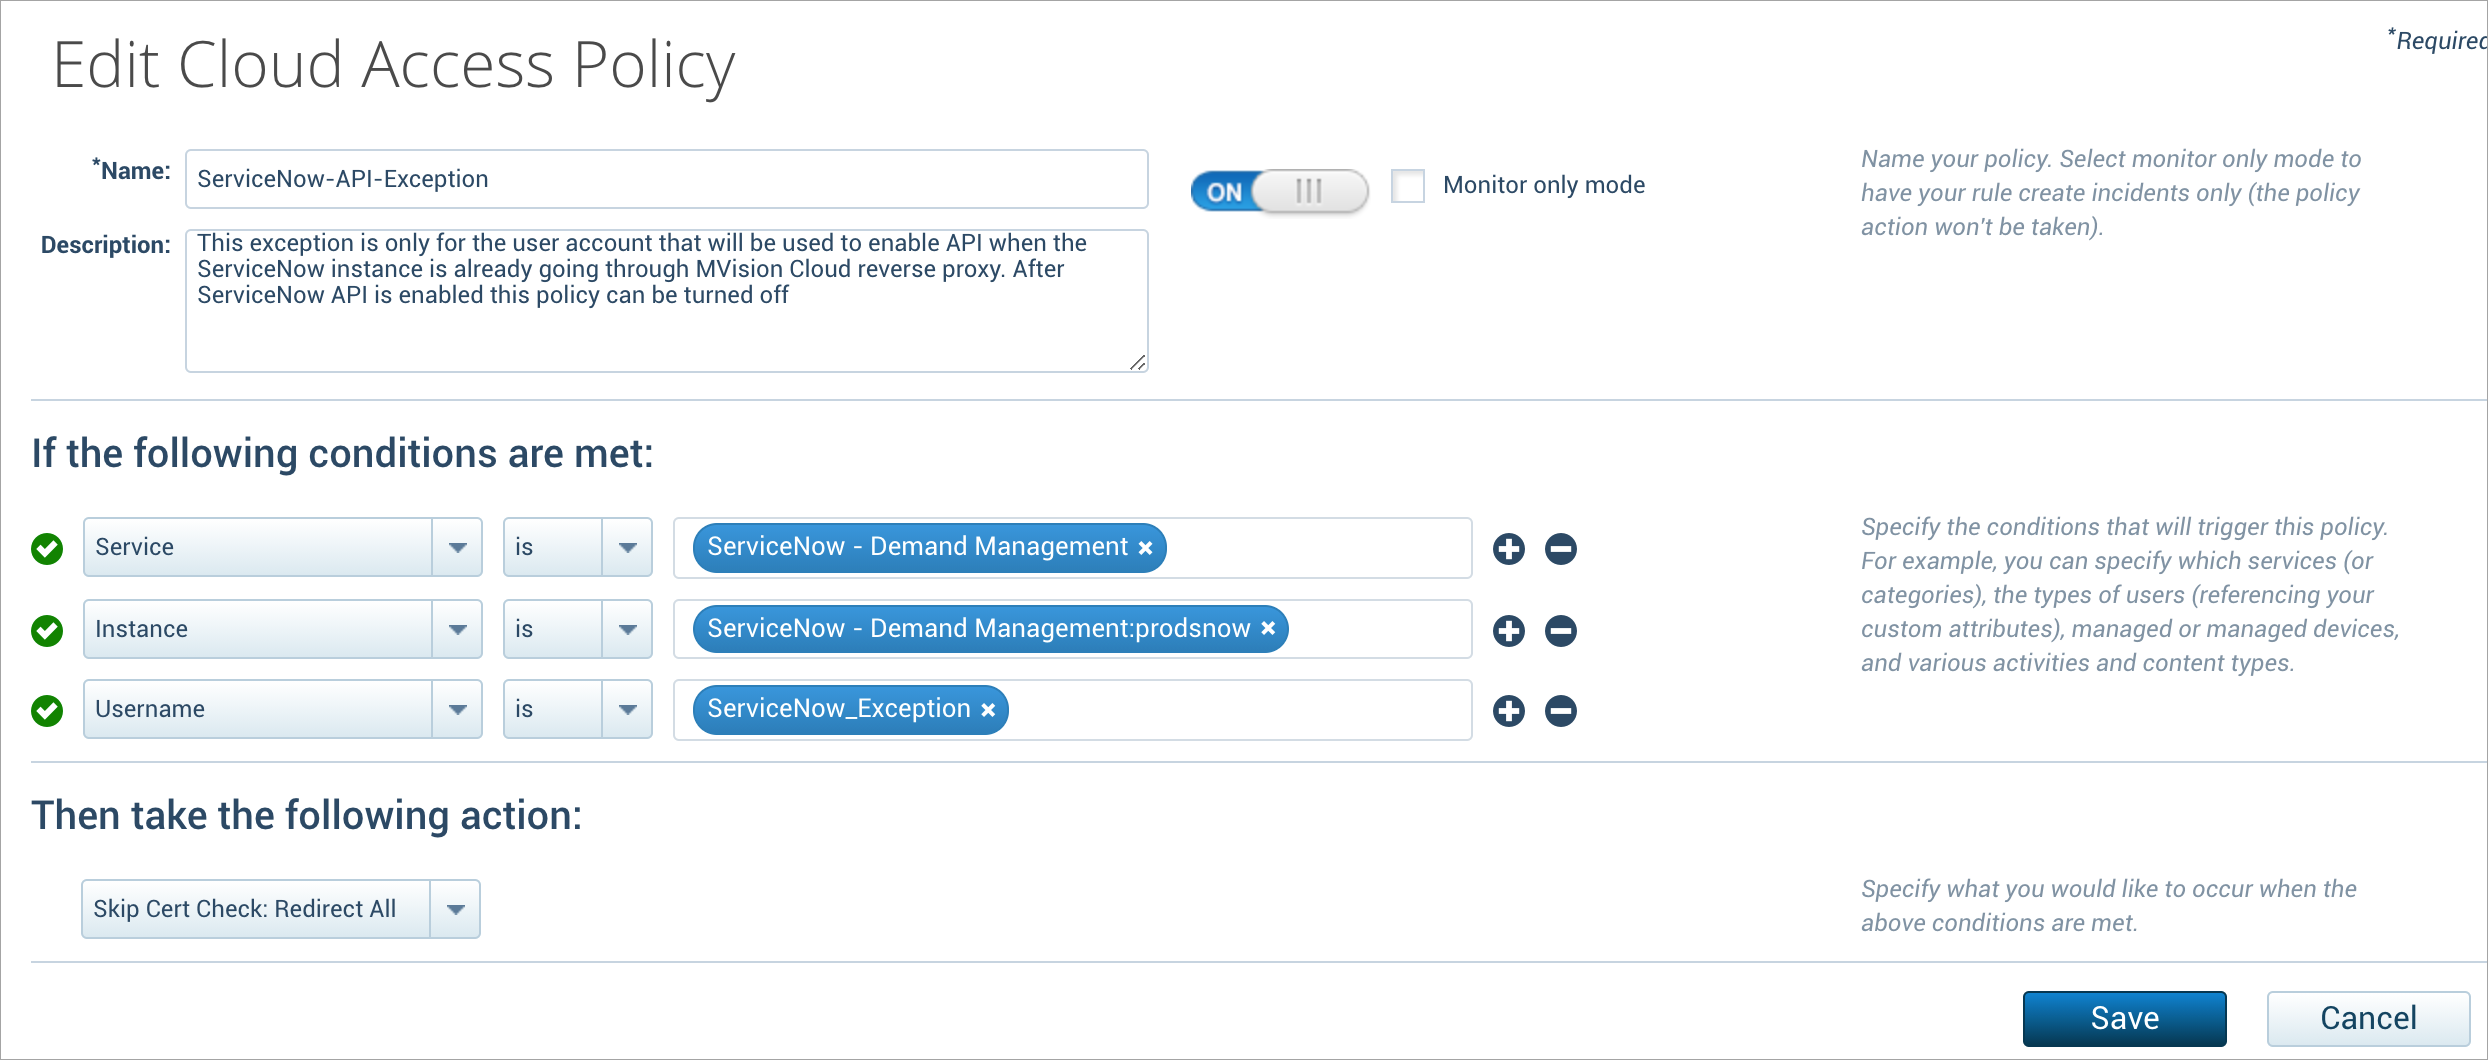
NOTE: This note is applicable only if a reverse proxy is configured.
- If your ServiceNow instance is configured through reverse proxy and while enabling API via a reverse proxy, you might encounter an error and may not see the Step 8 screen ( [
 ]--> click to view the screen) with options Allow/Deny. In that case, configure the following CAP policy to Skip Cert Check: Redirect All as shown in the below screenshot for the API user configured to enable API.