Configure Workday for SiteMinder (IdP)
Use this procedure to configure Workday to work with the SiteMinder identity provider, including the federation partnership between SiteMinder and Workday, and configuring SAML for Skyhigh CASB and Workday.
Configure SiteMinder
Configure Identity Provider and Service Provider entities.
Create the Local Entity
- Select Create Entity.
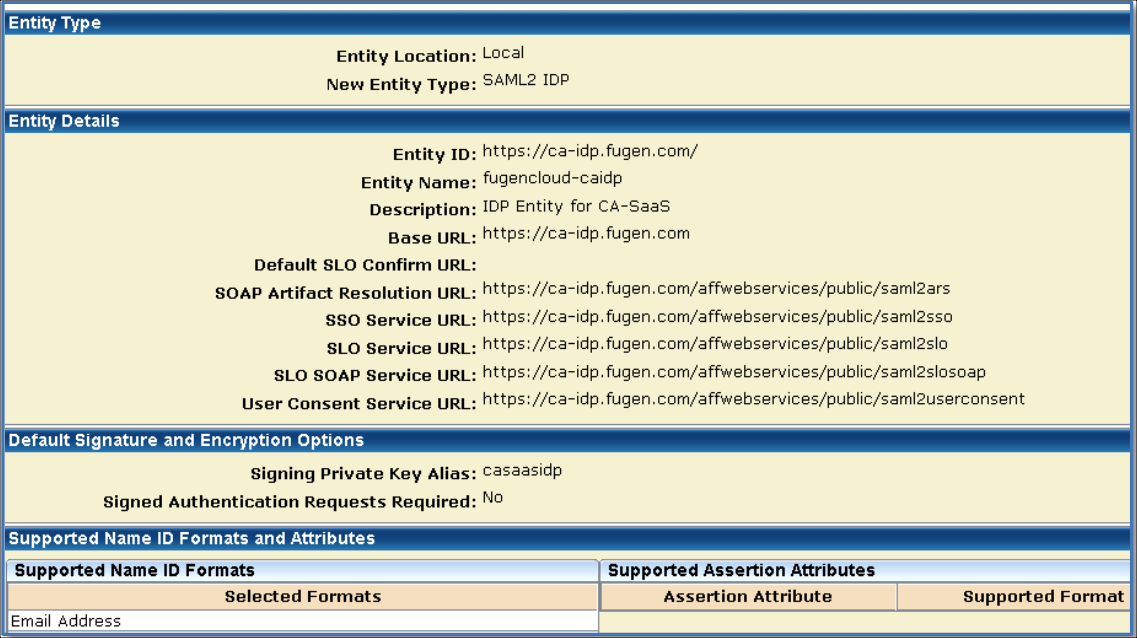
- Entity Location. Local.
- Entity Type. SAML2 IDP.
- Entity ID. Universal identifier, preferably a domain name. For example, https://ca-idp.fugen.com/.
- Entity Name. Any. For example, fugencloud-caidp.
- Base URL. Is pre-populated
- Signing Private Key Alias. Select the alias for the imported private key. For example, casaasidp.
- Supported Name ID Format. Email Address
Export the Local Certificate
- Select Infrastructure > X509 Certificate Management > Trusted Certificates and Private Keys.
- Select Action > Export of the certificate to export.
- Click Export and save the file.

Create the Remote Entity
- Select Create Entity.
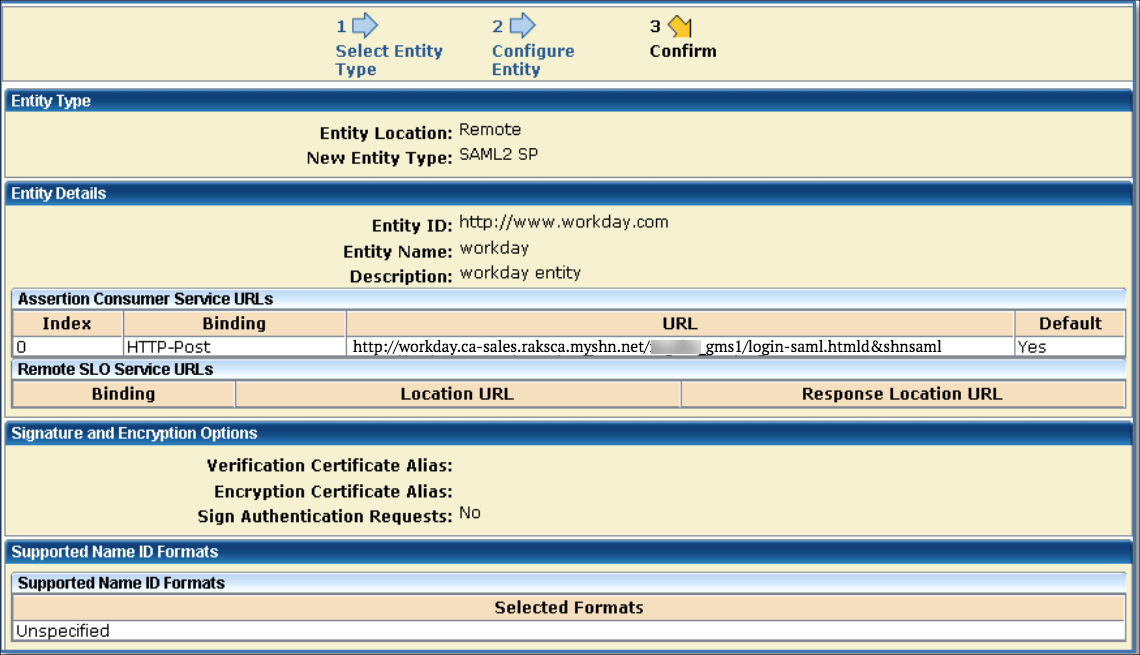
- Entity Location. Remote.
- New Entity Type. SAML2 SP.
- Entity ID. Universal identifier, preferably a domain name. This is the value as in Service Provider ID field of Workday SAML 2.0 SSO configuration. For example, http://www.workday.com.
- Entity Name. Any. For example, Workday.
- Assertion Consumer Service URL. http://workday.ca-sales.raksca.myshn....htmld&shnsaml
- Supported Name ID Format. Static.
Configure the Federation Partnership between CA SiteMinder and Workday
- Login to CA SiteMinder and navigate to Federation > Partnership Federation > Create Partnerships (SAML 2 IDP > SP).
- Select Create Partnership (SAML 2 IDP-SP).
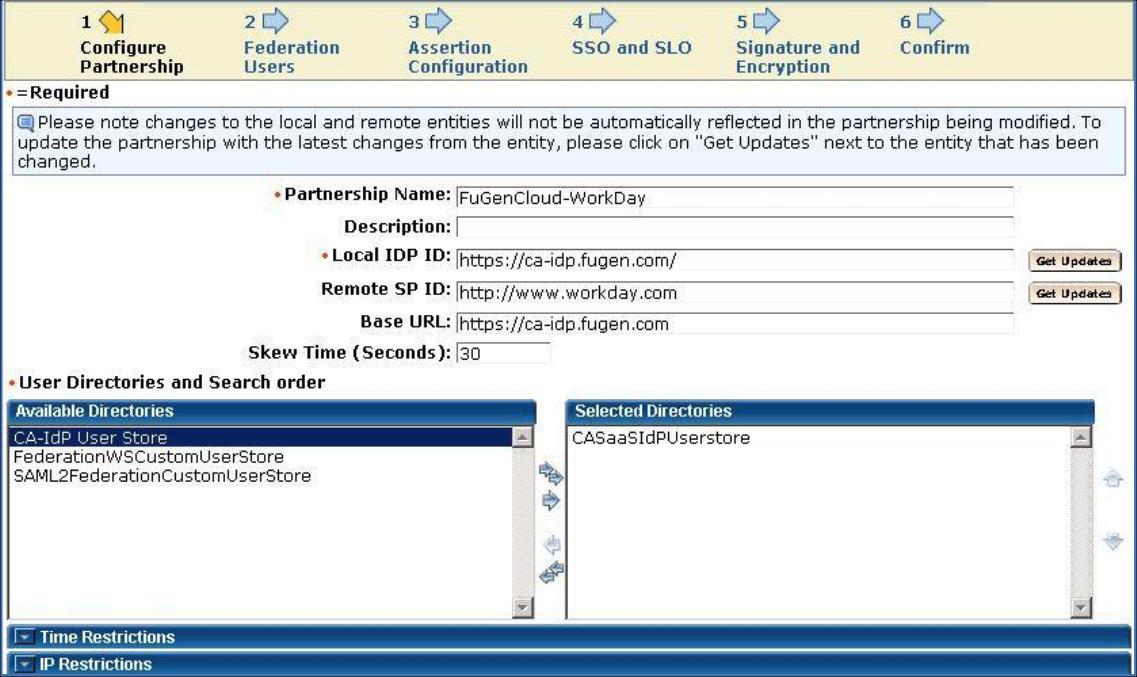
- Add Partnership Name. Any. For example, FuGenCloud-Workday.
- Local Identity Provider. Select Local Identity Provider ID. For example, https://ca-idp.fugen.com/.
- Remote Partner ID. Select Remote Partner ID, http://www.workday.com.
- User Directories and Search Order. Select one or more User Directories in the required search order.
Federation Users
Configure Federation Users. Select users that should be allowed to federate. For example, All Users in Directory.

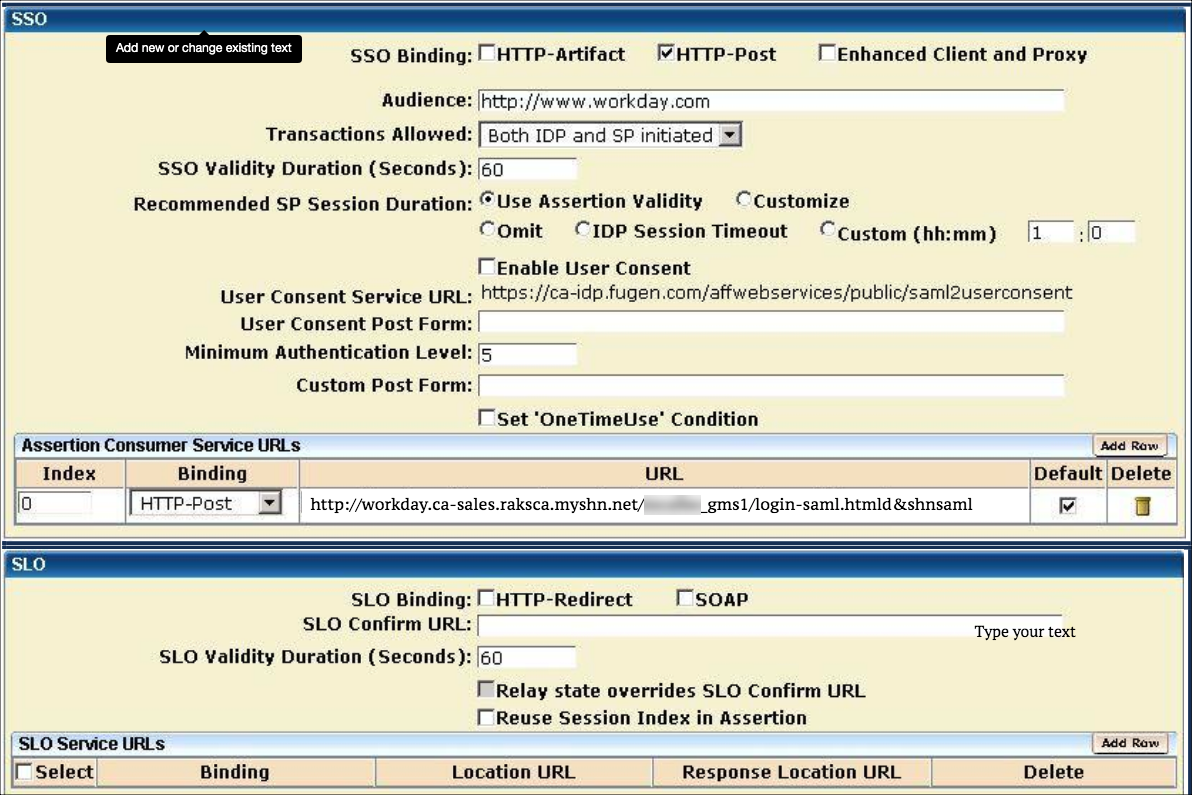
Configure the Assertion
- Name ID Format. Static.
- Name ID Type. User Attribute.
- Value. This should be the user name of the Workday account ID. For example, aid.
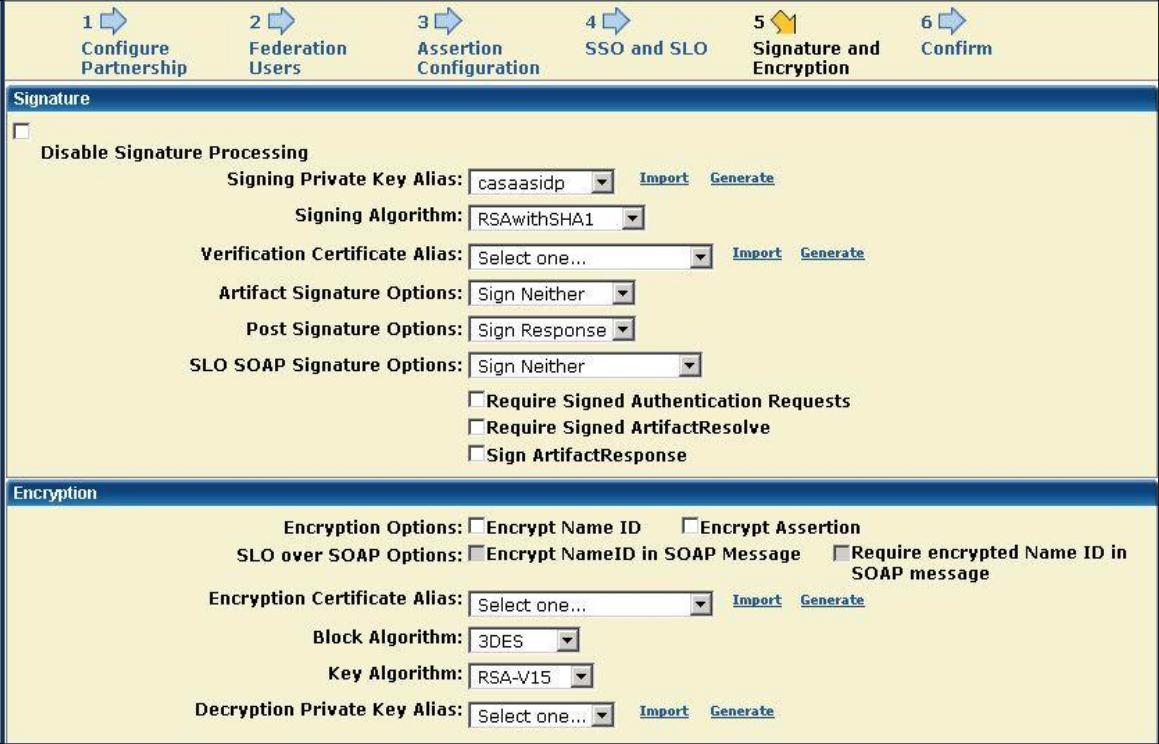
Configure the Signature and Encryption
- Signing Private Key Alias. Select the alias for the imported private key. For example, casaasidp.
- Post Signature Options. Select Sign Response.
NOTE: The SAML provider must be configured to sign the entire SAML message, not just the Assertion element.
Confirmation Page
Confirm the values and save the Partnership.
Activate the Partnership
Activate the Partnership.

Configure Skyhigh CASB for SAML
- Login to Skyhigh CASB.
- Go to Service Management > Workday instance.
- In the Proxy section, under SAML certificates, upload the SiteMinder certificate under IDP, and upload the Workday certificate under SP.
- Download proxy certificate.
Configure Workday for SAML
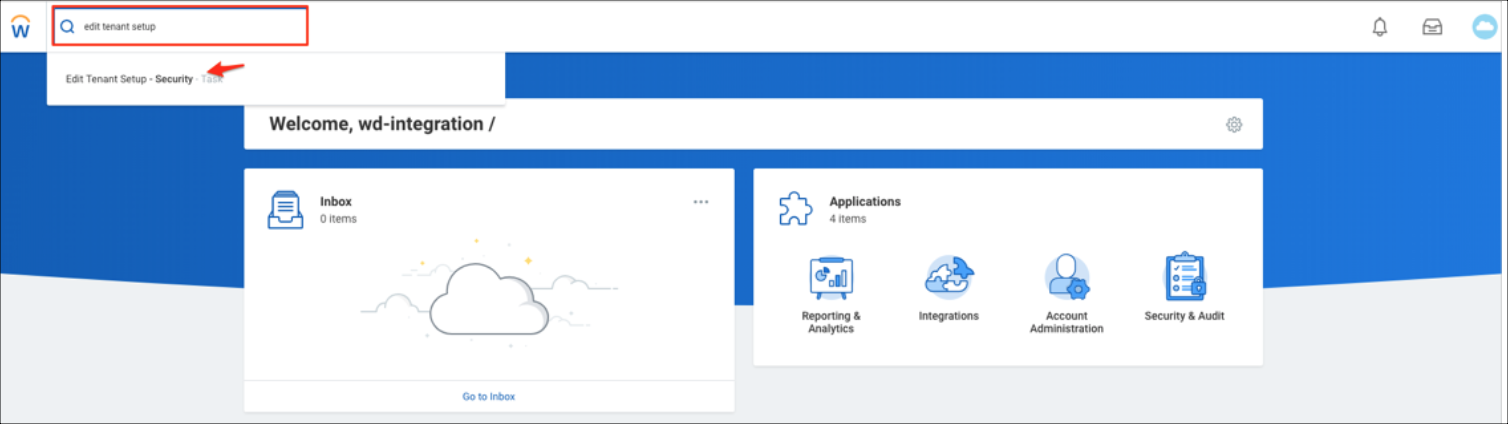
- Login to the Workday instance admin console.
- Search for Edit Tenant Setup - Security.
- Go to Single Sign-On. Click +, then enter the following:
- Login Redirect URL. For example, https://impl.workday.com/<instance_name>/login-saml2.flex
- Mobile App Login Redirect URL. For example, https://impl.workday.com/<instance_name>
- Mobile Browser Login Redirect URL. For example, https://impl.workday.com/<instance_name>/login-saml2.flex

- Enable SAML Authentication.
- Under SAML Identity Providers, click +, then enter the following:
- Identity Provider Name. Name for reference. For example, FuGen IdP.
- Issuer. Identity Provider Entity ID. For example, https://ca-idp.fugen.com/.
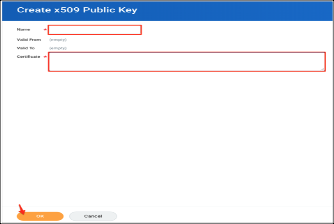
- X509 Certificate. In the Create x509 Public Key screen, enter a unique name for your certificate. For example, proxy.cert.
- Service Provider ID. Service Provider Entity ID, according to the Workday document http://www.workday.com.
- Select the checkbox Enable SP initiated SAML Authentication.
- IdP SSO Service URL. Add Identity Provider SSO URL. For example, https://ca-idp.fugen.com/affwebservi...ublic/saml2sso.
- Enable Do Not Deflate SP-initiated Authentication Request.
- Authentication Request Signature Method. Select SHA1.
- Select the checkbox Enable Signature KeyInfo Validation.
For SP initiated access: https://impl.workday.com/<instance_name>/login-saml2.flex
For IDP initiated access: https://ca-idp.fugen.com/affwebservices/public/saml2sso