Configure Microsoft InTune for iOS
This document provides the configuration flow of pushing VPN profile to mobile device from Intune MDM (Mobile Device Management).
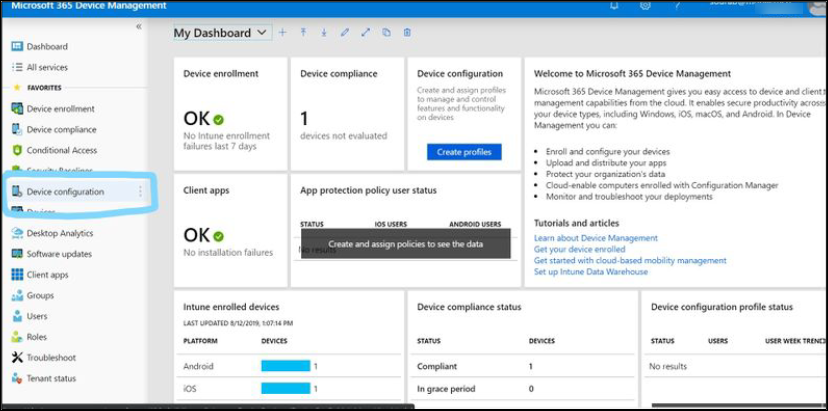
Assumption: Device already managed with Intune.
Creation of custom VPN Profile
- Login to the Intune MDM account using the URL: https://devicemanagement.microsoft.com/

- Once logged into the account, click Device Configuration.
- In the Device Configuration, click Profiles to create the new VPN profile.
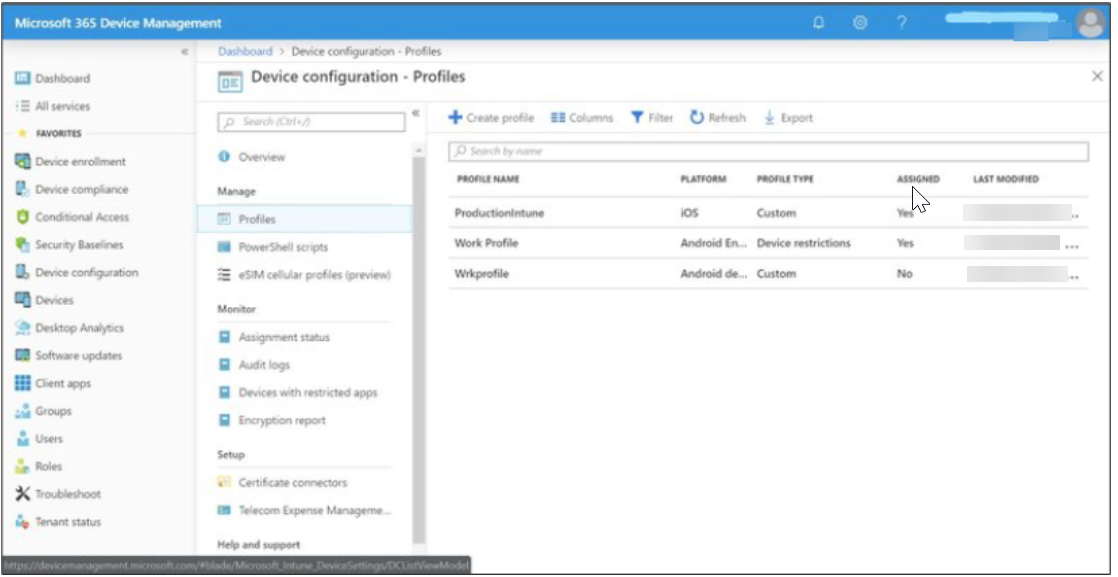
- Click Create Profile in the Profiles section. Refer how to create the apple configurator VPN profile.
Create the profile by completing the required information in the fields.
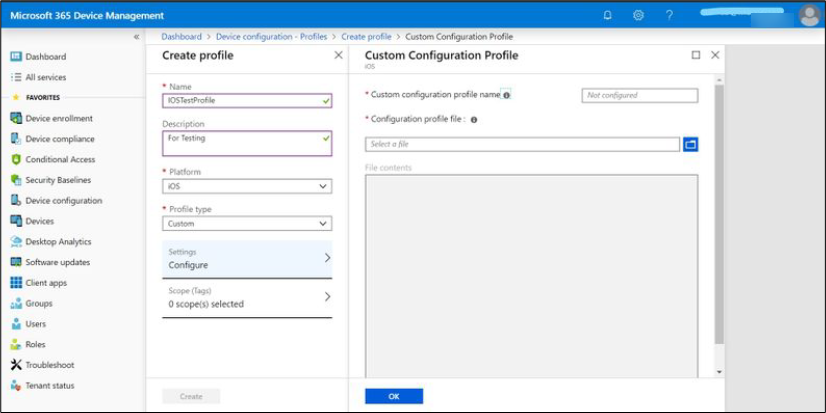
- Once Profile Type is selected as Custom, a window will be opened to upload the Apple Configurator profile file.
Provide the Custom configuration profile name and upload the apple configurator (.mobileconfig) file.
[Refer Step#4 for how to create the apple configurator VPN profile]
When you use the apple configurator to create a mobileconfig file, it adds the following key value pair which causes certificate installation failure. Delete this key pair to make the certificate work.
<key>DNS</key>

<dict>

<key>SupplementalMatchDomainsNoSearch</key>

<integer>0</integer>

</dict>
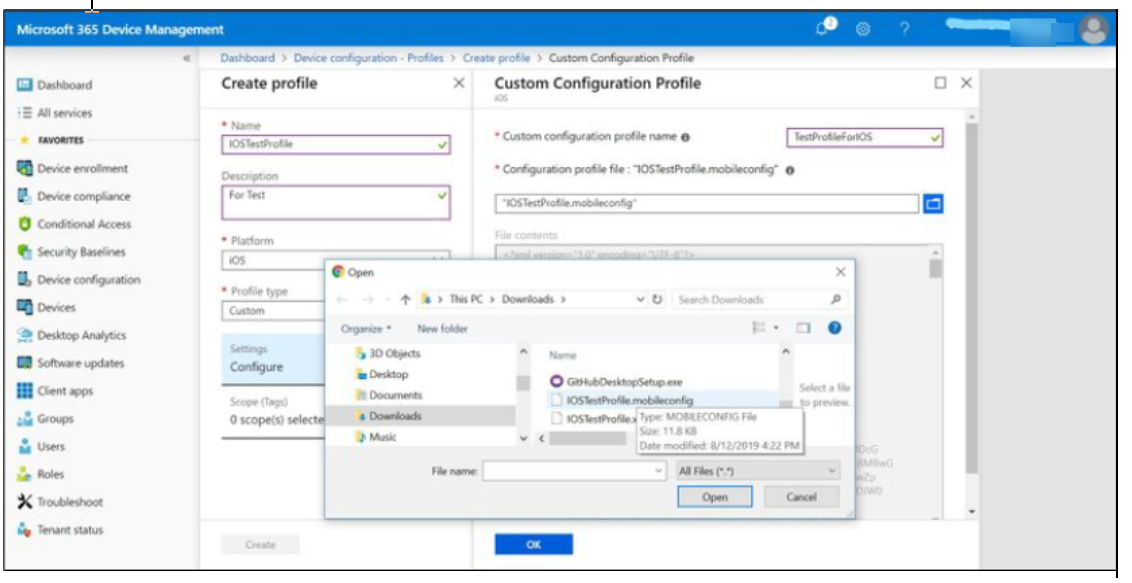
- File content looks like in below image. click OK.
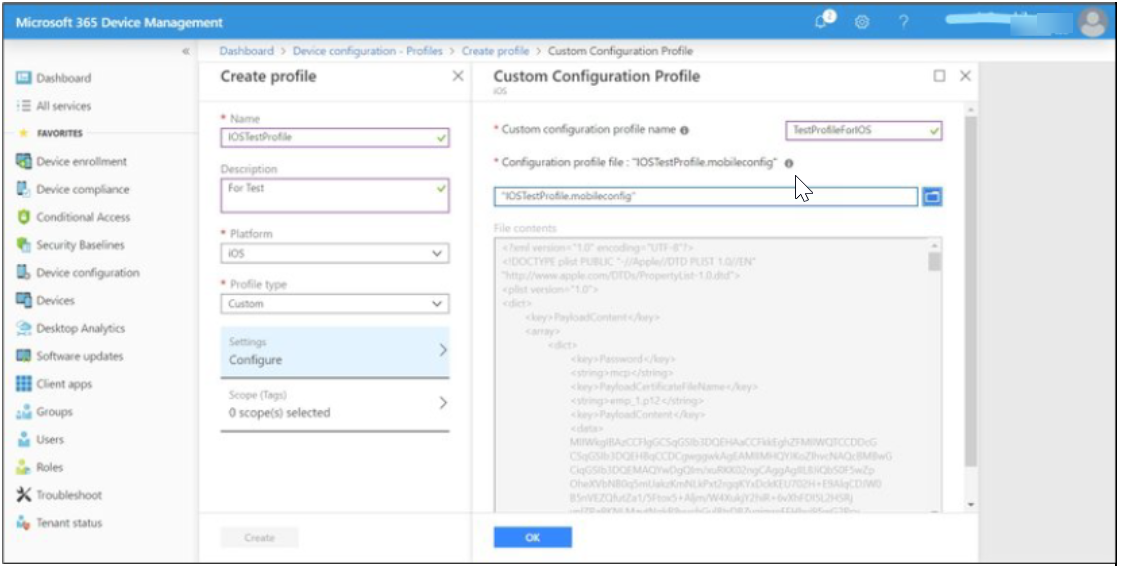
- Click Create.
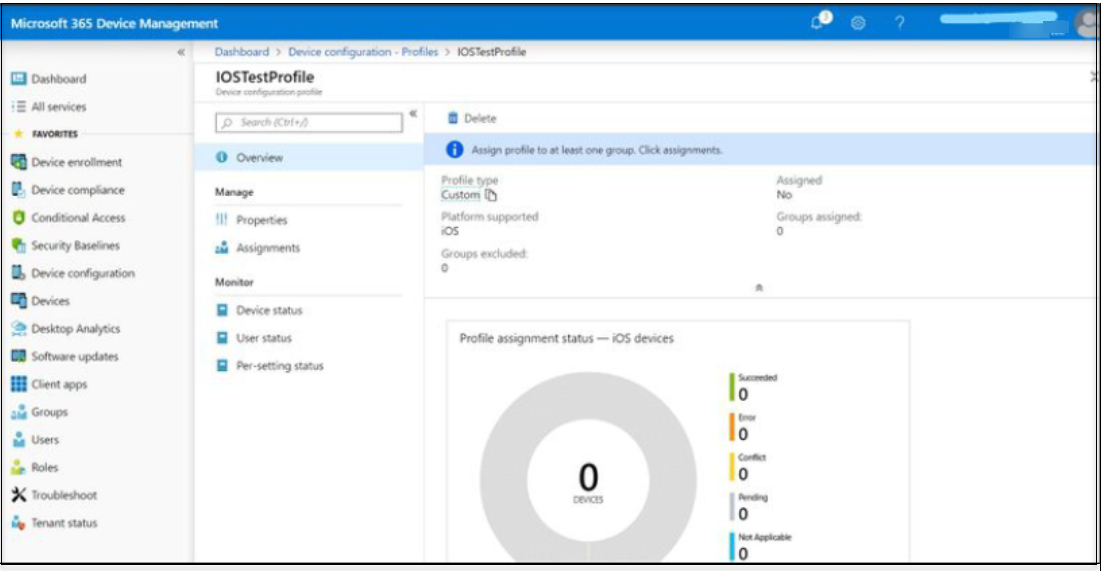
An example of a saved profile is shown below:
Assign the Profile to a Managed Device
- In the Saved profile page, click Assignments.
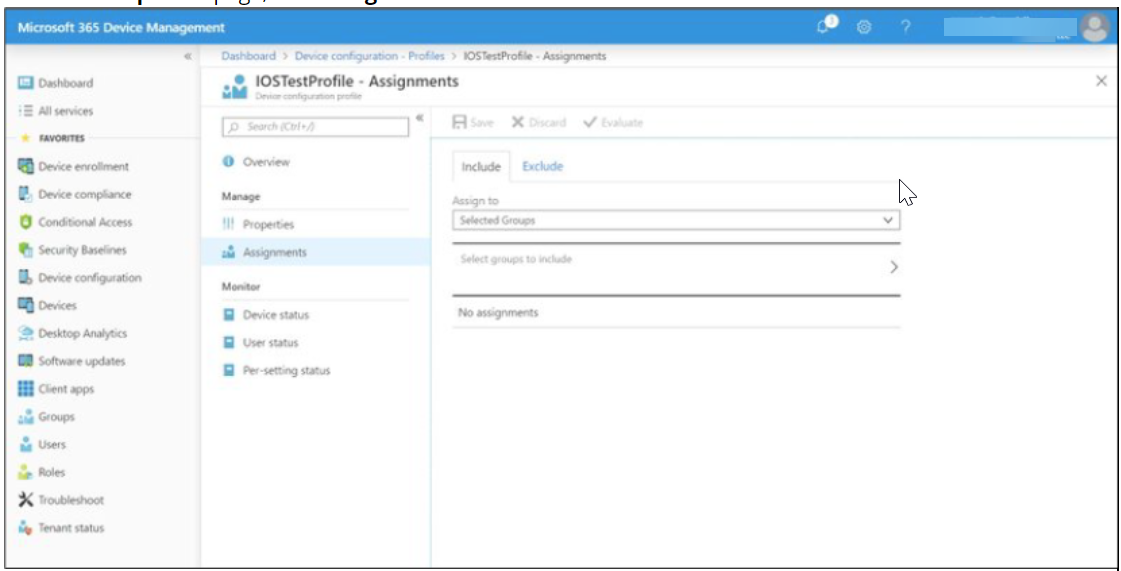
- From the Assign to drop down list, select the specific groups to distribute the profile.

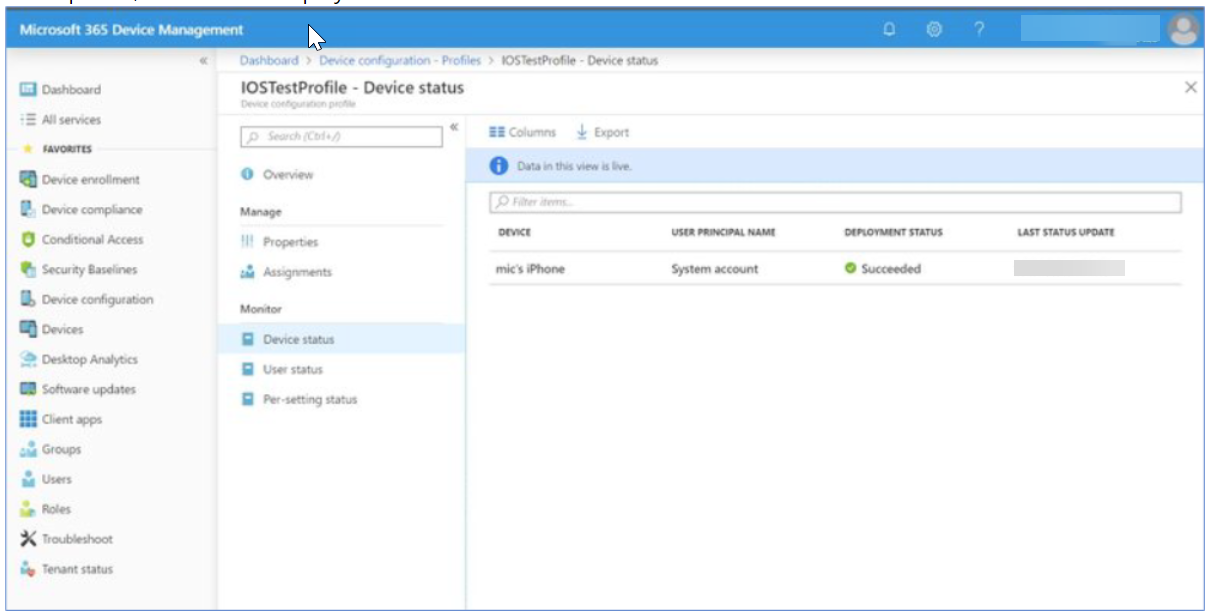
3. Click Save. In the profile, click Device status in the Monitor section. Click the device in which profile got pushed.
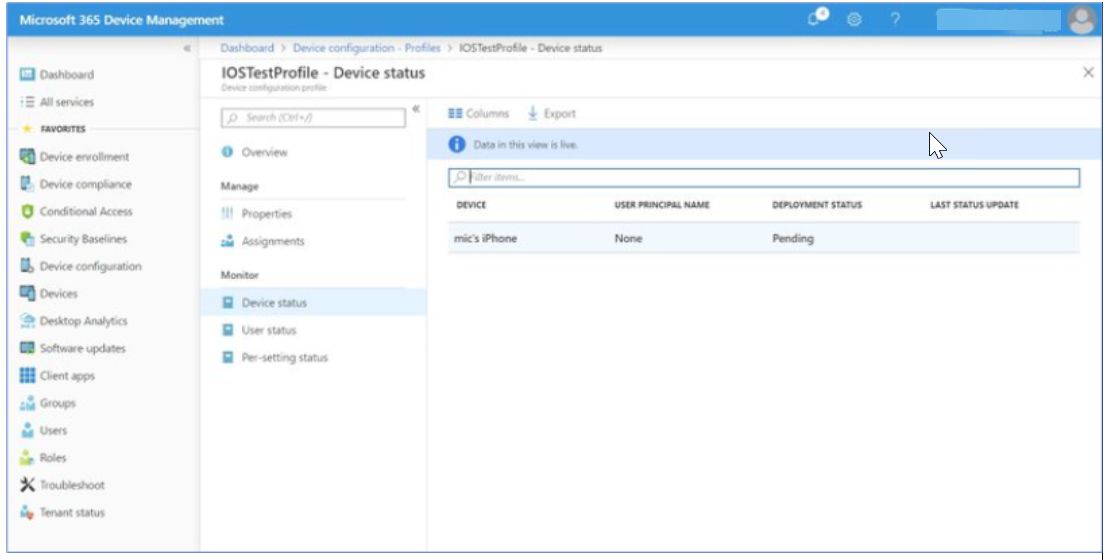
- Once the device page is opened, click Sync to activate the profile distribution action immediately.
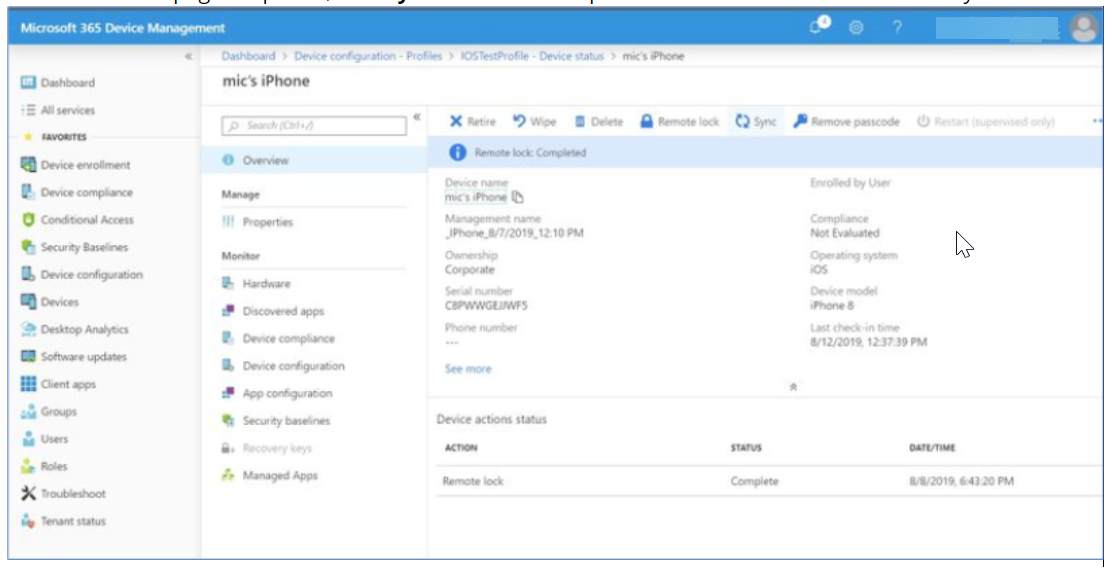
- In the profile, now device’s deployment status is Succeeded.
Inside the Device after Publishing the Profile
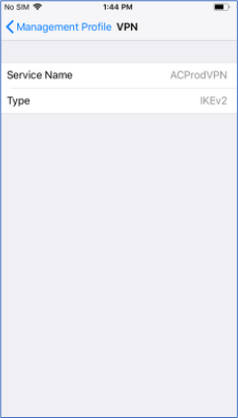
- In the device, in Settings > General > Profiles & Device Management > <MDM Profile> >More Details > VPN SETTINGS, our distributed profile will be visible.
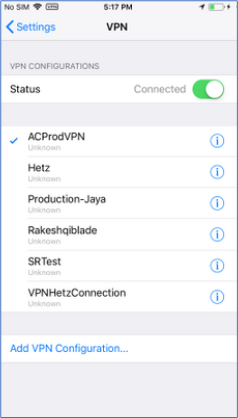
- Go to Settings > VPN, tick mark the profile that got pushed from Intune. Now, click Status to enable a VPN connection.
Create a VPN Profile using Apple Configurator
- Install Apple Configurator 2 application in a MAC machine. and click New Profile.
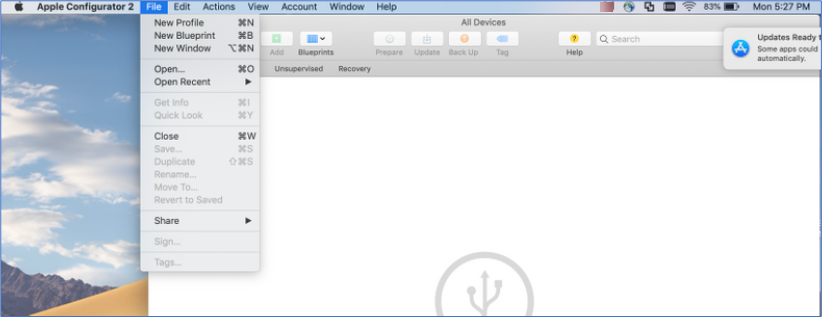
- Give specific name in the General > Name field.

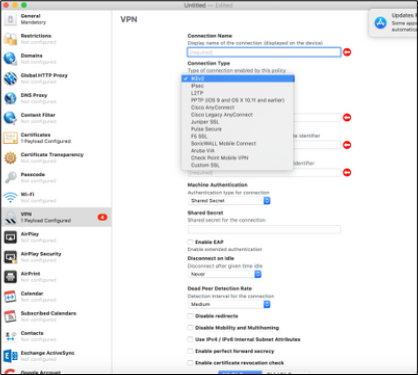
- Click Certificates and upload the device certificate.

- Click on VPN and configure it with the required fields. Please refer to the table at the end of the page to configure VPN profile fields.
Save the file. It will be saved with the .mobileconfig extension.
VPN Profile Info
| Fields | Values |
| Connection Name | IOSTestProfile |
| Connection Type | IKEv2 |
| Server |
c<customer ID>.smcs.skyhigh.cloud The following information is required to configure an SMCS app in the MDM of your choice. VPN gateway address: c<customer ID>.smcs.skyhigh.cloud |
| Remote Identifier | vpn.skyhigh.cloud (This string is SAN (Subject Alternate Name) of server certificate) |
| Connection Name | IOSTestProfile |
| Connection Type | IKEv2 |
| Local Identifier | XXXXX (This string is SAN-(Subject Alternate Name) of client certificate) |
| Machine Authentication | Certificate |
| Certificate Type | RSA |
| Server Certificate Issuer Common Name | XXXX [OPTIONAL] (This string is CN-Common Name of server root certificate) |
| Server Certificate Common Name | vpn.skyhigh.cloud (This string is CN-Common Name of server certificate) |
| Enable EAP | True |
| Disconnect on Idle | Never |
| EAP Authentication | Certificate |
| Identity Certificate | Select the identity certificate |
| Dead Peer Detection Rate | Medium |
| Enable Perfect Forward Secrecy (PFS) | True |
| IKE SA Params & Child SA Params |
Encryption Algorithm: AES-256 Encryption Algorithm: SHA2-256 Diffi e Hellman Group: 14 or, 15 Lifetime In Minutes: 1440 |
| Connection Name | IOSTestProfile |
| Connection Type | IKEv2 |
| Proxy Setup | None |
Configure Always-On VPN Connection via Intune for iOS
You can configure an Always-On VPN connection for iOS devices using Microsoft Intune to encrypt all traffic and route it through the VPN, even when the device is not connected to your organization's network. Follow these steps to configure an Always-On VPN connection for iOS devices via Intune:
Create an Always On-VPN Profile
You must first create an Always On-VPN Profile in Intune to configure an Always-On VPN connection for iOS devices.
To create an Always On-VPN Profile:
- Log in to the Intune MDM admin portal.
- In the Intune admin portal, go to Devices > Configuration profiles.
- Under Policies, click Create and select New Policy.
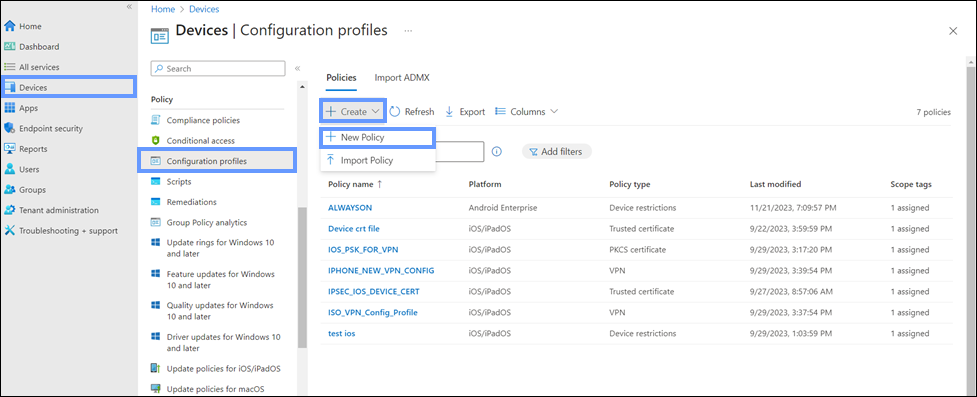
- On the Create a profile panel, configure the following:
- Platform. Select iOS/iPadOS as the platform for the profile.
- Profile type. Select Templates as the profile type.
- Template name. Select VPN as the template.
- Click Create.

Configure VPN Profile Settings
You can now configure the settings of the newly created Always On-VPN profile.
To configure the VPN profile settings:
- In Basics, configure the following setting:
- Name. Enter a descriptive name for the VPN profile.
- Click Next.

- In Configuration settings, configure the following VPN settings:
- Connection type. Select IKEv2 as the VPN connection type.

- Base VPN. Click Base VPN to configure the following settings:
- Connection name. Enter a descriptive name for the VPN profile, which appears on the user's devices.
- VPN server address. Enter the address for the VPN server in the format: c<UserID>.smcs.skyhigh.cloud.

- IKEv2 settings. Click IKEv2 settings to configure the following settings:
- Always-on VPN. Select Enable to activate the Always-on VPN connection for your SMCS app.
- Connection type. Select IKEv2 as the VPN connection type.
NOTE: Intune does not support the Always-on VPN connection option with Wi-Fi and Cellular for Iphone.
- Network interface. Select Wi-Fi or Cellular as the network interface.
_1.png?revision=1)
- Remote identifier. Enter vpn.skyhigh.cloud as the remote identifier.
- Local identifier. Select Subject common name as the local identifier.
- Client Authentication. Under Client Authentication, configure the following settings to authenticate the SMCS app:
- Client Authentication type. Select Machine authentication as the client authentication type.
- Authentication method. Select Certificates as the authentication method.
- Authentication certificate. Click + Select a certificate to select the required certificate, and click OK.
NOTE: You can configure additional settings for the VPN profile such as split tunneling, DNS, and more based on your organization's requirements.
- Automate VPN. Select the required setting to automatically reconnect the VPN during network loss.
- Proxy. Configure proxy settings if required.
- Click Next.

Assign the VPN Profile
After configuring the settings of the newly created Always On-VPN profile, you can assign the VPN profile to users in your organization.
To assign the VPN profile:
- In Assignments, configure the following setting:
- Add groups. Click Add groups to assign the VPN profile to Azure AD groups.
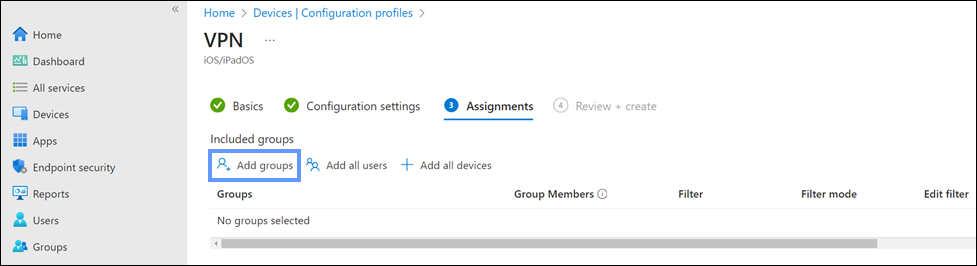
- Select groups to include. Select the Azure AD groups from the list, and click Select.
These groups must include the iOS devices where you want to enable the Always-On VPN connection.
- Select groups to include. Select the Azure AD groups from the list, and click Select.
- Add groups. Click Add groups to assign the VPN profile to Azure AD groups.
- Click Next.

- In Review + create, review the configured settings of the VPN profile.
NOTE: Make sure that Always-on VPN is enabled under the Configuration settings.
- Click Create.
Once the VPN profile is created and assigned, the Always-On VPN connection is deployed and enabled on iOS devices for users in the assigned groups.
NOTE: After enabling an Always-On VPN connection for iOS devices via Intune, users can monitor the status of the Always-On VPN connection on their iOS devices. For details, see Monitor Always-On VPN Connection on iOS Devices.
Monitor Always-On VPN Connection on iOS Devices
After deployment, the Always-On VPN profile installs automatically on designated iOS devices. Users can monitor the status of the Always-On VPN connection on their iOS devices.
To monitor an Always-On VPN connection:
- On your iOS device, go to Settings > General > VPN & Device Management > VPN.

- You can now monitor the status of the Always-On VPN connection, which should be displayed as enabled.